


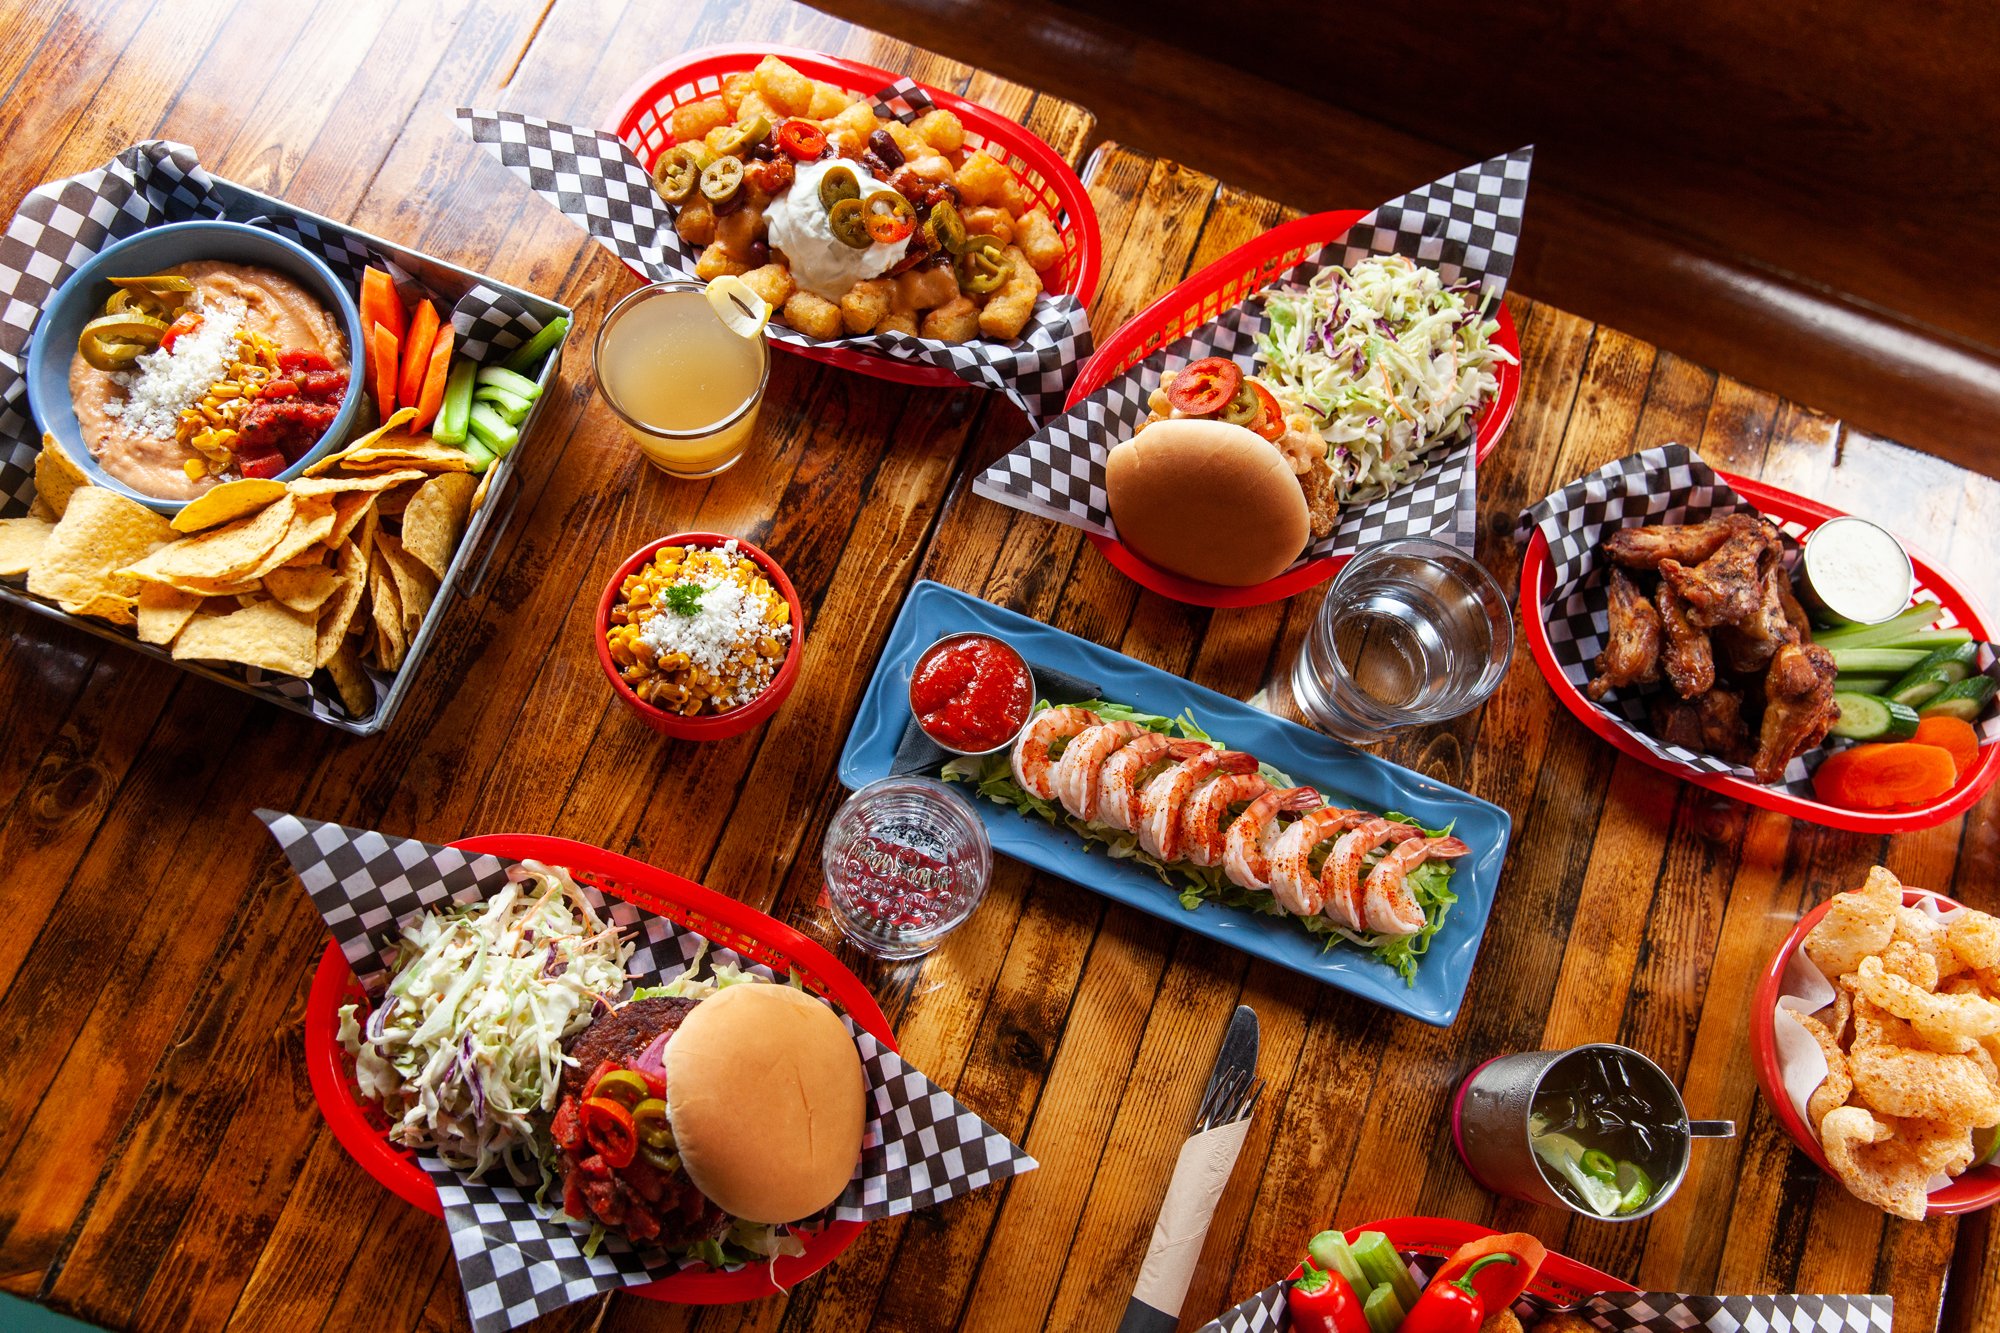

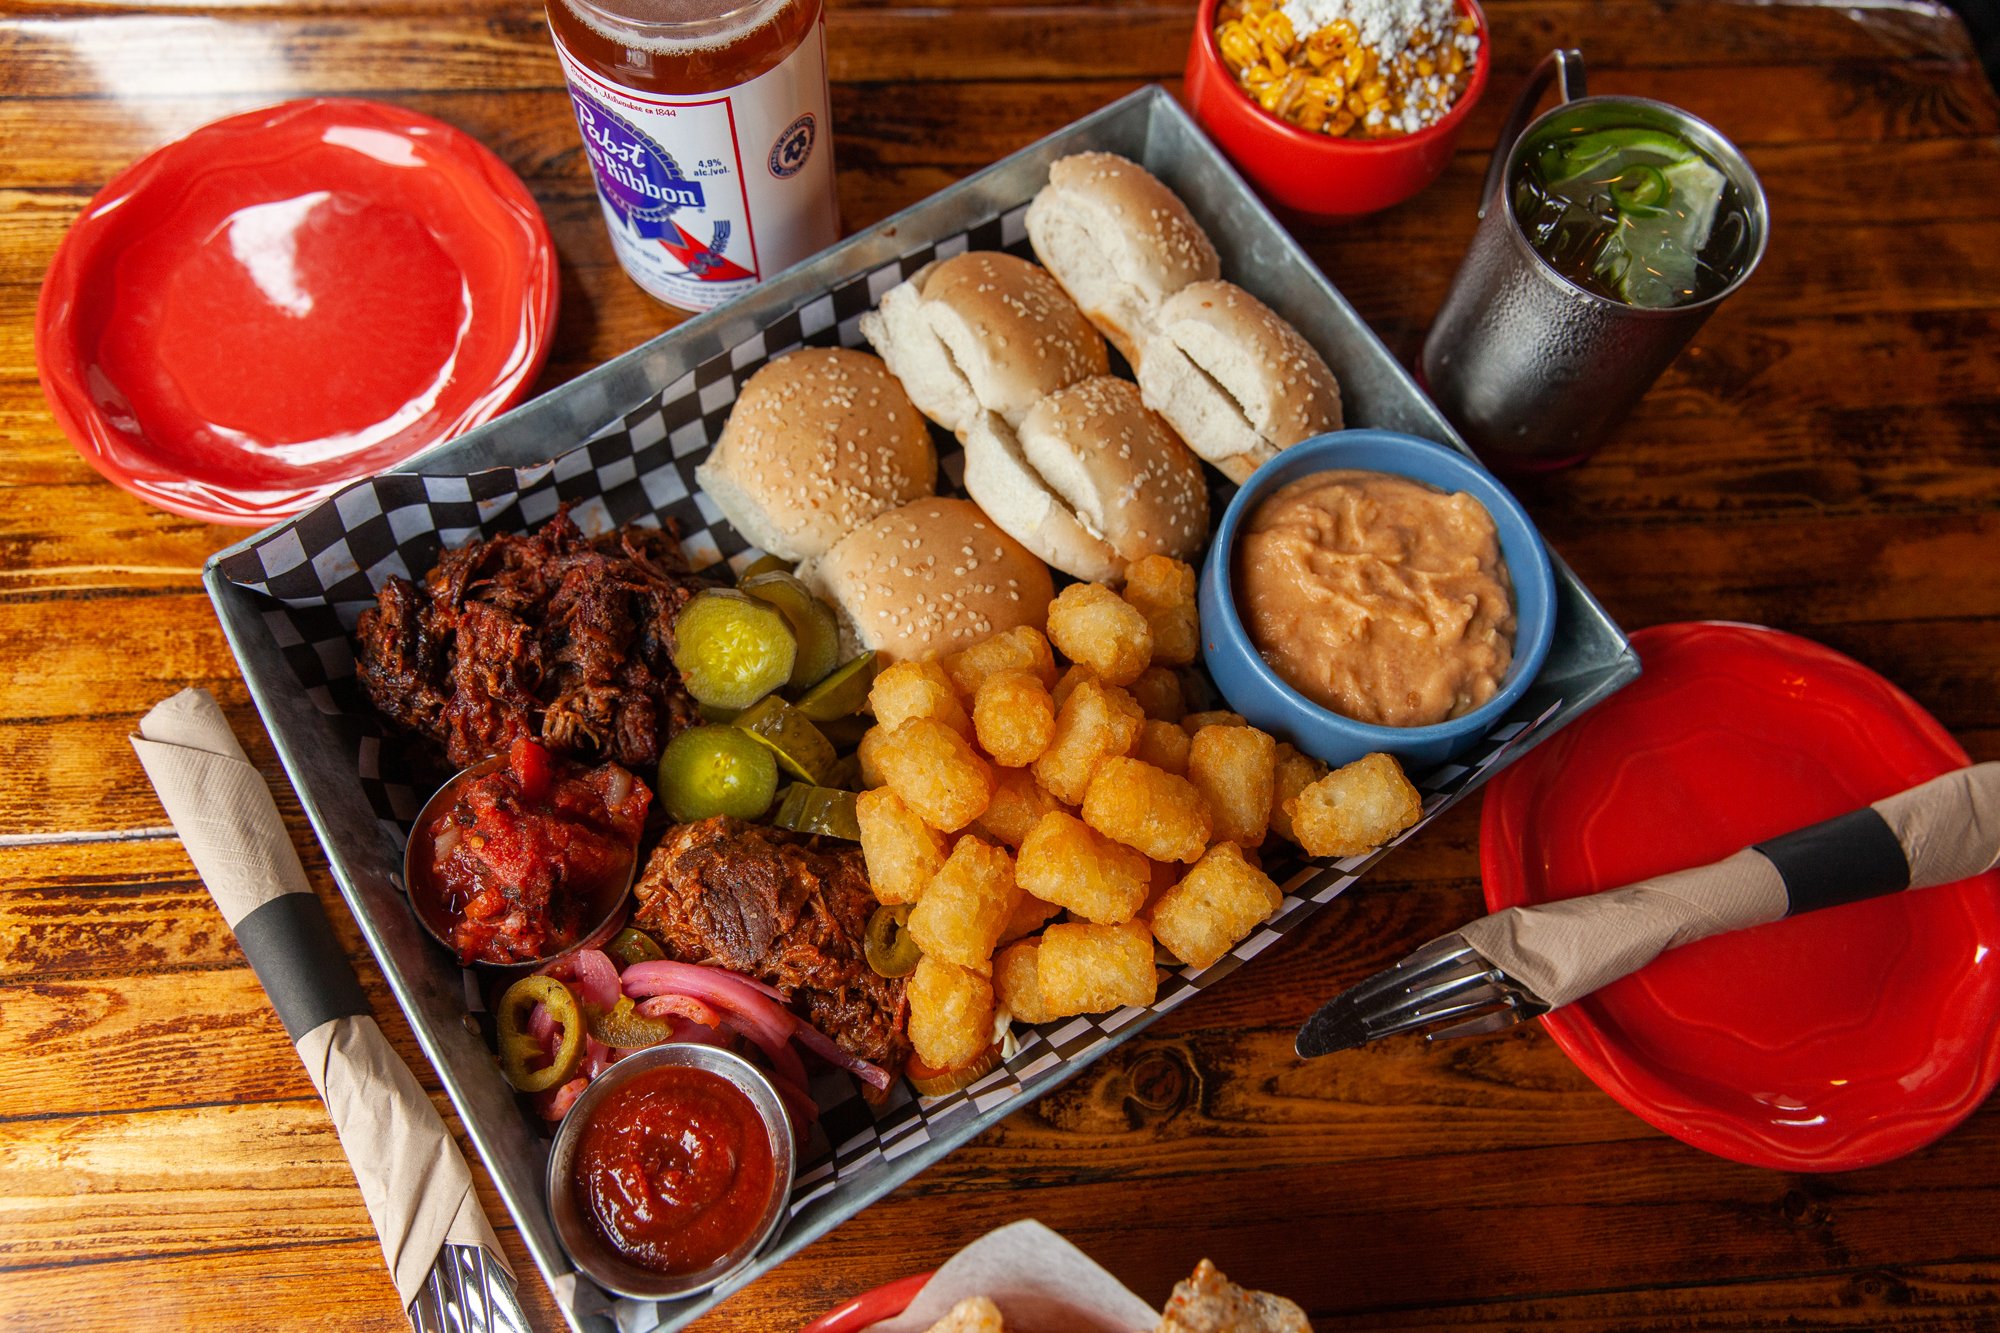
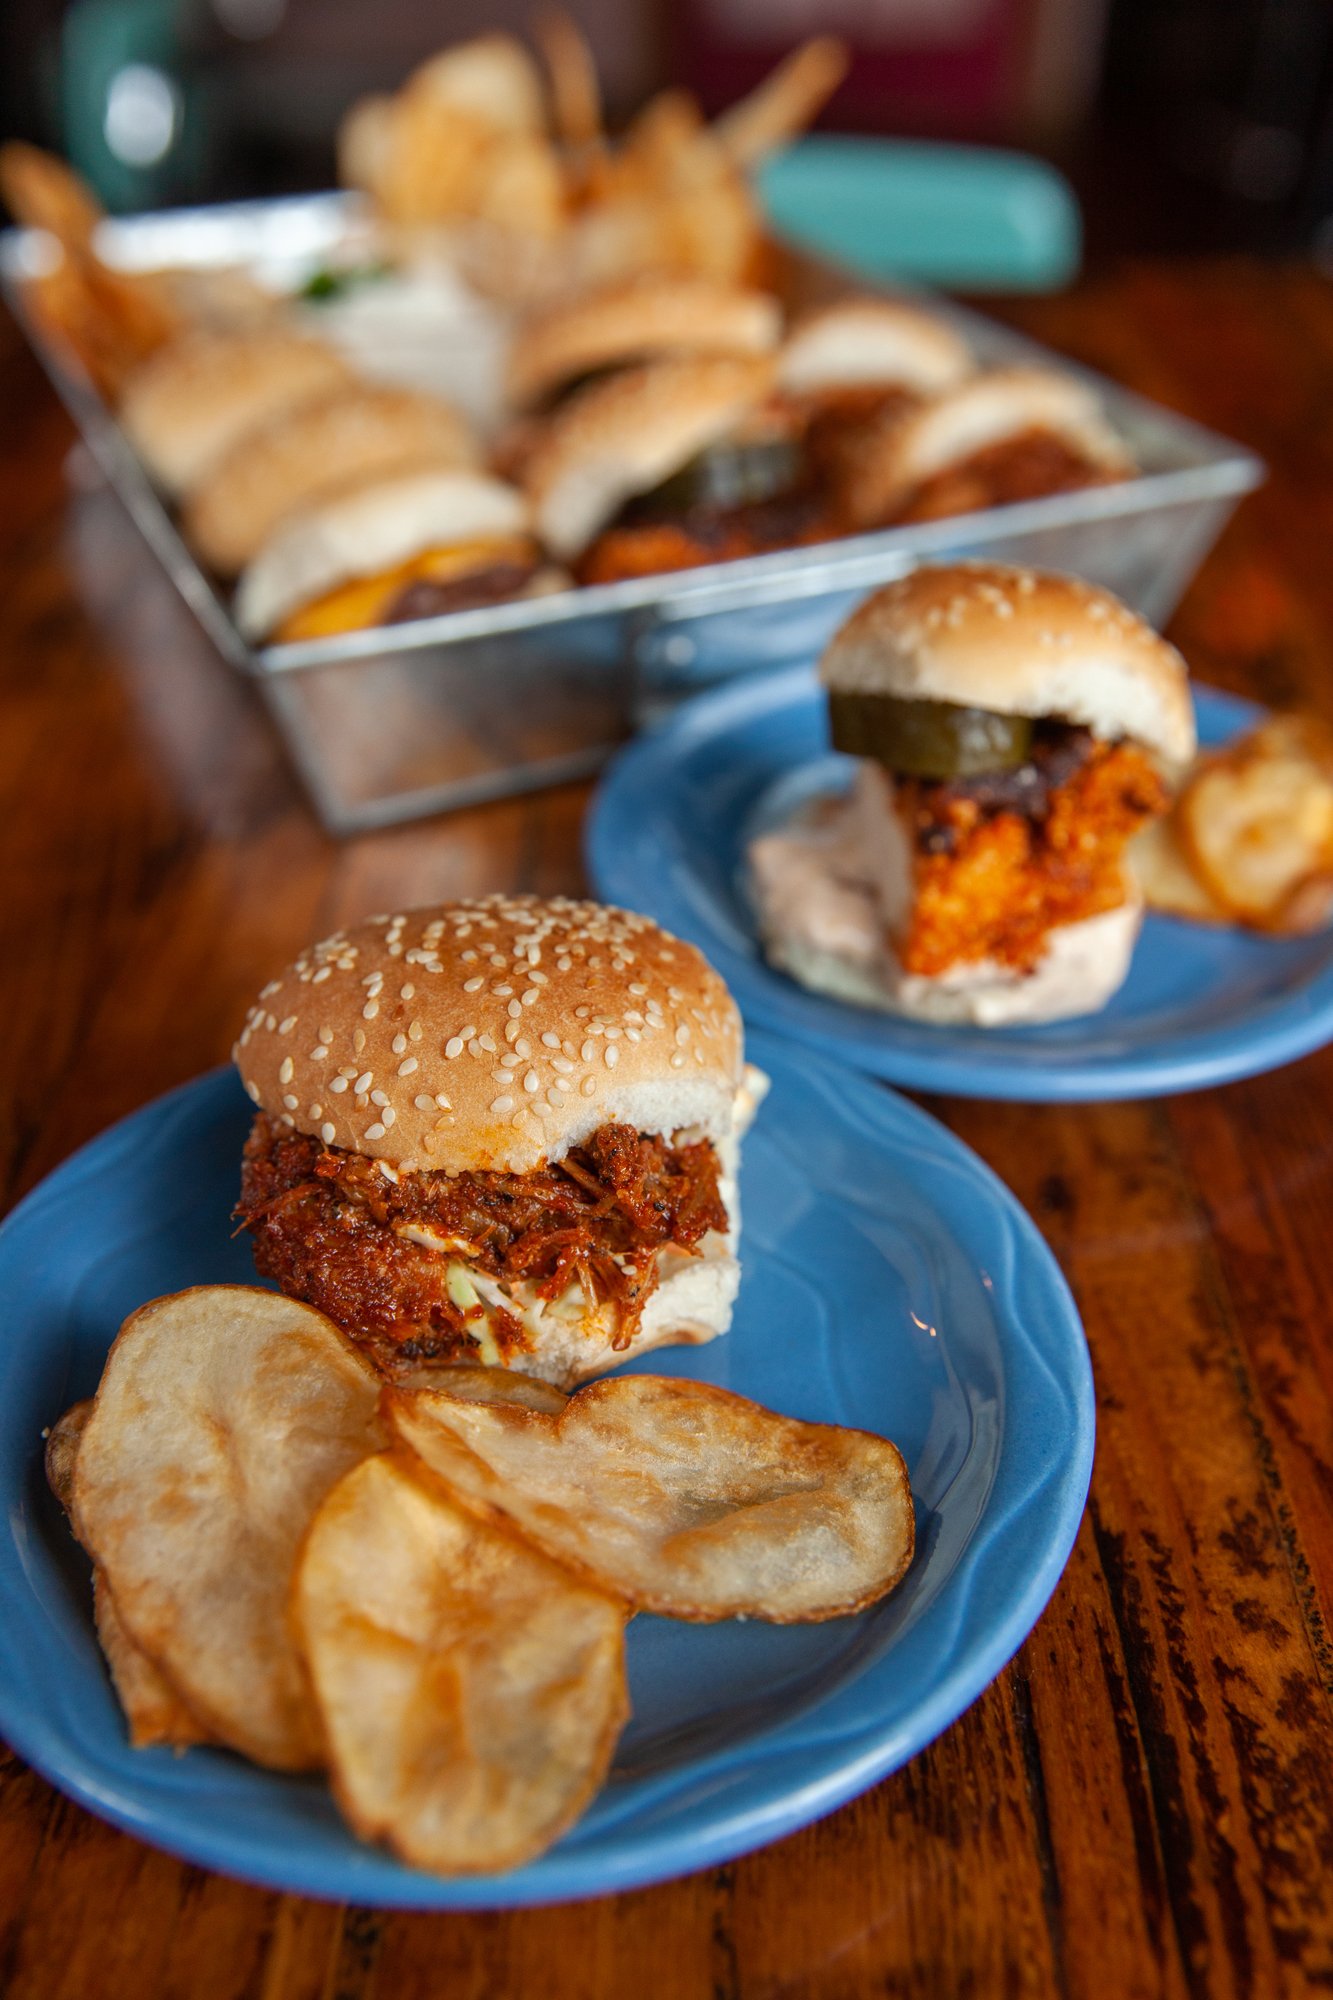
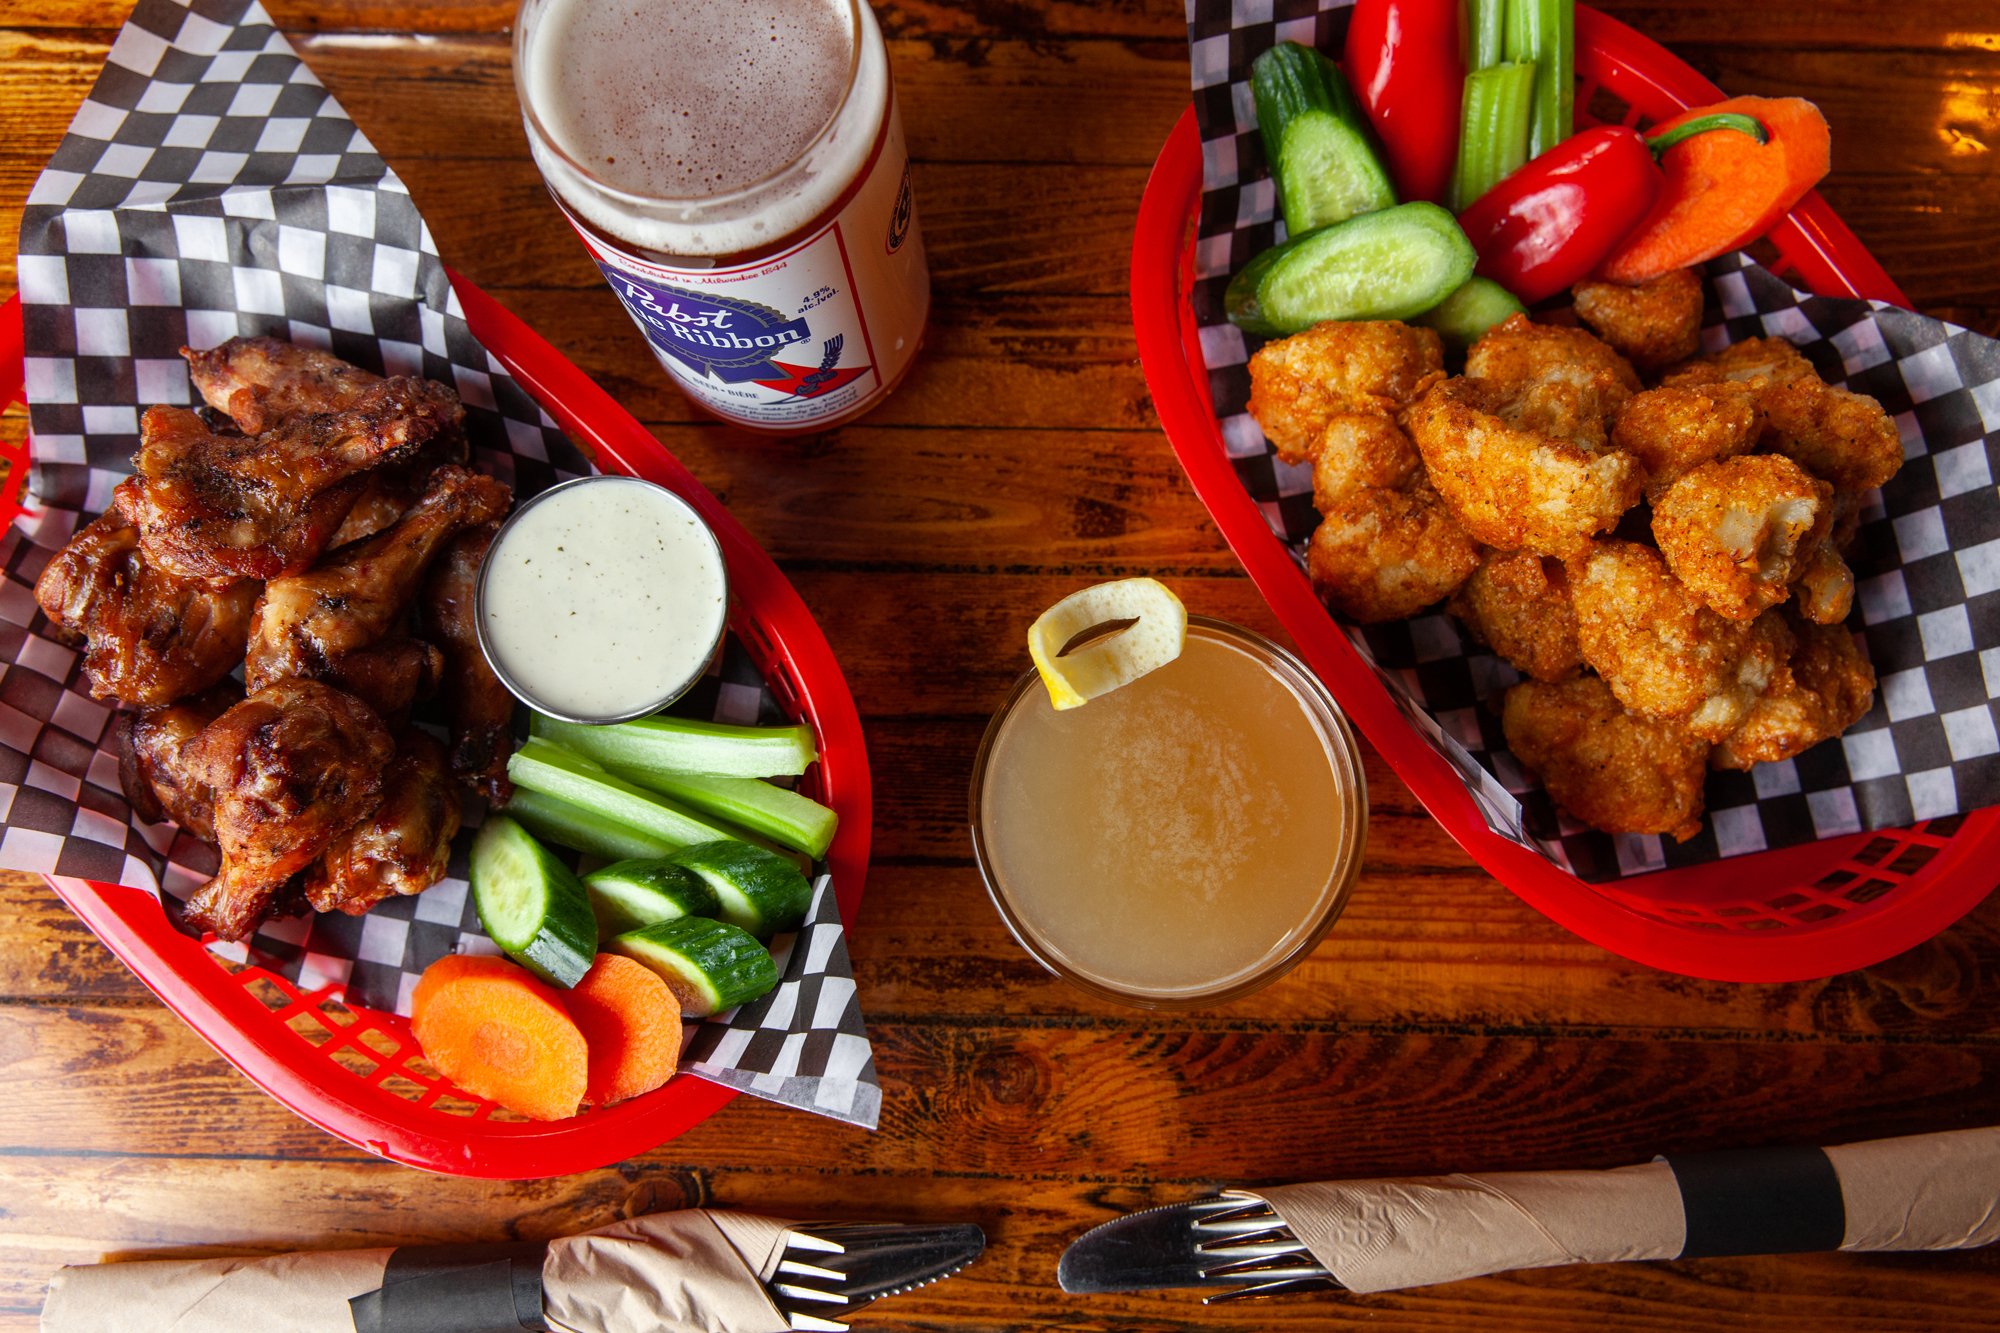
Slim’s BBQ
Food & Restaurant Photography
March 2022
BLOG
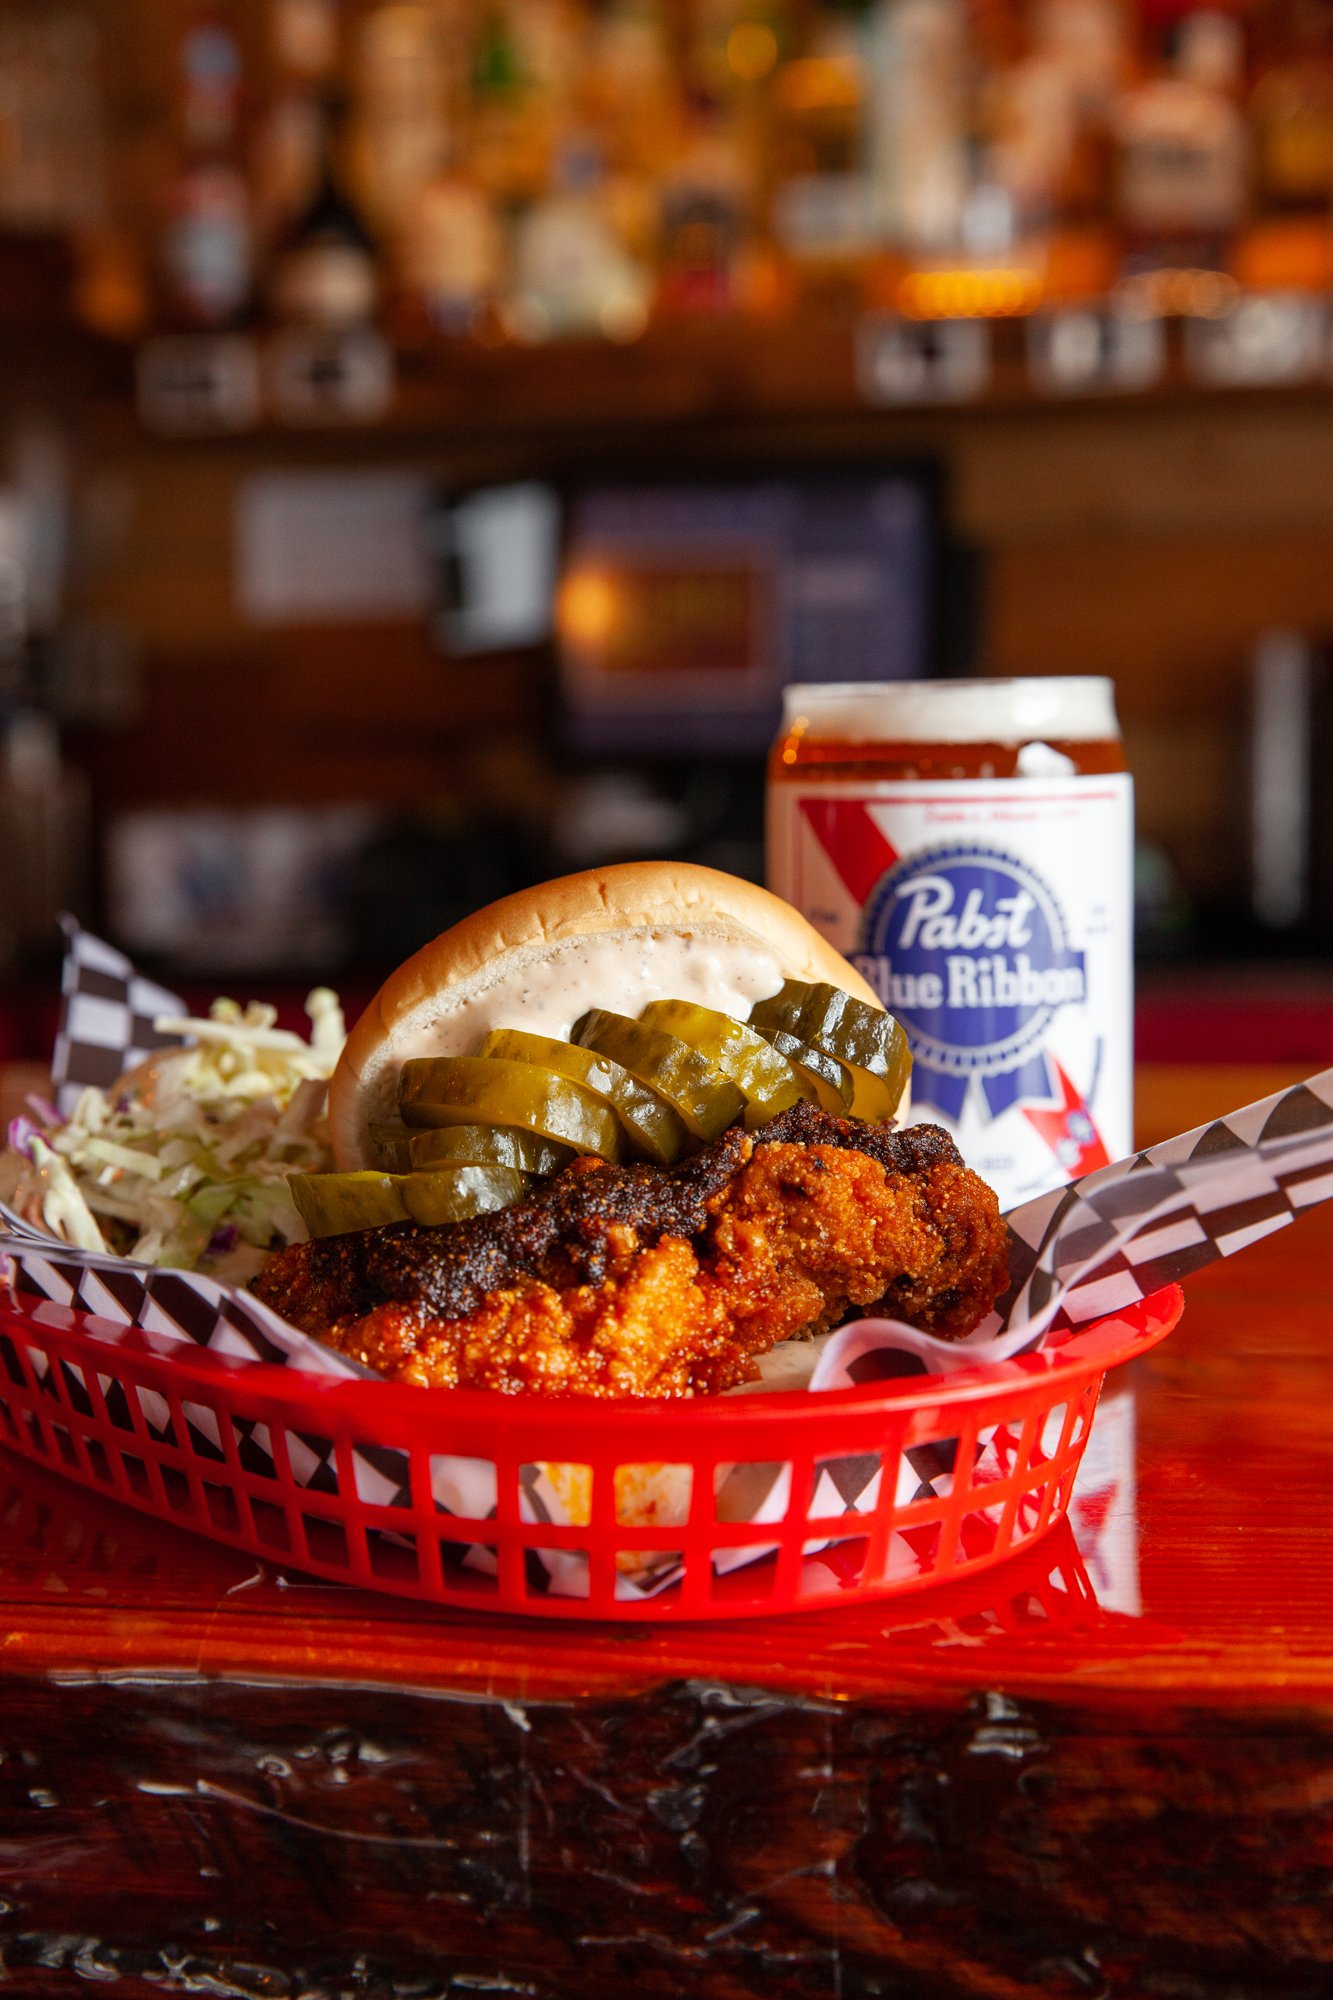
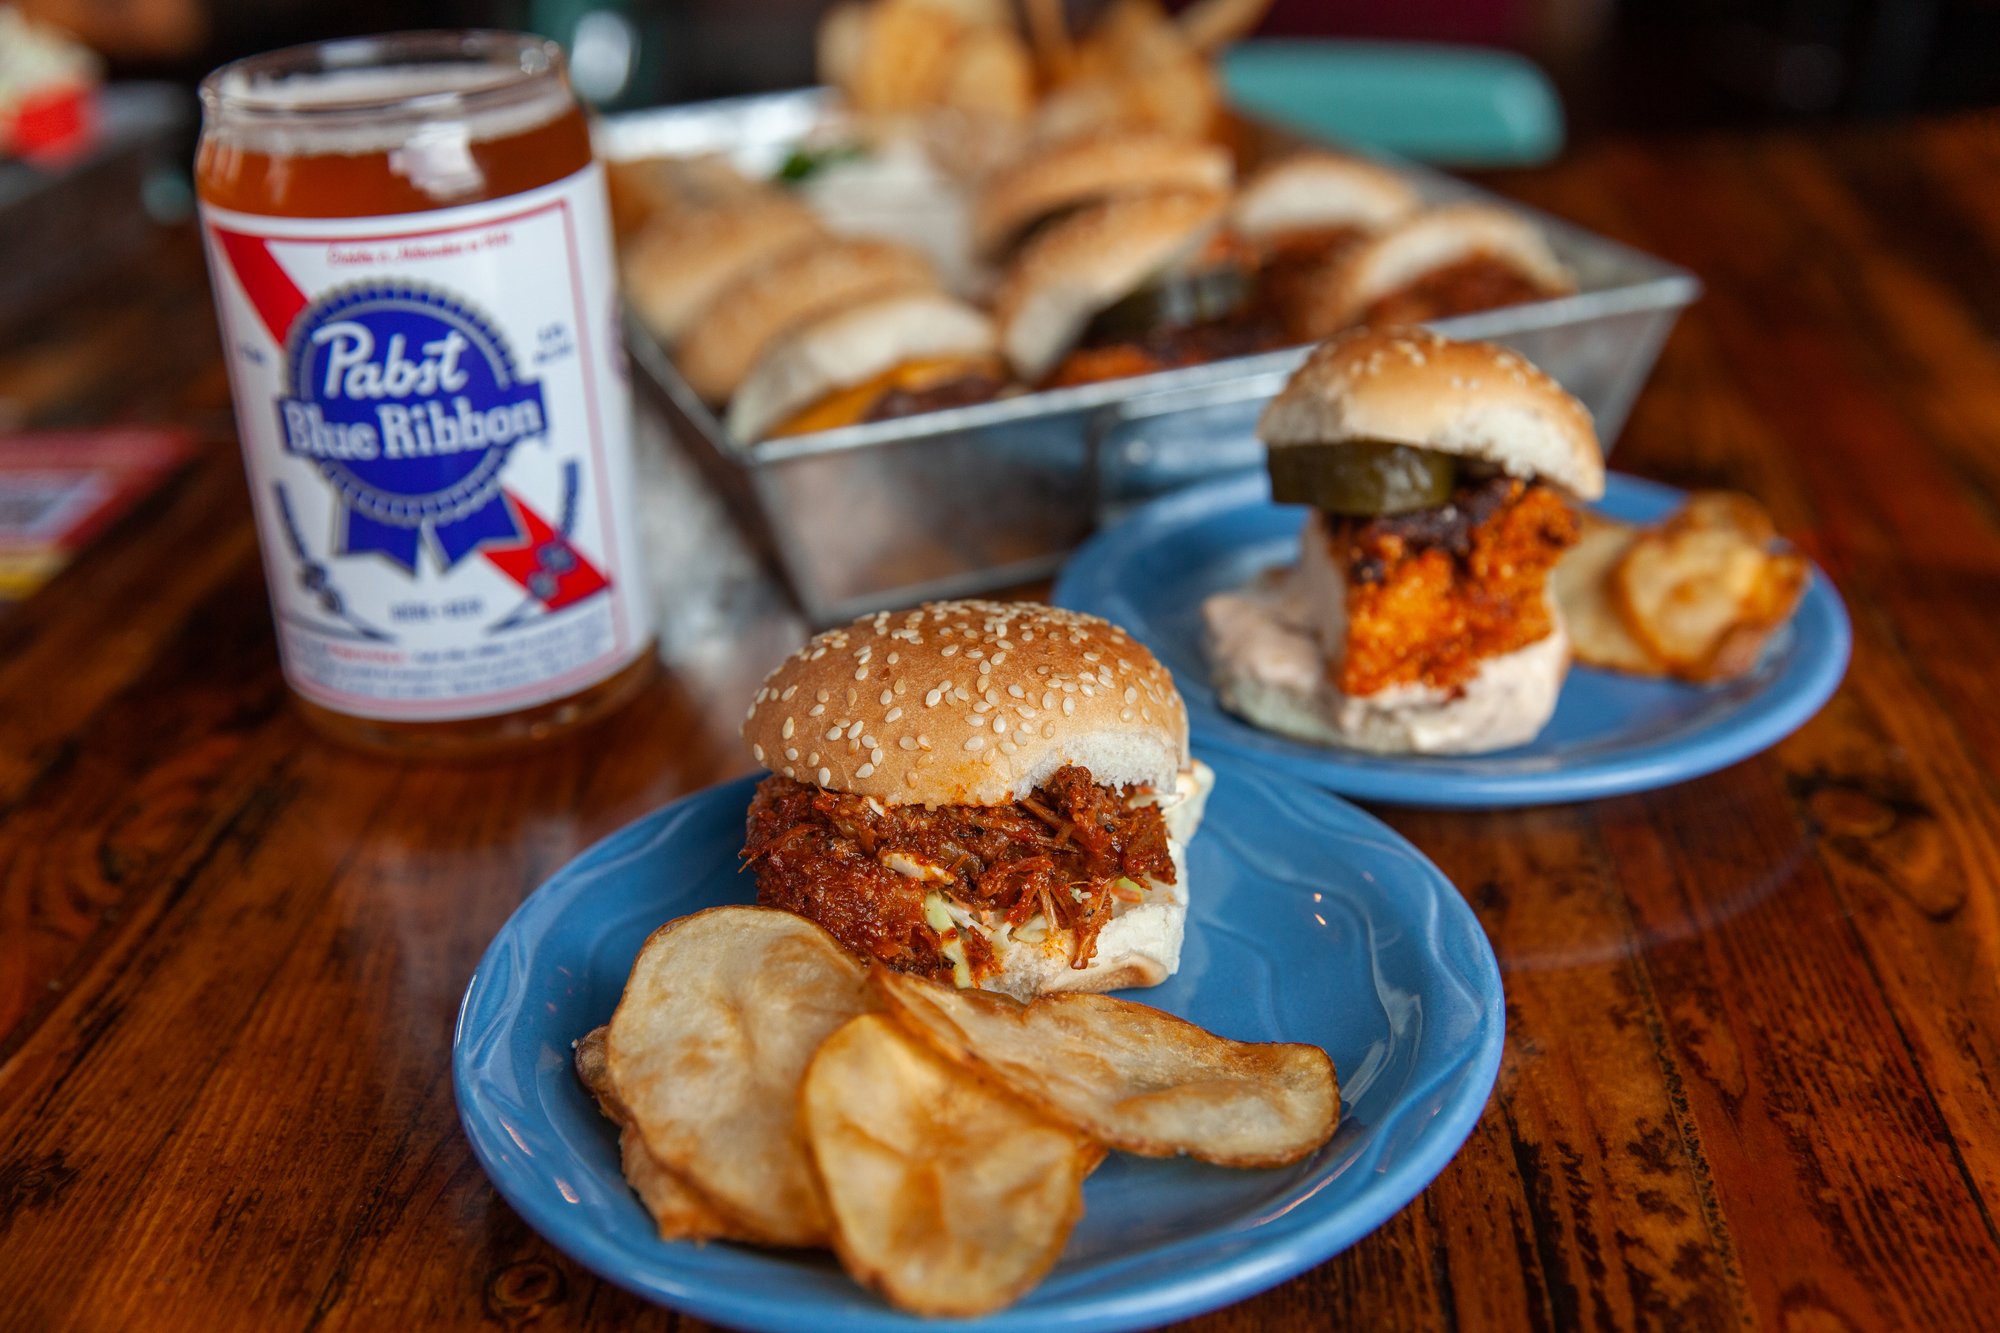
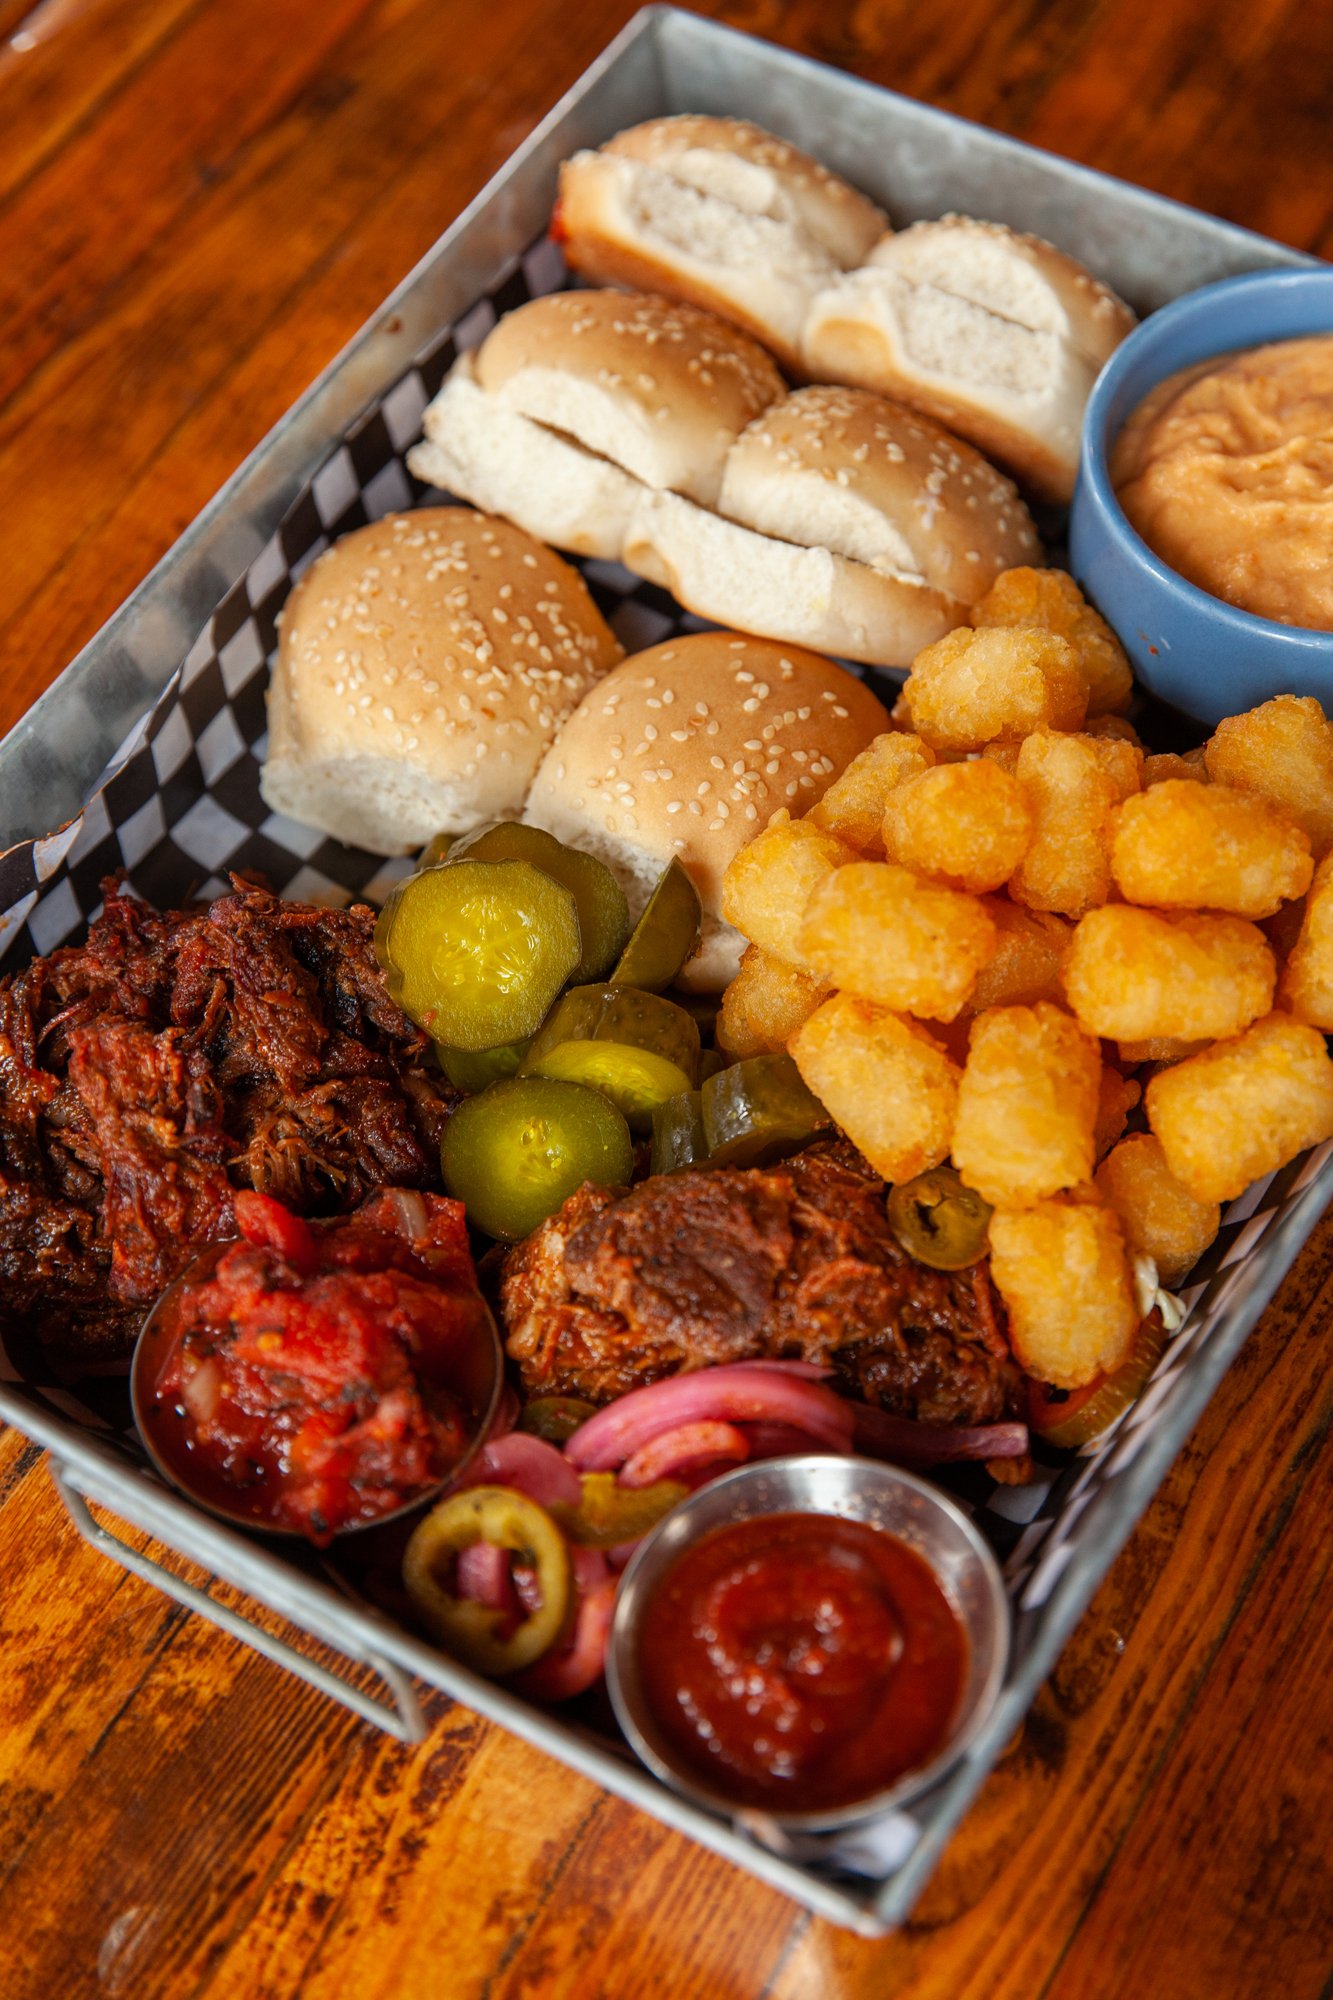
Slim’s BBQ
Food & Restaurant Photography
March 2022
Vancouver International Wine Festival
Bacchanalia Gala
May 17, 2022

RECIPE: Breakfast Sausage - But Make It Vegan
for Environment911.org
April 2022
Some mornings call for a really big breakfast—and these breakfast patties fit in beautifully with a tofu scramble and some roasted potatoes. I like to make them for brunch, or on a camping trip, while sipping on my hot cup of tea. They’re loaded with so much flavour and spice, I guarantee you won’t miss the meat.
Makes Approx. 8-10 Sausages
INGREDIENTS
- 2 cans of black beans
- small onion
- 1 red pepper
- 6 cloves garlic
- fresh rosemary
- fresh sage
- fresh thyme
- 1.5 tsp fennel seeds
- salt & pepper
- optional: teaspoon of paprika (or other spice)
- 2 flax eggs (instructions here)
- (optional: bread crumbs)
- cooking oil
INSTRUCTIONS
Make your flax eggs.
Roughly chop and de-seed your pepper, peel and quarter your onion, and peel your garlic.
Add three ingredients into a food processor and pulse until finely chopped.
Remove and place into a large bowl.
Add the black beans into the processor and blend until almost a paste, and then place into the bowl with the pepper-onion-garlic mixture.
Chop your fresh rosemary, sage and thyme and add to the bowl with some salt and pepper. (This is also great to sprinkle over potatoes if you’re having them.)
Mix ingredients together with your hands, then add in the flax eggs and mix until combined.
(If the mixture doesn’t hold together fully, add in some bread crumbs or oat flour.)
Dive into equal parts of desired size. Roll and then press flat.
Heat oil in a pan and fry until both sides are nicely browned.
If you have leftovers, try making a breakfast burrito or hash the next day.
Bonjour Québec
Event Photography
April 14, 2022
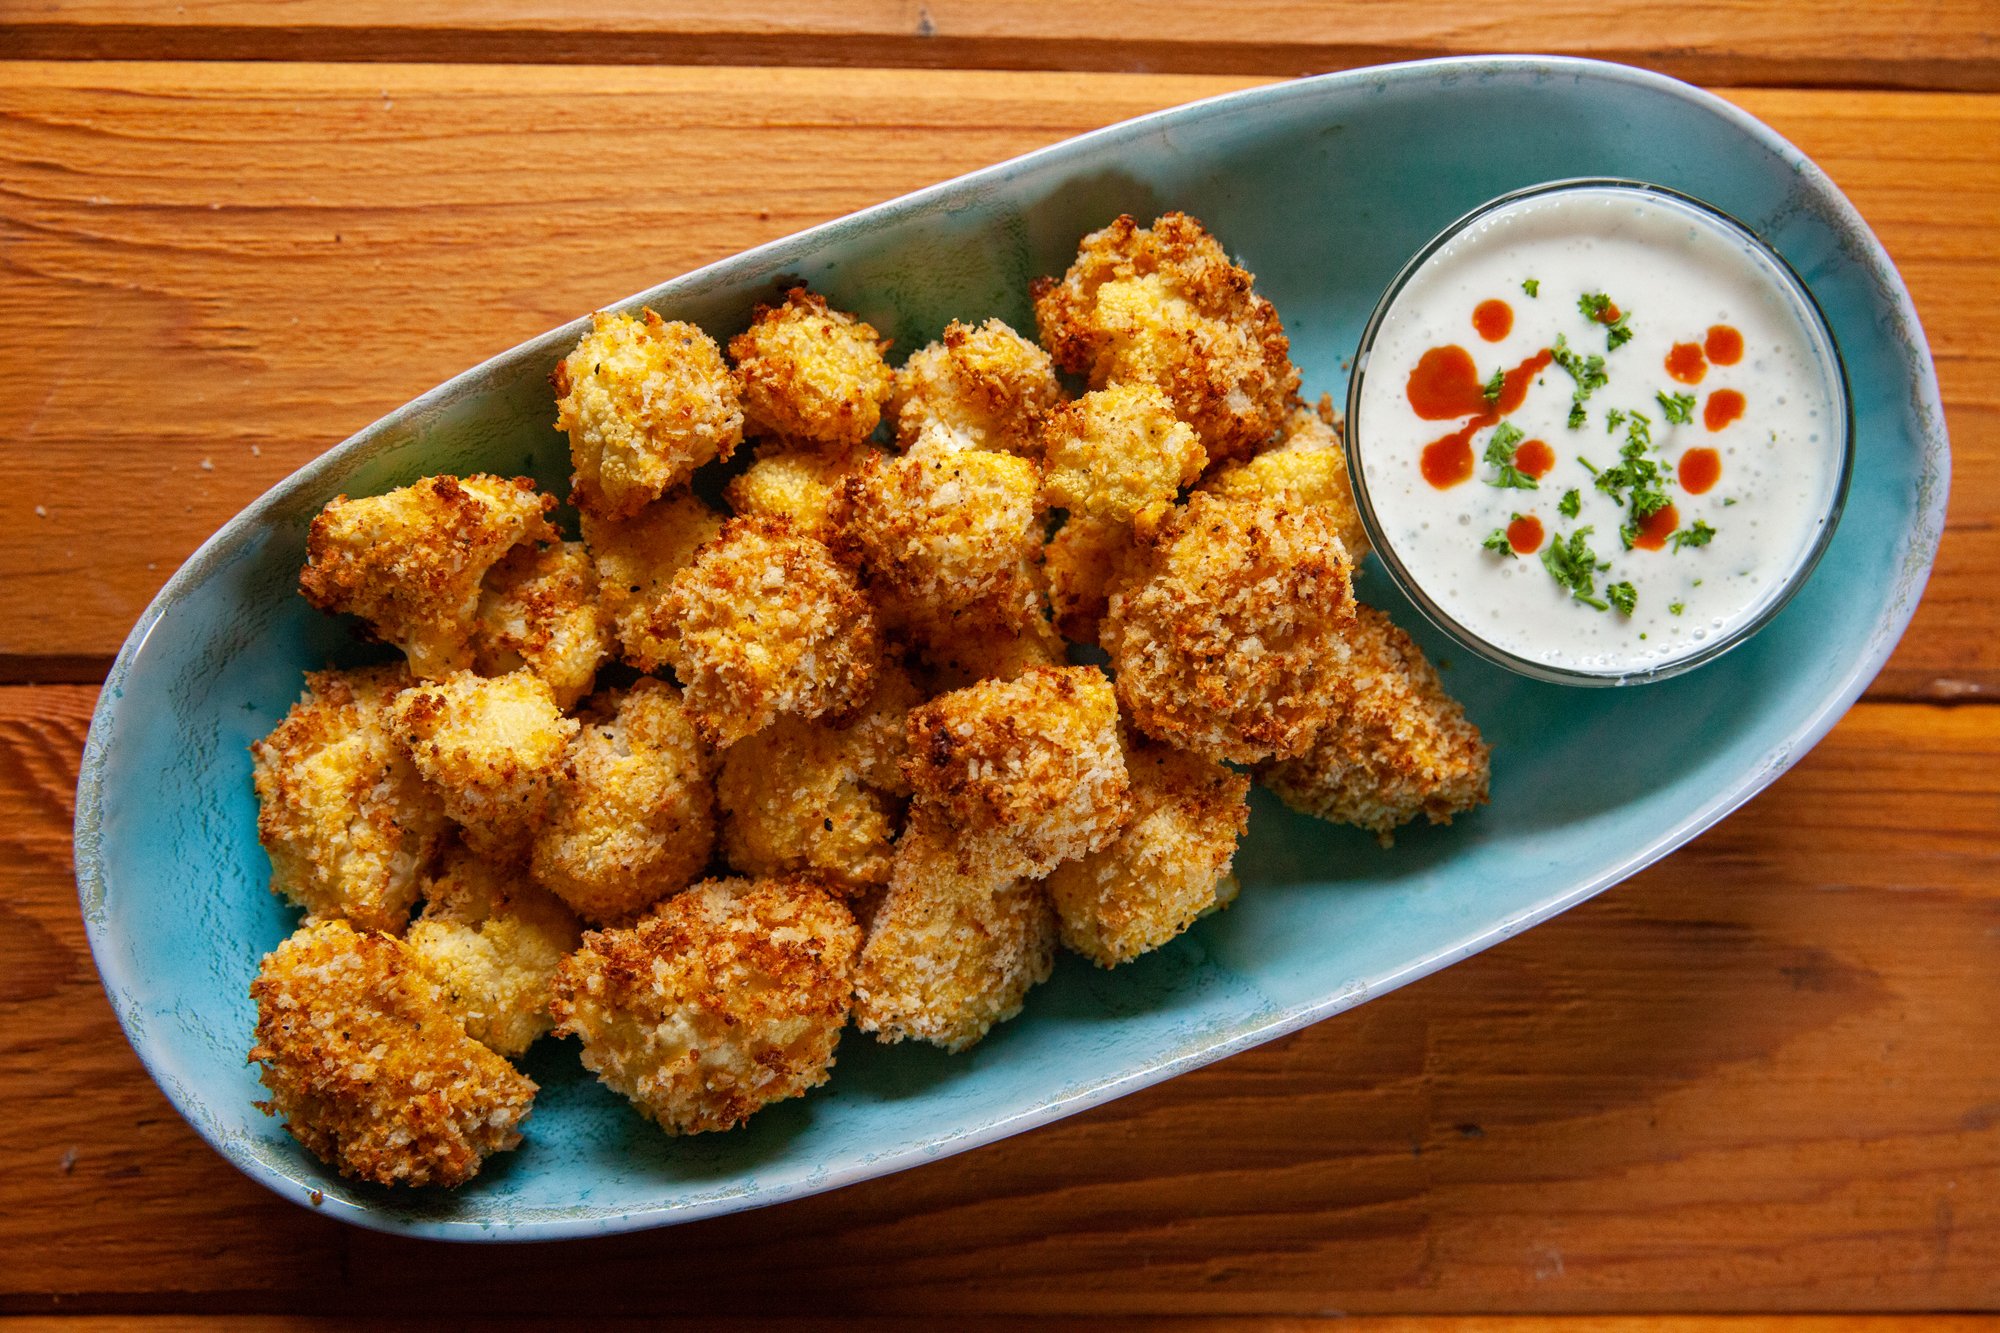
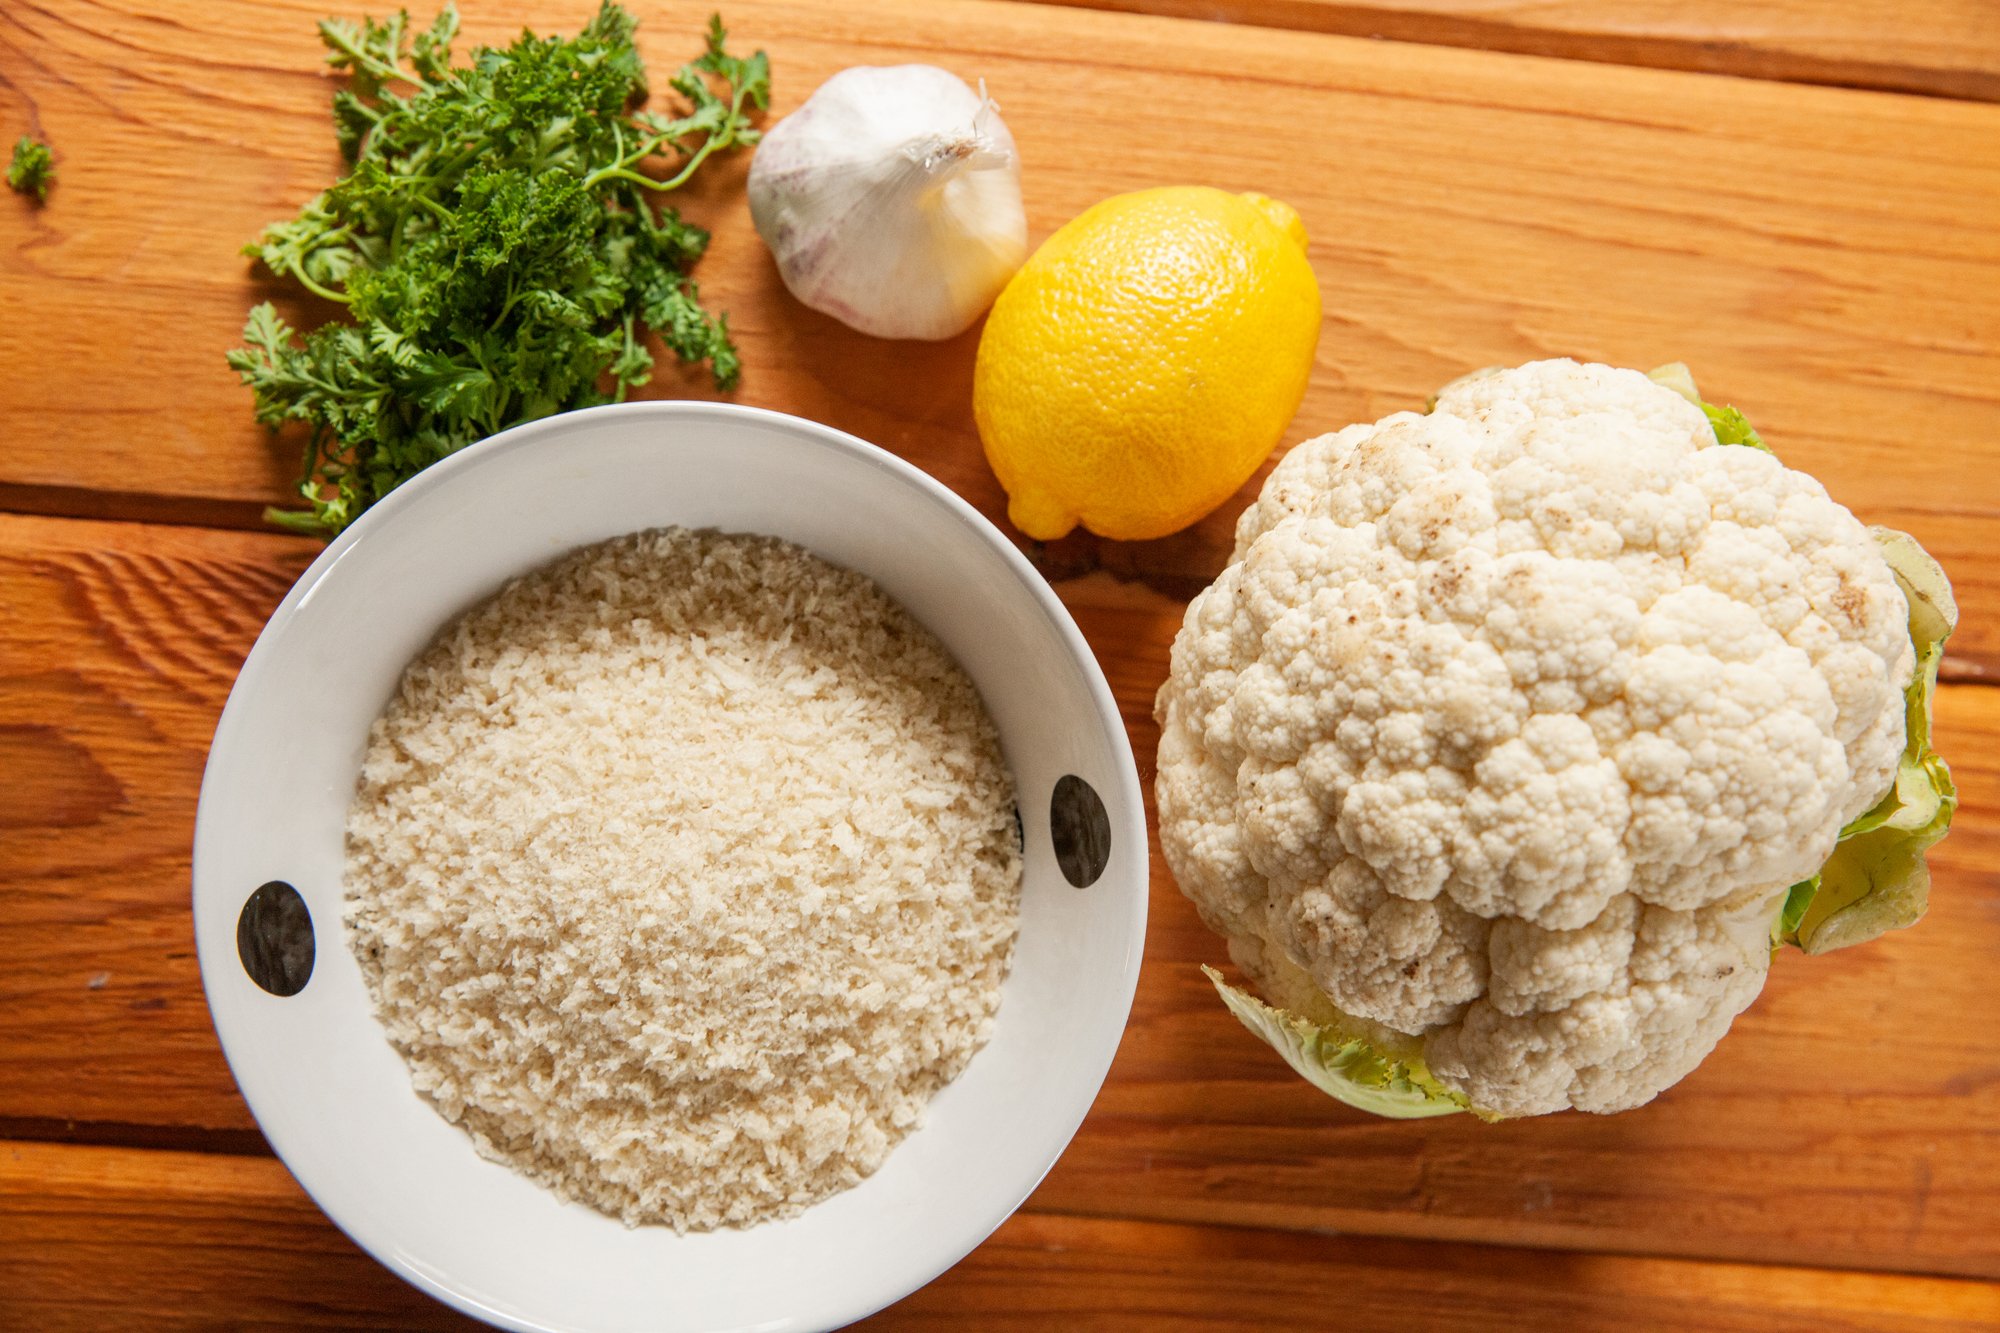
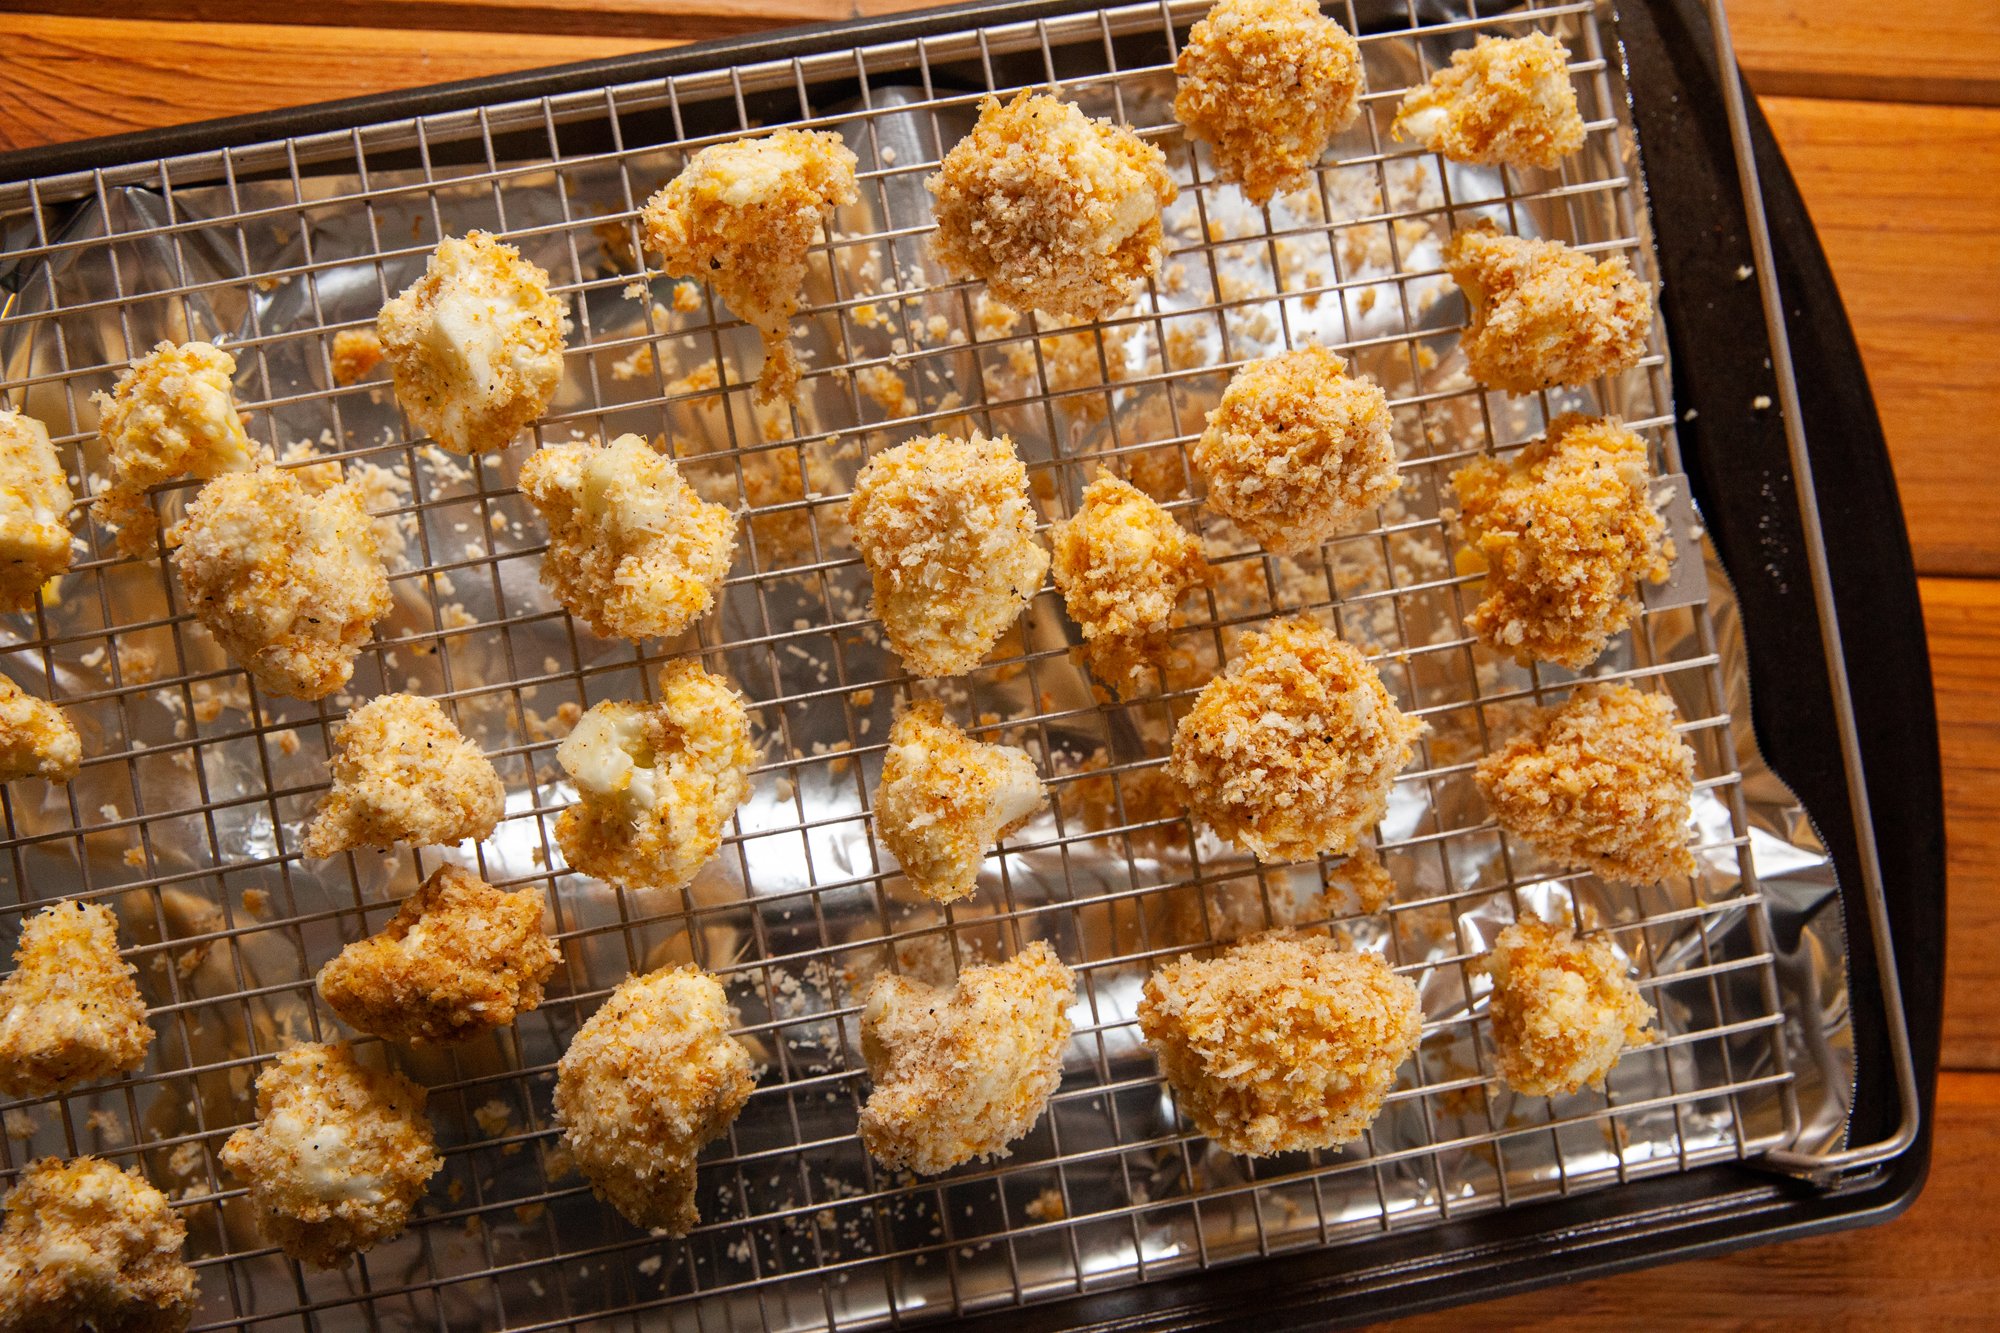
Vegan Panko Cauliflower Bites for Environment911.org
February 2022
If you need a good weekend mid-day snack to go along with whatever sports you’re watching on the TV, this is a super easy, and tasty recipe.
If you wanted you could also coat them in the hot sauce of your choice once they’re baked.
Vegans and non-vegans alike will love this snack!
Serves 4-6
INGREDIENTS:
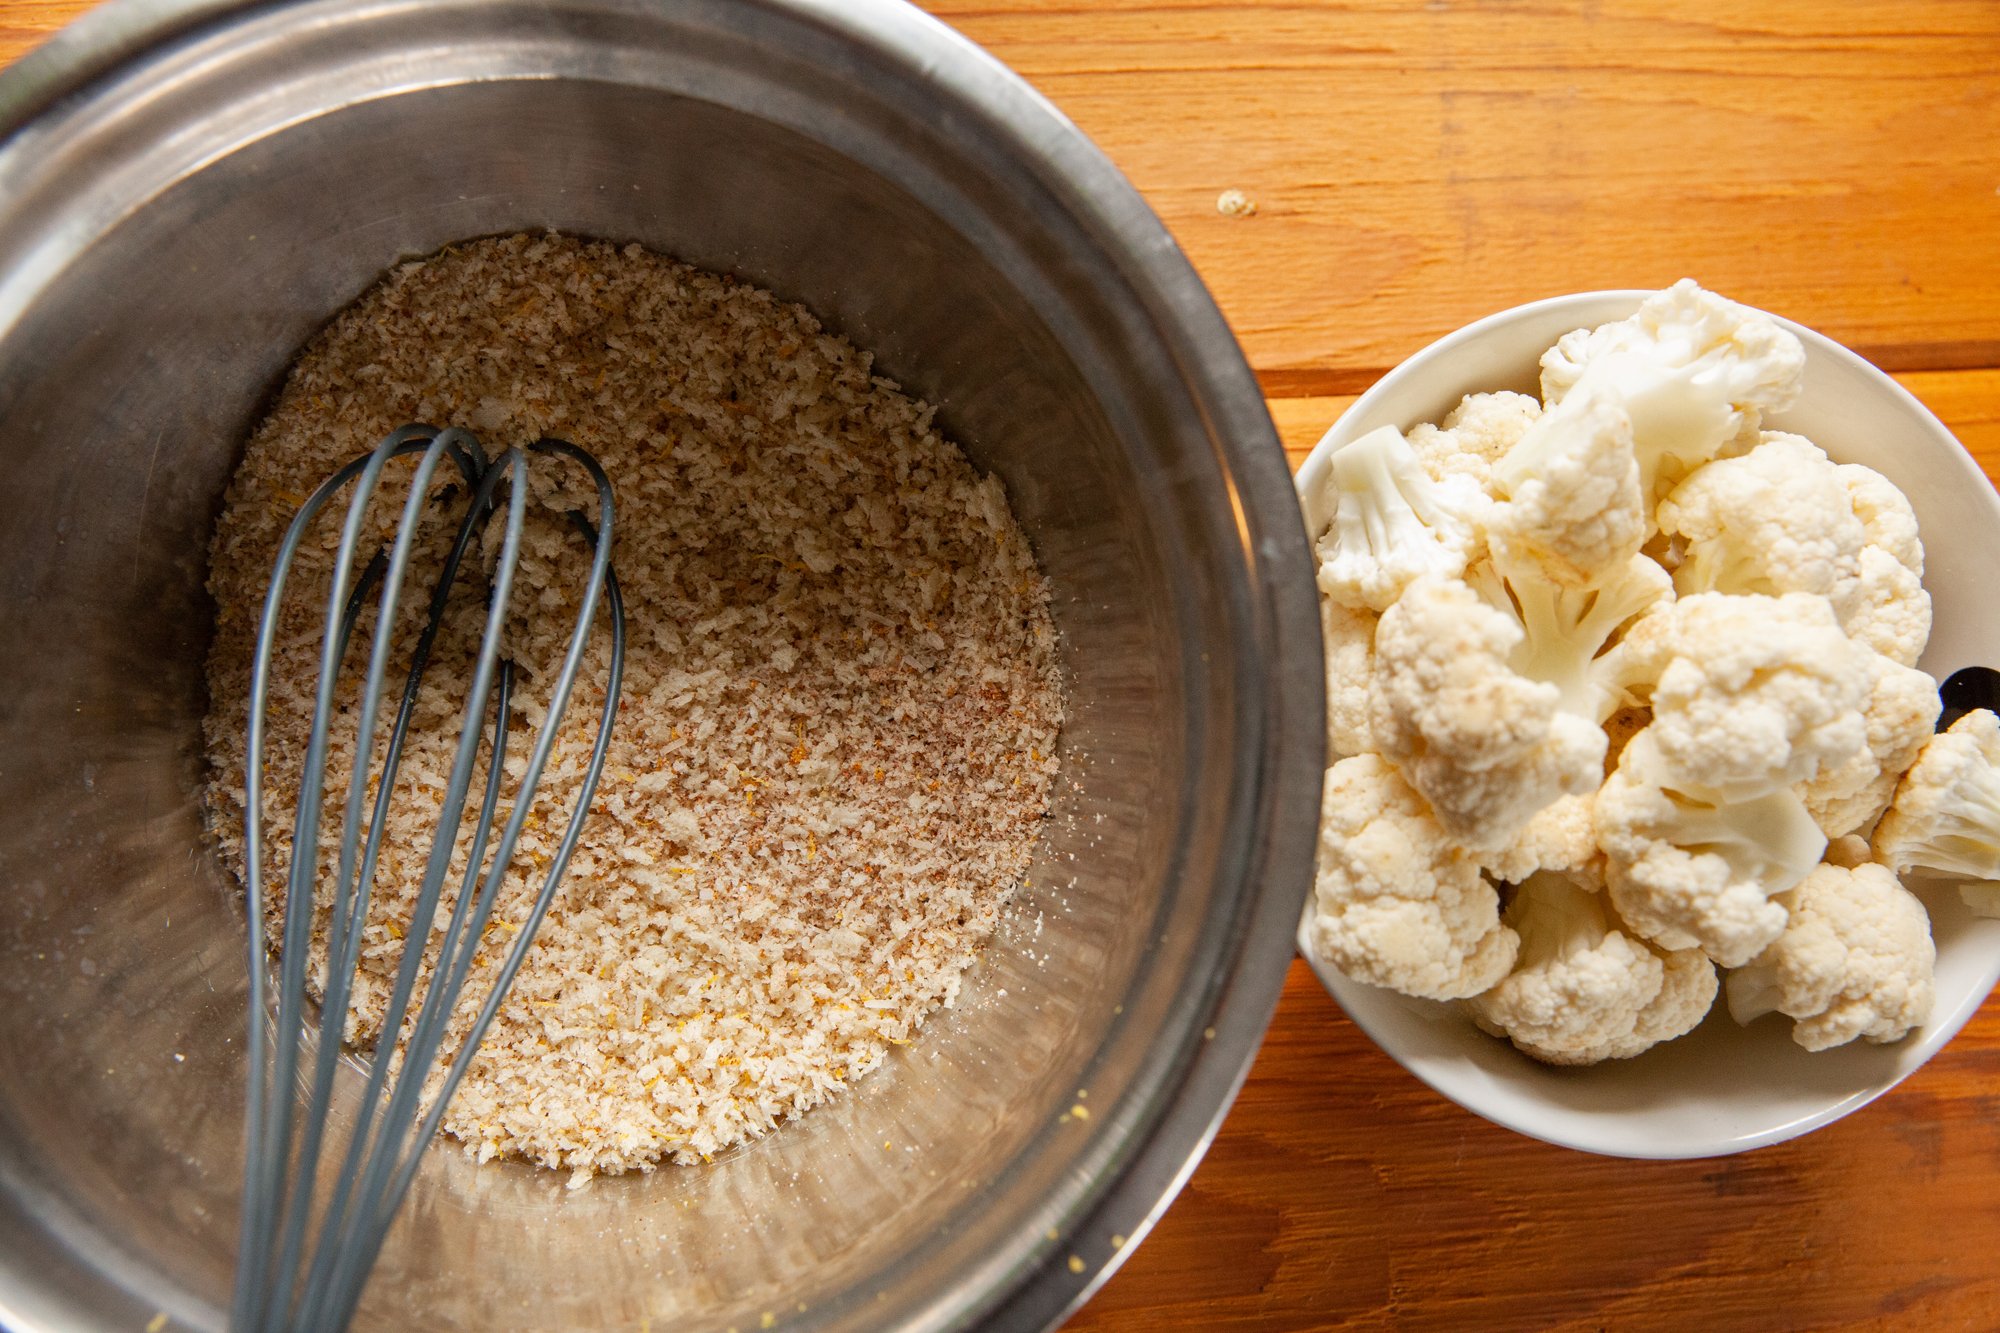
- 1 medium to large head of cauliflower, cut into bite-sized pieces
- 1 small head of garlic
- 1 cup panko breadcrumbs
- 1/2 cup vegan parmesan (or nutritional yeast)
- 1 cup non-dairy milk
- all-purpose flour (approx. 1 cup)
- 1/2 tsp garlic powder
- 1/2 tsp onion powder
- 1/4 tsp salt
- 1/4 tsp pepper
- 1/4 tsp paprika (optional, more if you want more heat)
- zest of one small lemon
- juice of one small lemon
- 1/4 cup vegan buttermilk (see how to make it here)
- 1/4 cup of vegan yogurt (plain) or mayo
- finely chopped parsley and/or chives (approx. 1 tbsp)
- salt and pepper
- paprika and/or hot sauce (optional)
INSTRUCTIONS:
To save time roast the head of garlic ahead of time (in a foil packet, cutting the top off and drizzling with olive oil – approx. 30mins, at 450) - which allows it time to cool so you don't burn your fingers as well!
Preheat oven to 450.
Place an OVEN-PROOF, non-stick, cooling/wire rack on a baking sheet.
In one shallow bowl, add the cup of non-dairy milk and whisk in the all-purpose flour. In a 2nd bowl, combine the panko, onion and garlic powder, paprika, vegan parmesan, salt and pepper, and lemon zest until thoroughly mixed.
Dunk the cauliflower florets in the non-dairy milk/flour and then dredge them in the panko mixture, and put them on the baking sheet (you may want to spray it down with cooking spray for extra non-stickness.
Bake in the oven for about 20 mins and then flip and bake again for about 15-20 mins until brown and crispy! Keep an eye on them throughout, as some oven may cook them faster than others.
While this is baking, make the sauce by combining the roasted garlic, lemon juice, 'buttermilk', yogurt (or mayo), parsley or chives, optional hot sauce/paprika, and salt and pepper. You can do this by hand, but I used an immersion blender to make sure it was nicely pureed.
Pour into a small bowl for dunking once blended.
Plate the cauliflower on a serving tray with the sauce, and serve hot!
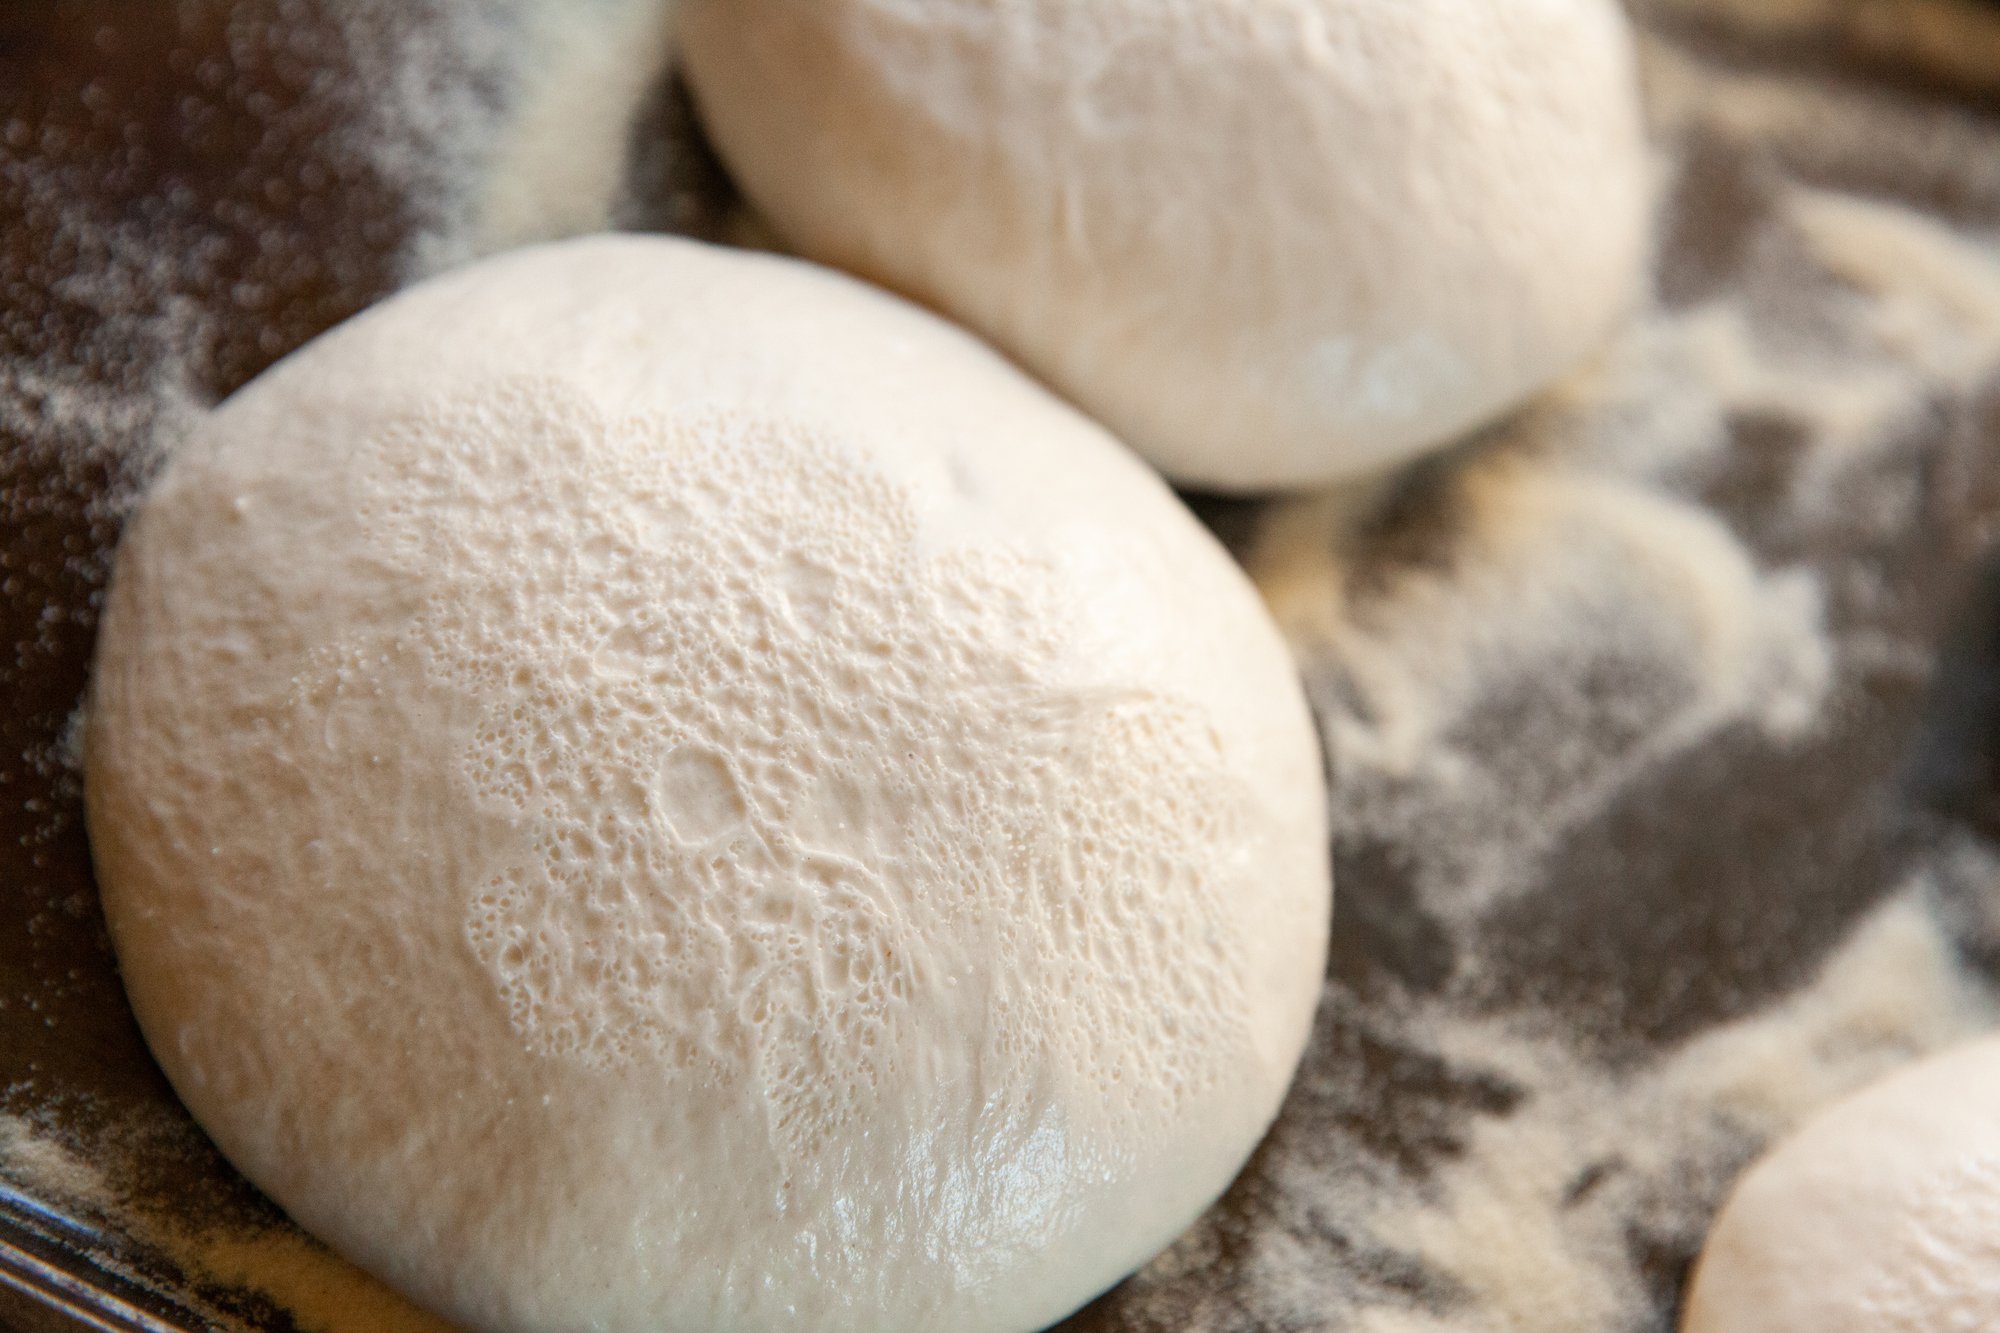
Pizza Dough From Scratch
for BCLiving
March 2022
Some things are just better when they're made from scratch, not to mention that making something “with your own two hands” gives such great satisfaction. When you do this, you will know exactly what ingredients went into your meals, and because of that, it gives you wiggle room for dietary or taste preferences. From Scratch is the way to go...
Pizza Dough
In 2020 I gave some tips about making your homemade pizza even better, and one of the most important ones was making your dough from scratch!
There are many ways you can do this, and much of it depends on time. But if you plan ahead you’ll get some of the best homemade pizza you’ve ever had!
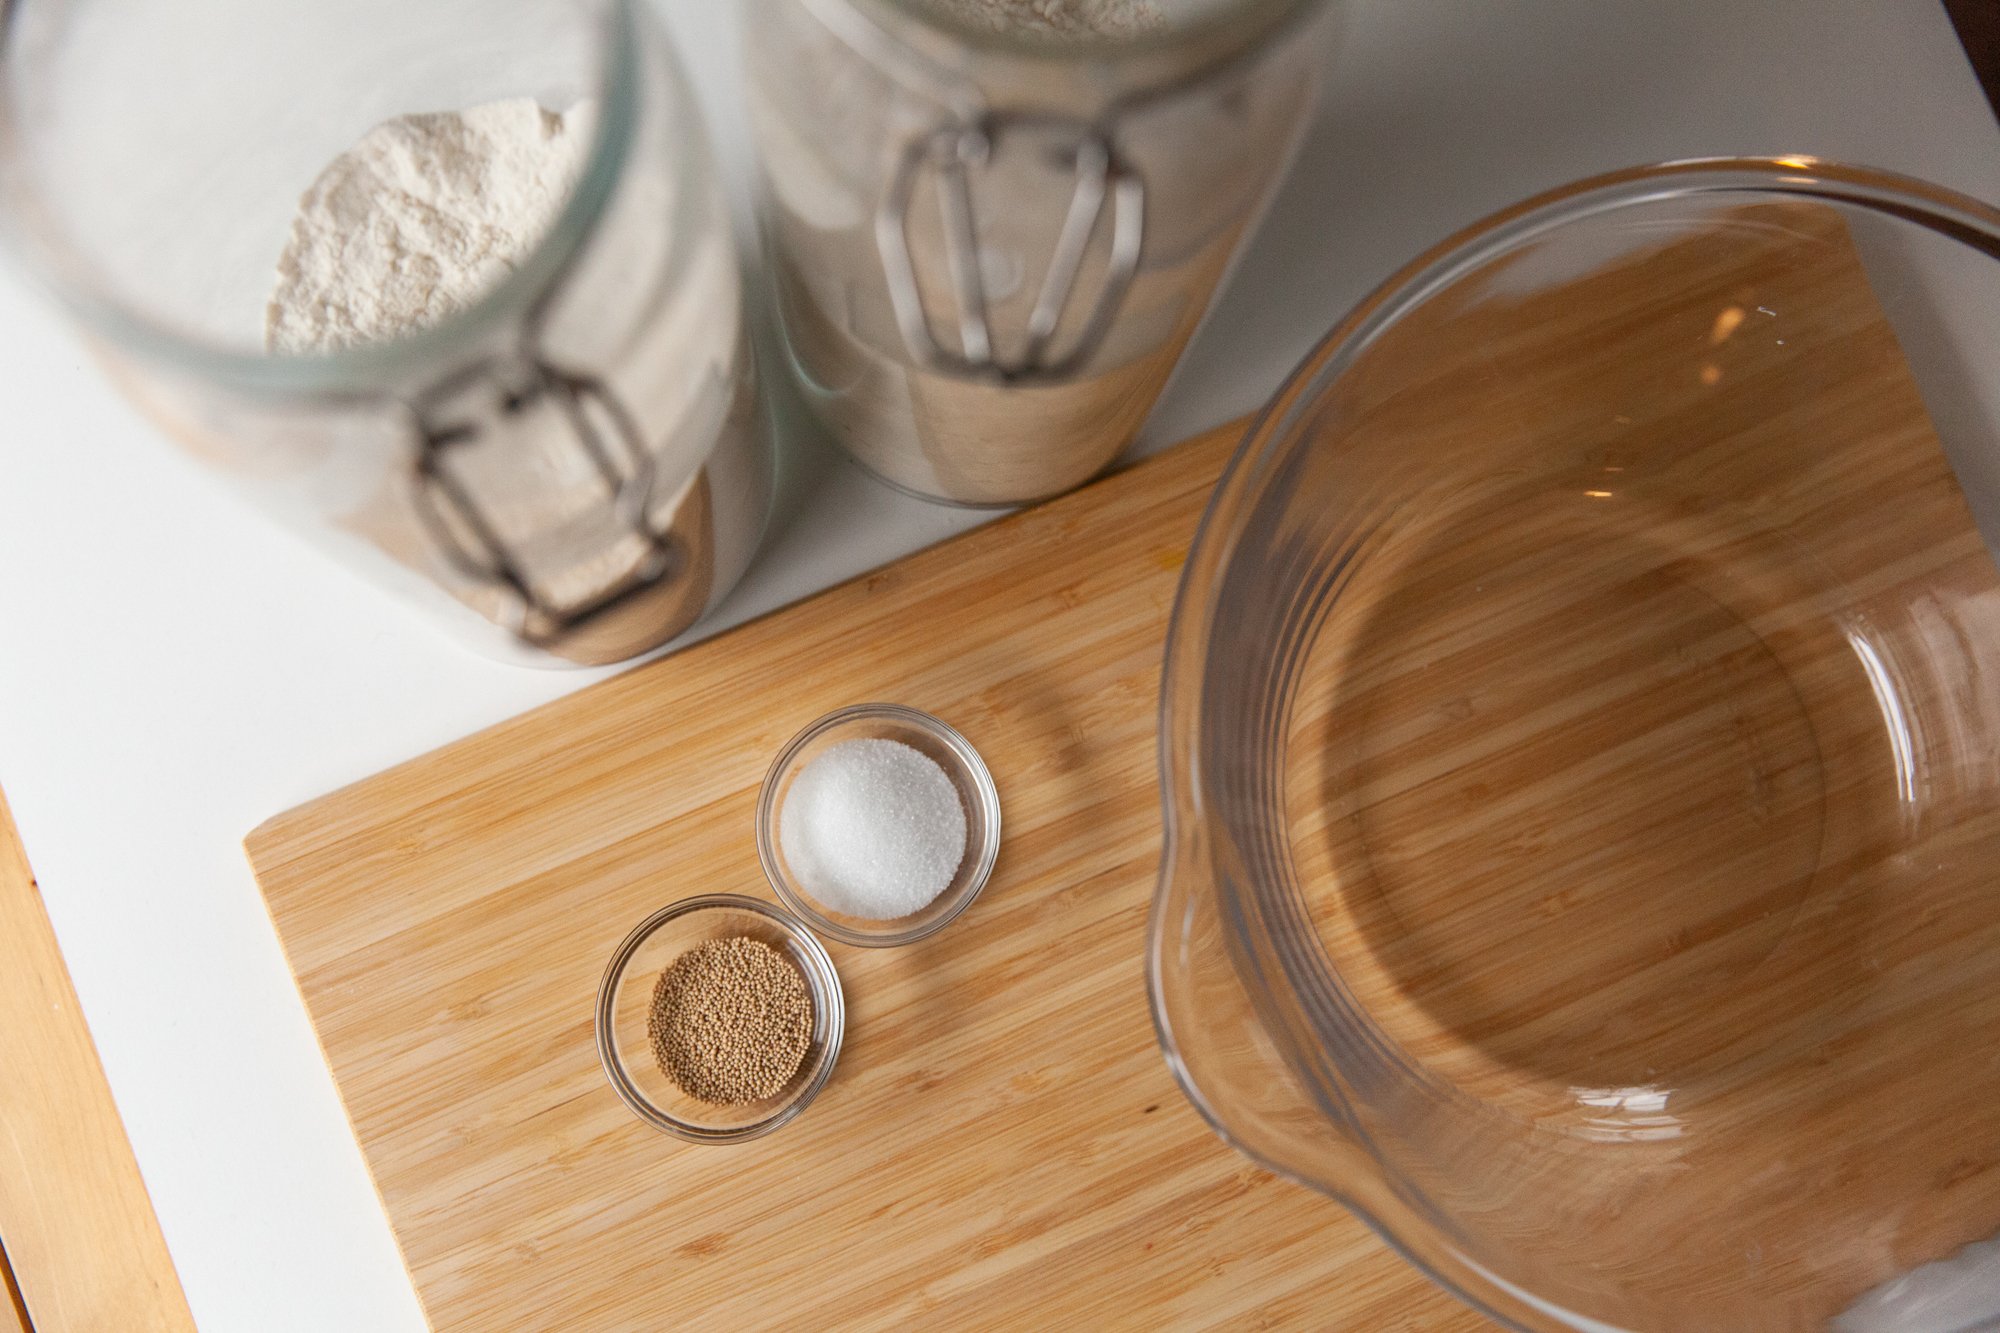
INGREDIENTS:
- *1 ½ teaspoons of yeast or 1 tbsp
- 2 cups of lukewarm water
- 1 teaspoon of sugar
- 2 cups of all-purpose flour
- 3 cups of 00 flour (or AP flour)
- 2 teaspoons of salt
- 2 tablespoons of olive oil
- semolina flour
- pizza sauce and toppings of your choice
INSTRUCTIONS:
*If you are making the dough for the same day, use 1 tbsp of yeast. If you are going to cold-ferment it overnight, use 1 ½ teaspoons
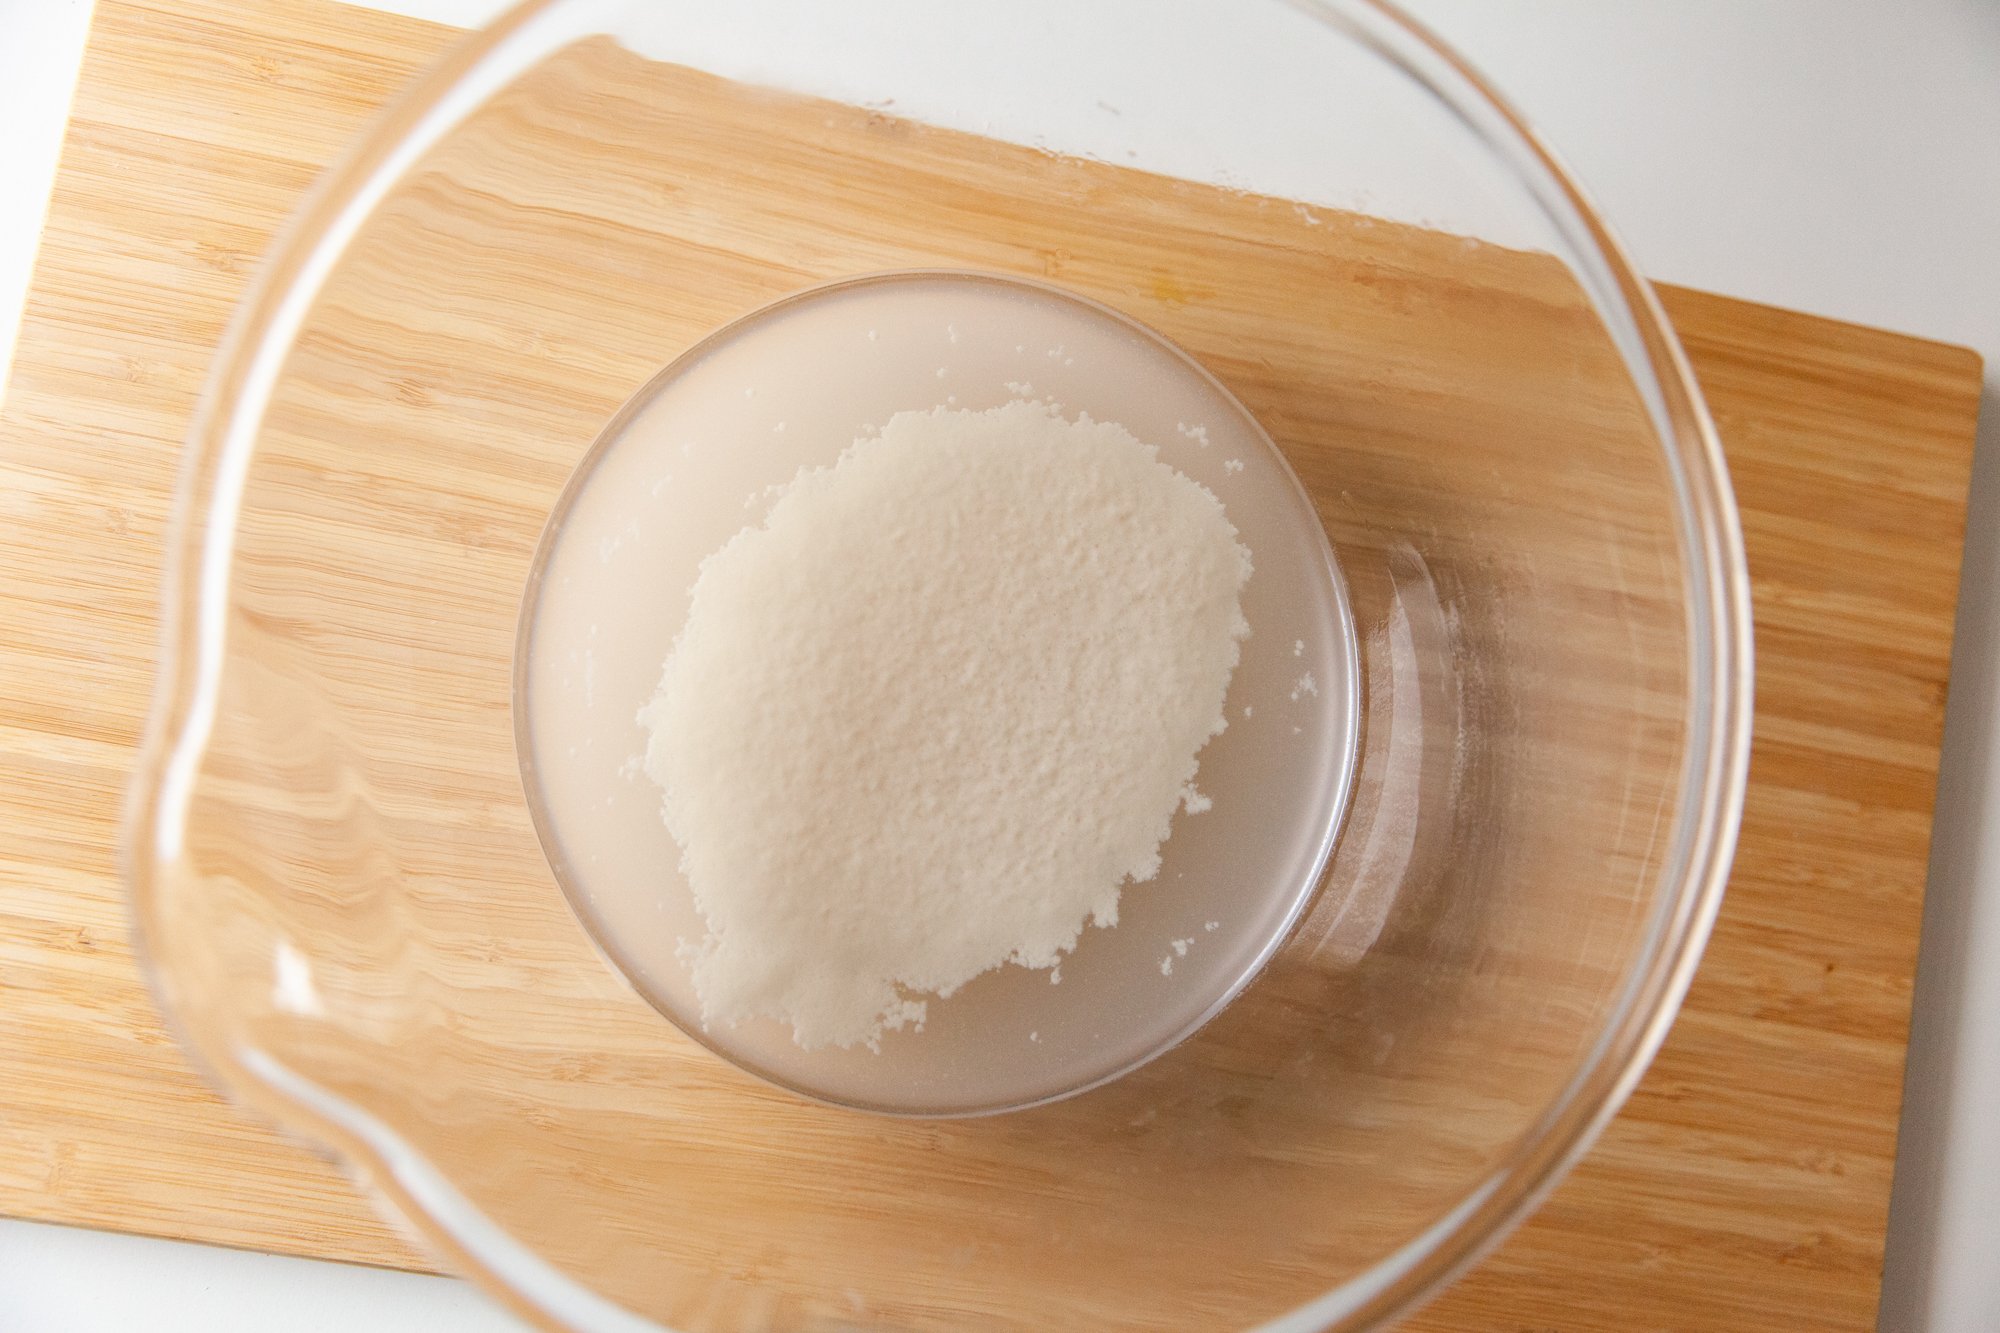
Place the yeast, sugar and lukewarm water in a bowl and whisk together.
Let it sit for 15-30 minutes until you see it is bubbling and smells yeasty.
Stir in the salt and the olive oil, and then add 2 cups of AP flour and 2 cups of 00 Flour.
Mix loosely and add more flour until the dough isn’t wet, and then let rest for 10 minutes.
Transfer to a clean, lightly floured surface and knead until the dough for five minutes.
Cover with cling-wrap or a tea towel and let sit for 10 minutes so the water can absorb more.
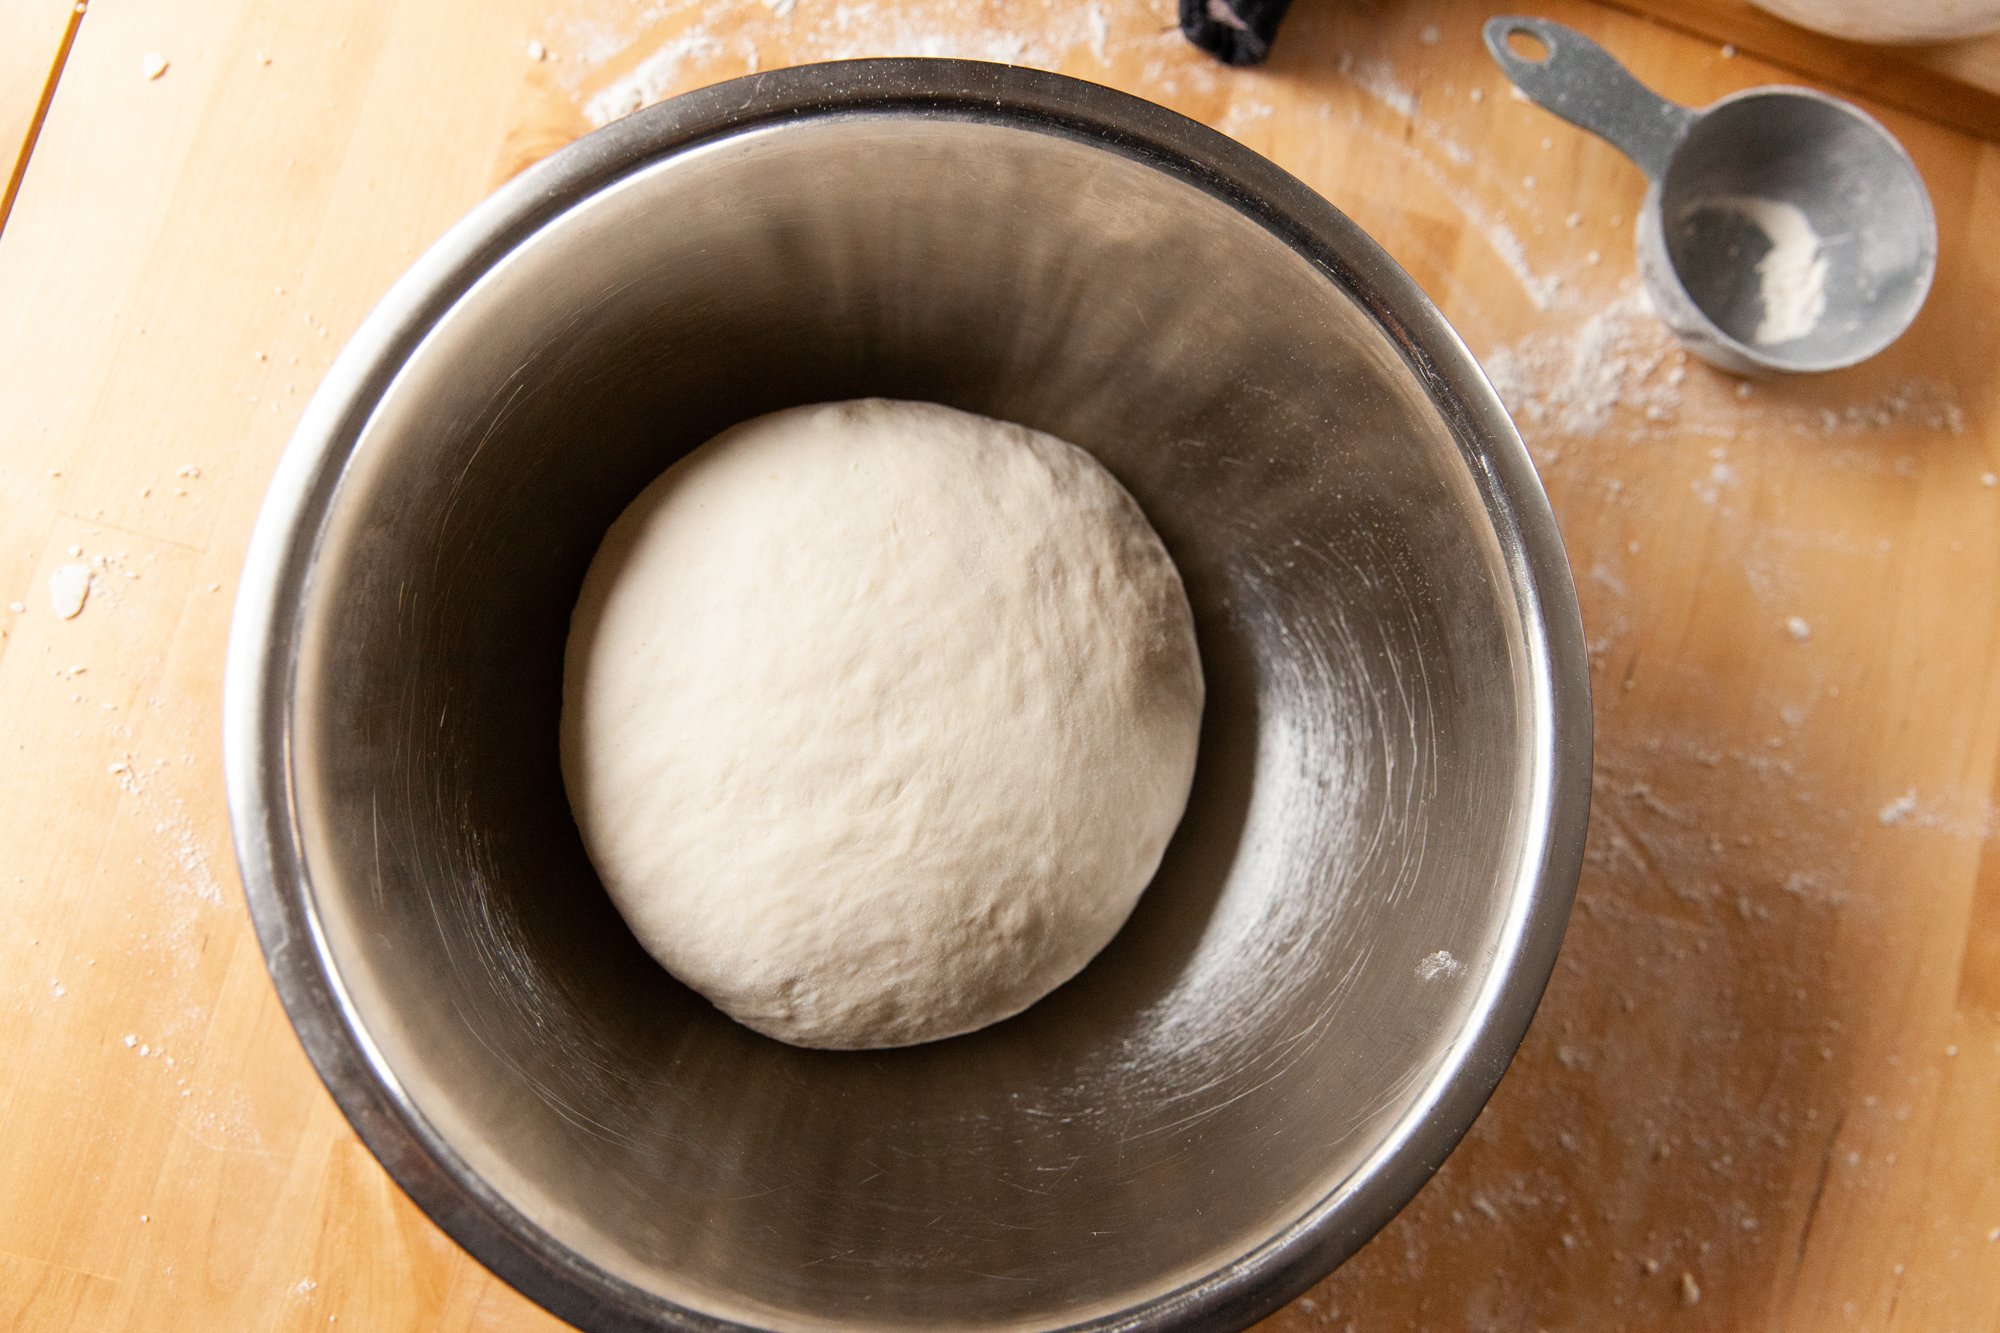
After this rest, knead for 4-5 more minutes until you have a smooth ball.
Place in an oiled bowl, cover, and let it rest until it doubles in size. This can take anywhere from 1-3 hours depending on your environment.
Once the dough has doubled you can cut into 3 or 4 even pieces (depending on the size you’d like), and then shape into balls.
At this stage, if you are using it right away, let them rest on an oiled sheet pan a while longer.
If you are cold-fermenting them, place some semolina flour on a sheet pan, then place the balls on top, and then smooth some olive oil over the top so the crust doesn’t get hard.
Cover the dough with plastic wrap and you can place it in the fridge for 12-72 hours (longer it ferments, the more flavor).
Before you use the dough, remove it from the fridge and let it come to room temperature. (At LEAST an hour).
You can shape your dough balls either with oil or semolina on the counter. Do NOT use a rolling pin!
Press your fingers into it to create the crust and work the dough from there. You can use your knuckles and slowly rotate the dough to stretch it out as well.
Place semolina on a pizza peel if using a pizza stone and then place the dough on top, followed by your chosen sauce and ingredients and then place it in the oven.
Cook the pizza at the highest temperature that your oven has, and cook for about 5 minutes (watching it the whole time) and with a few mins left after the crust has started to rise, turn the broil on to give the crust some color and cheese a bit more melt.
Every oven is different, and the time of year and your location will make for differences in rise, so write down your progress and take notes – adjusting as you go – to find your best dough and crust.
ENJOY YOUR PIZZA!
Follow me on Social Media