bc living

RECIPE: English Muffins for BC Living "From Scratch" - April 01, 2024

English Muffins
for BC Living "From Scratch" Column
April 01, 2024

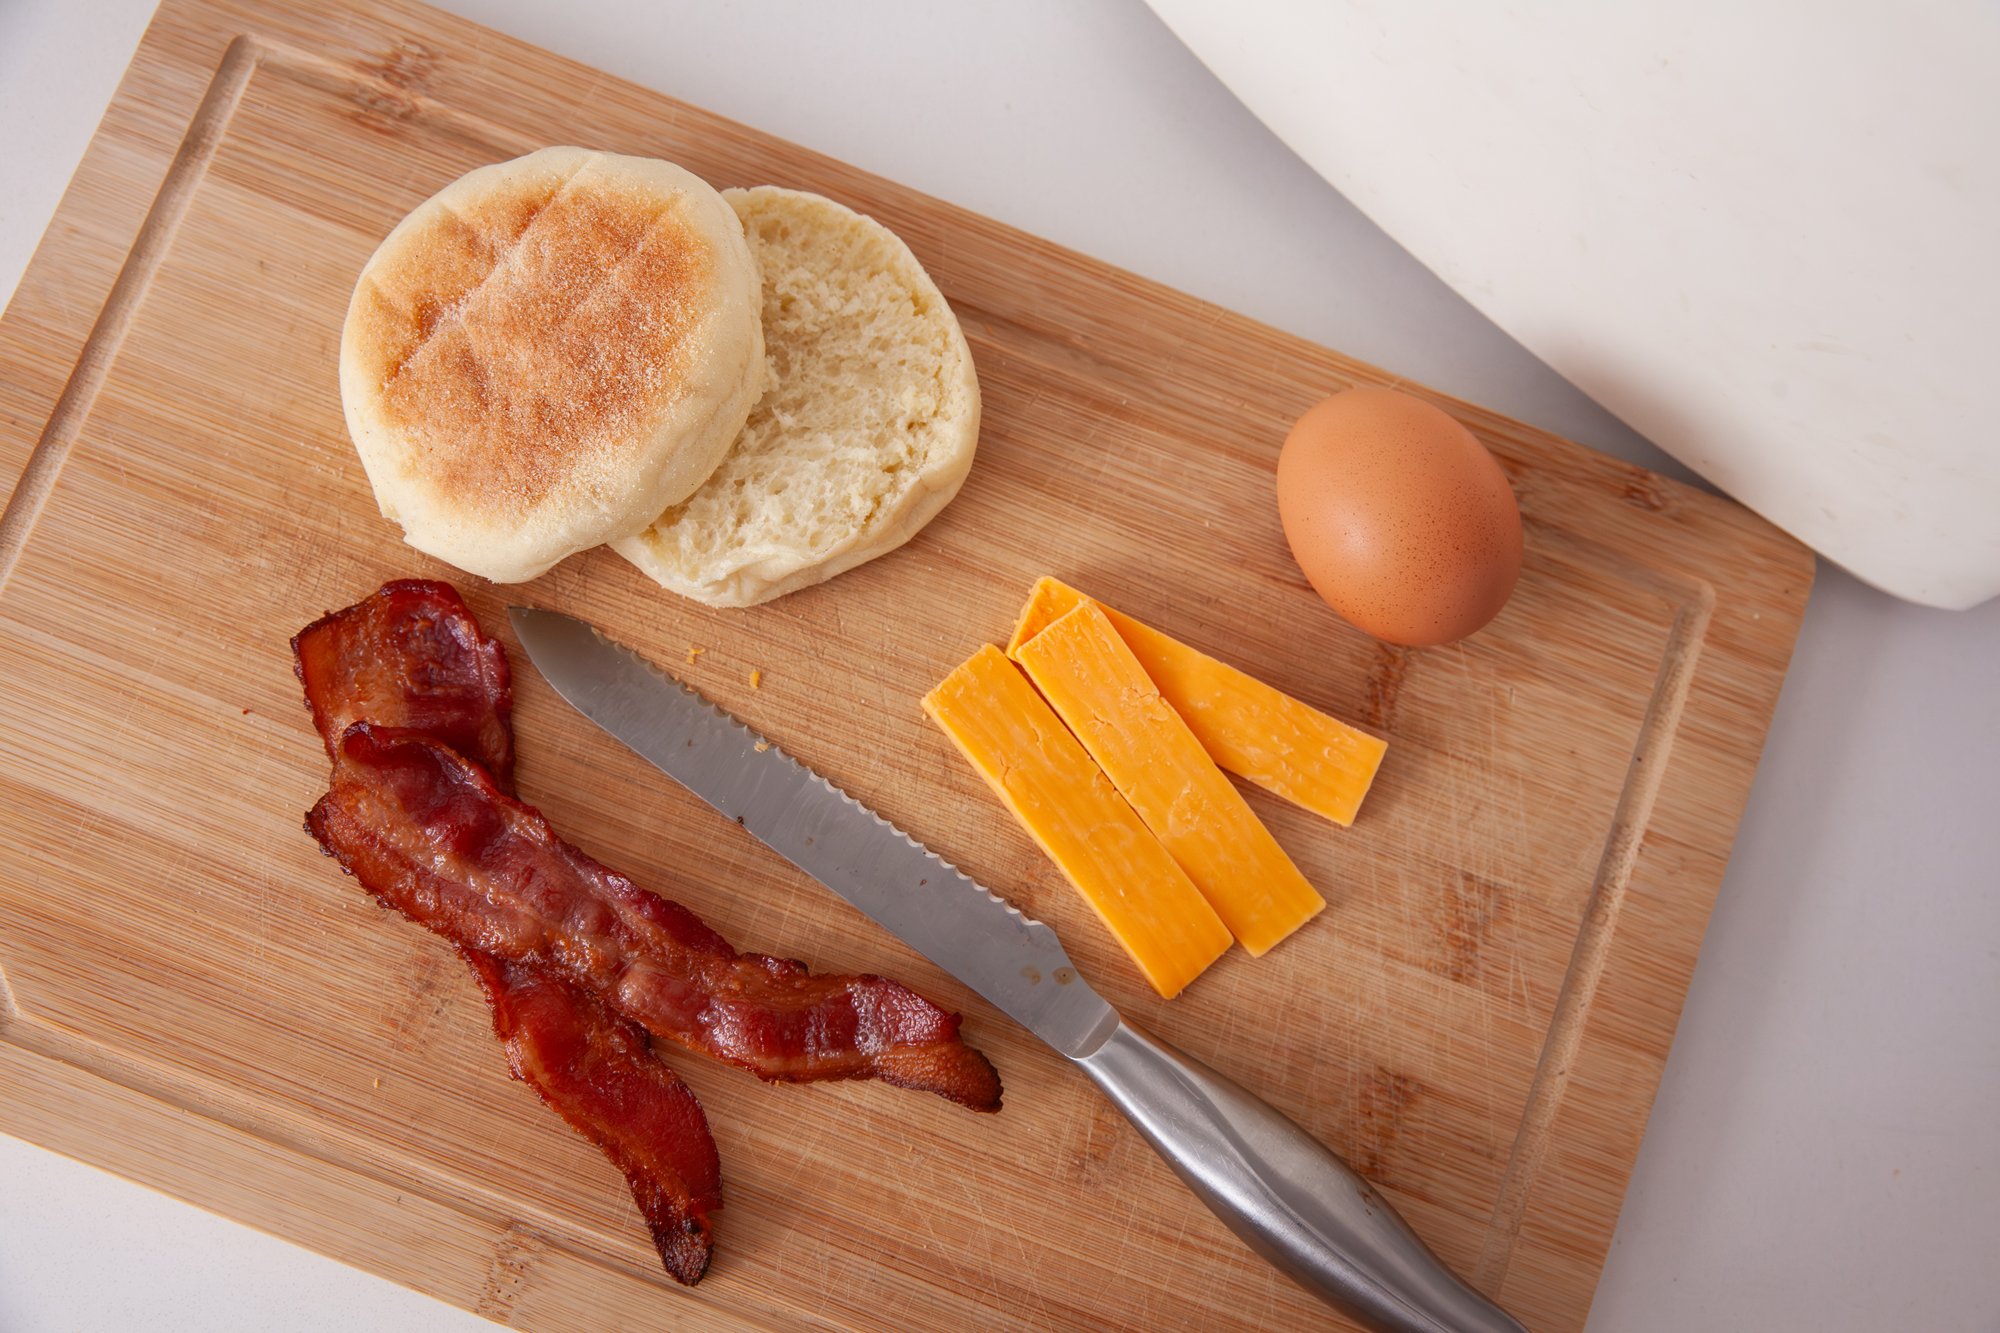
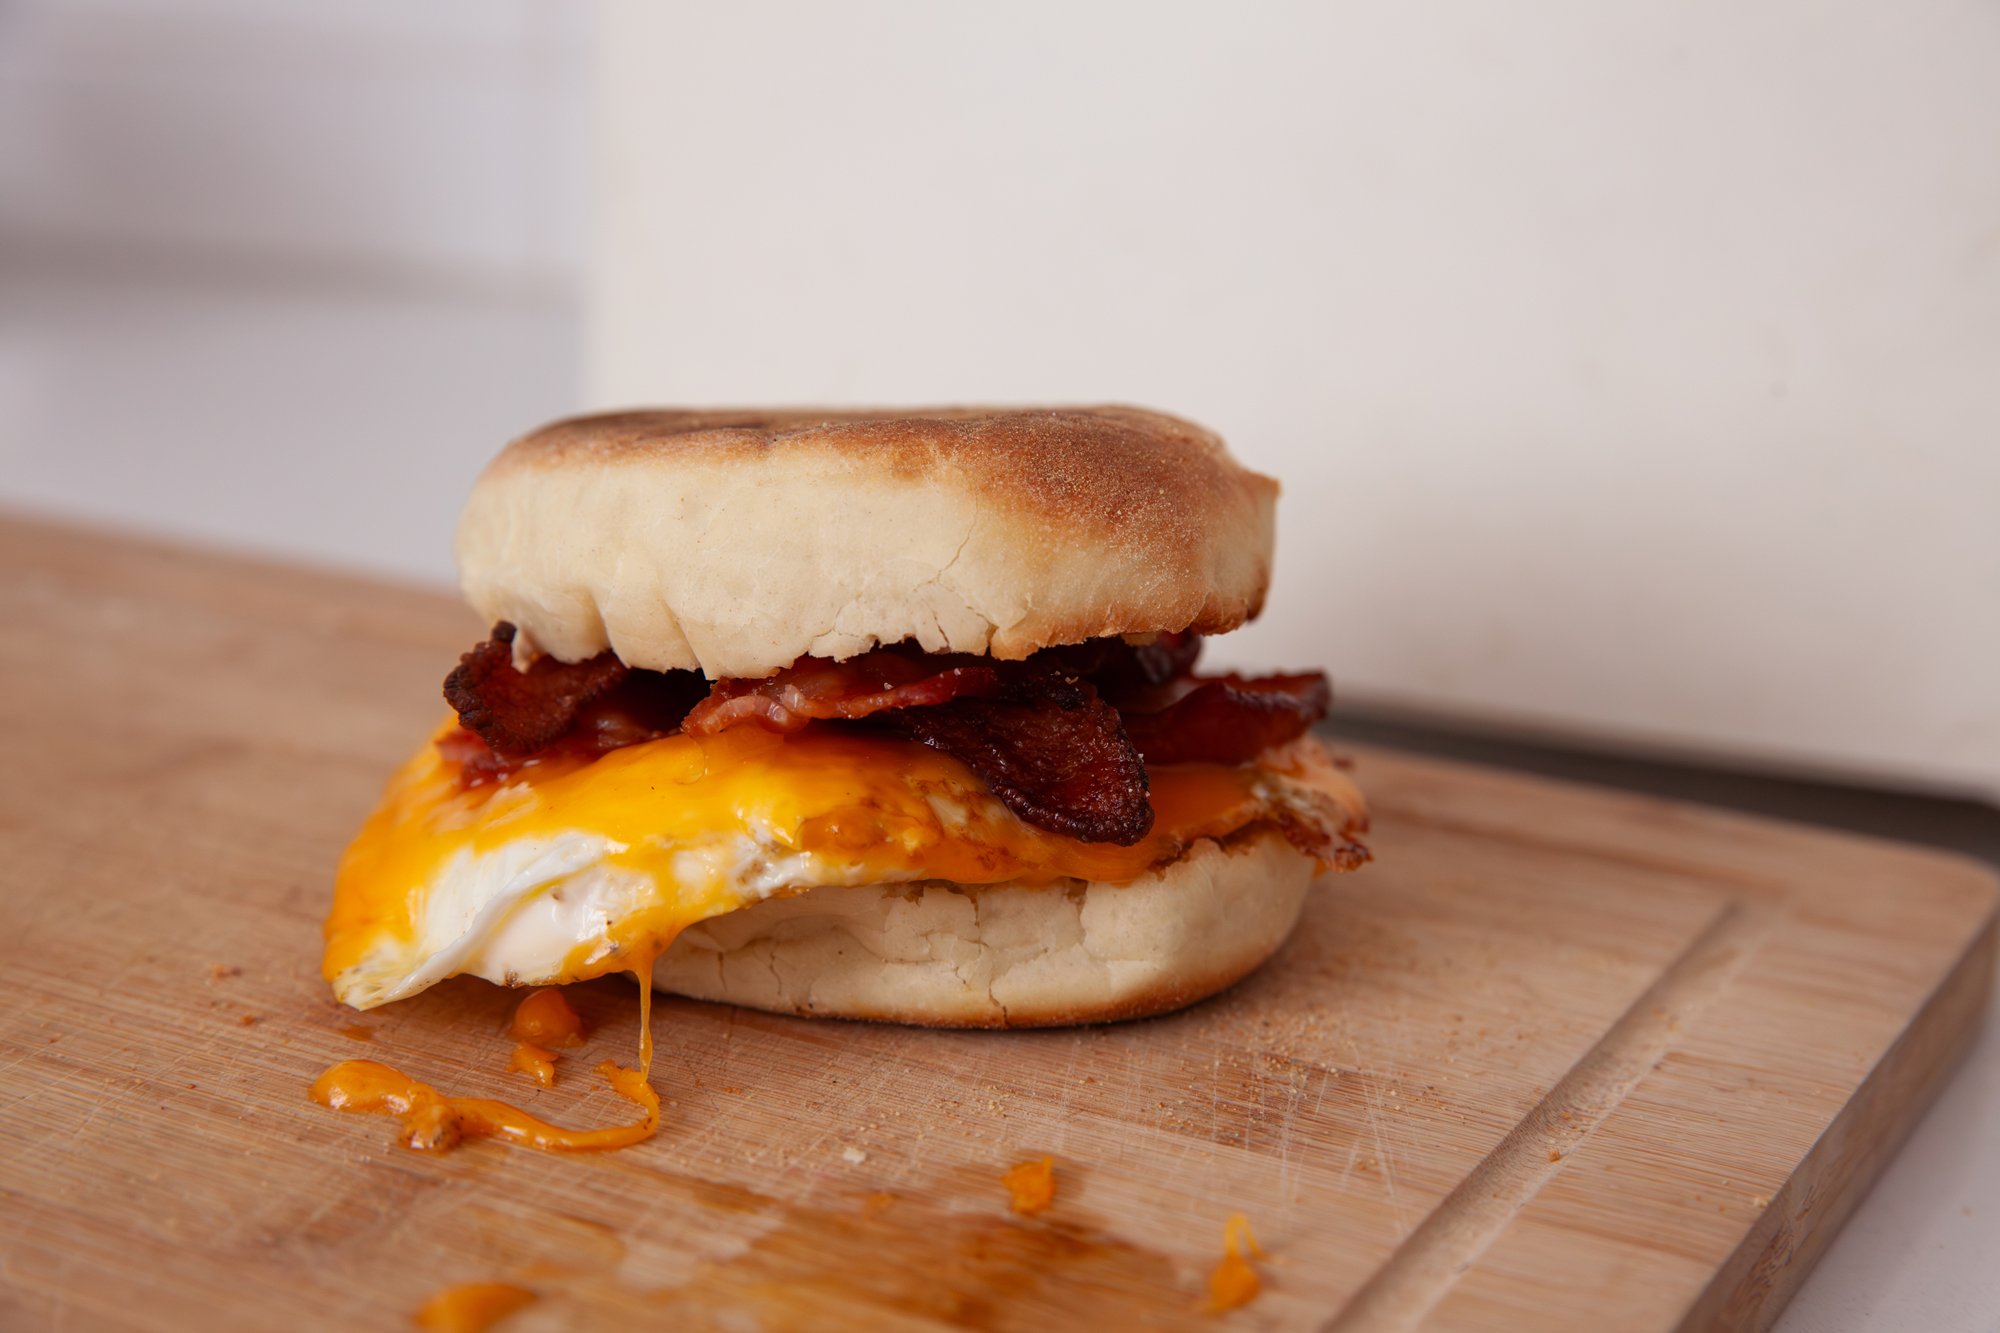
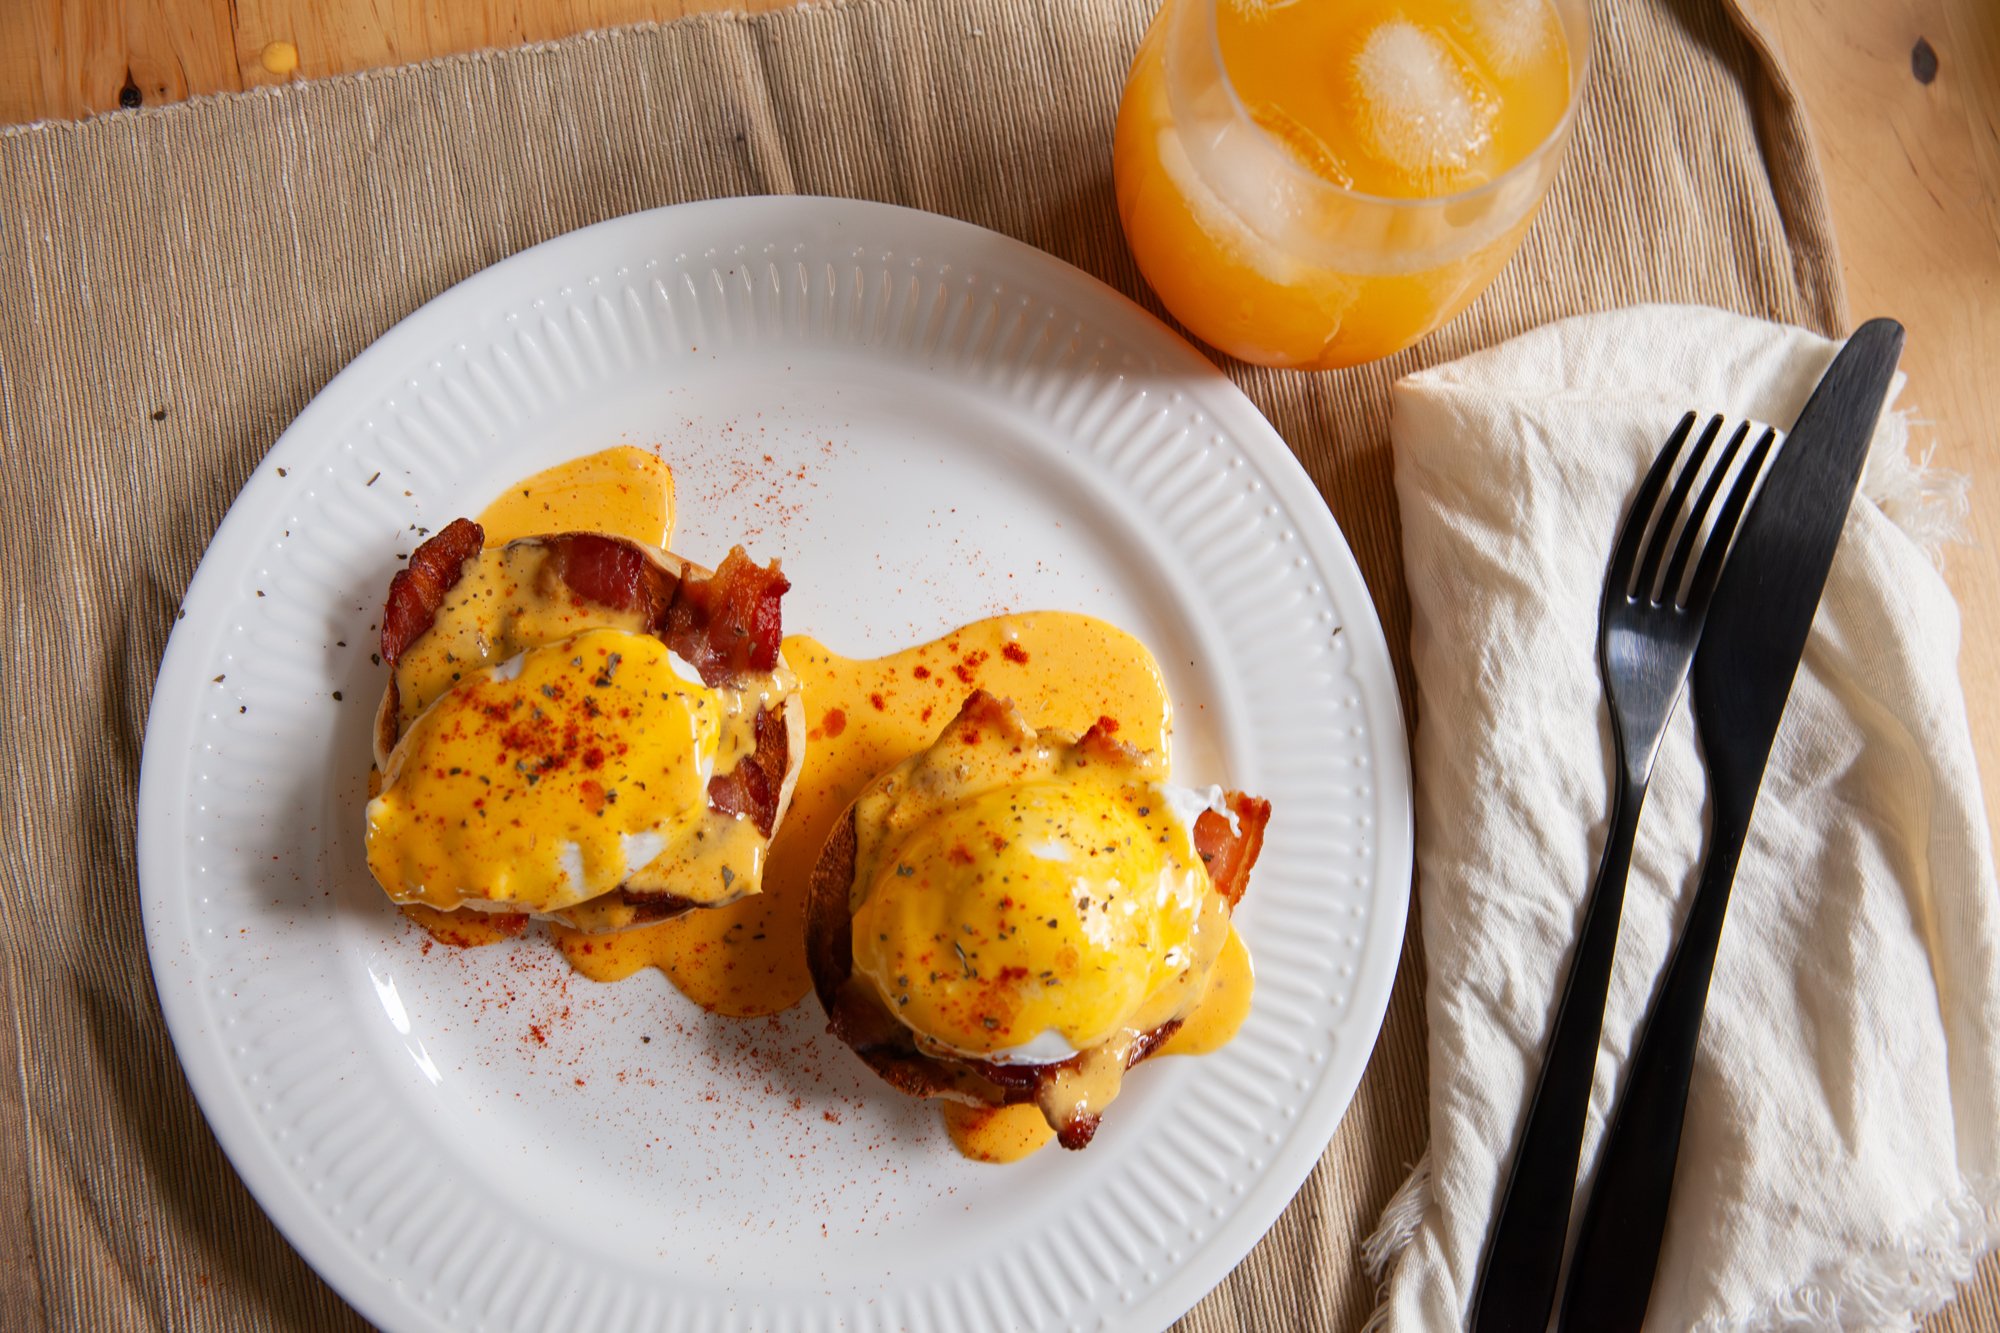
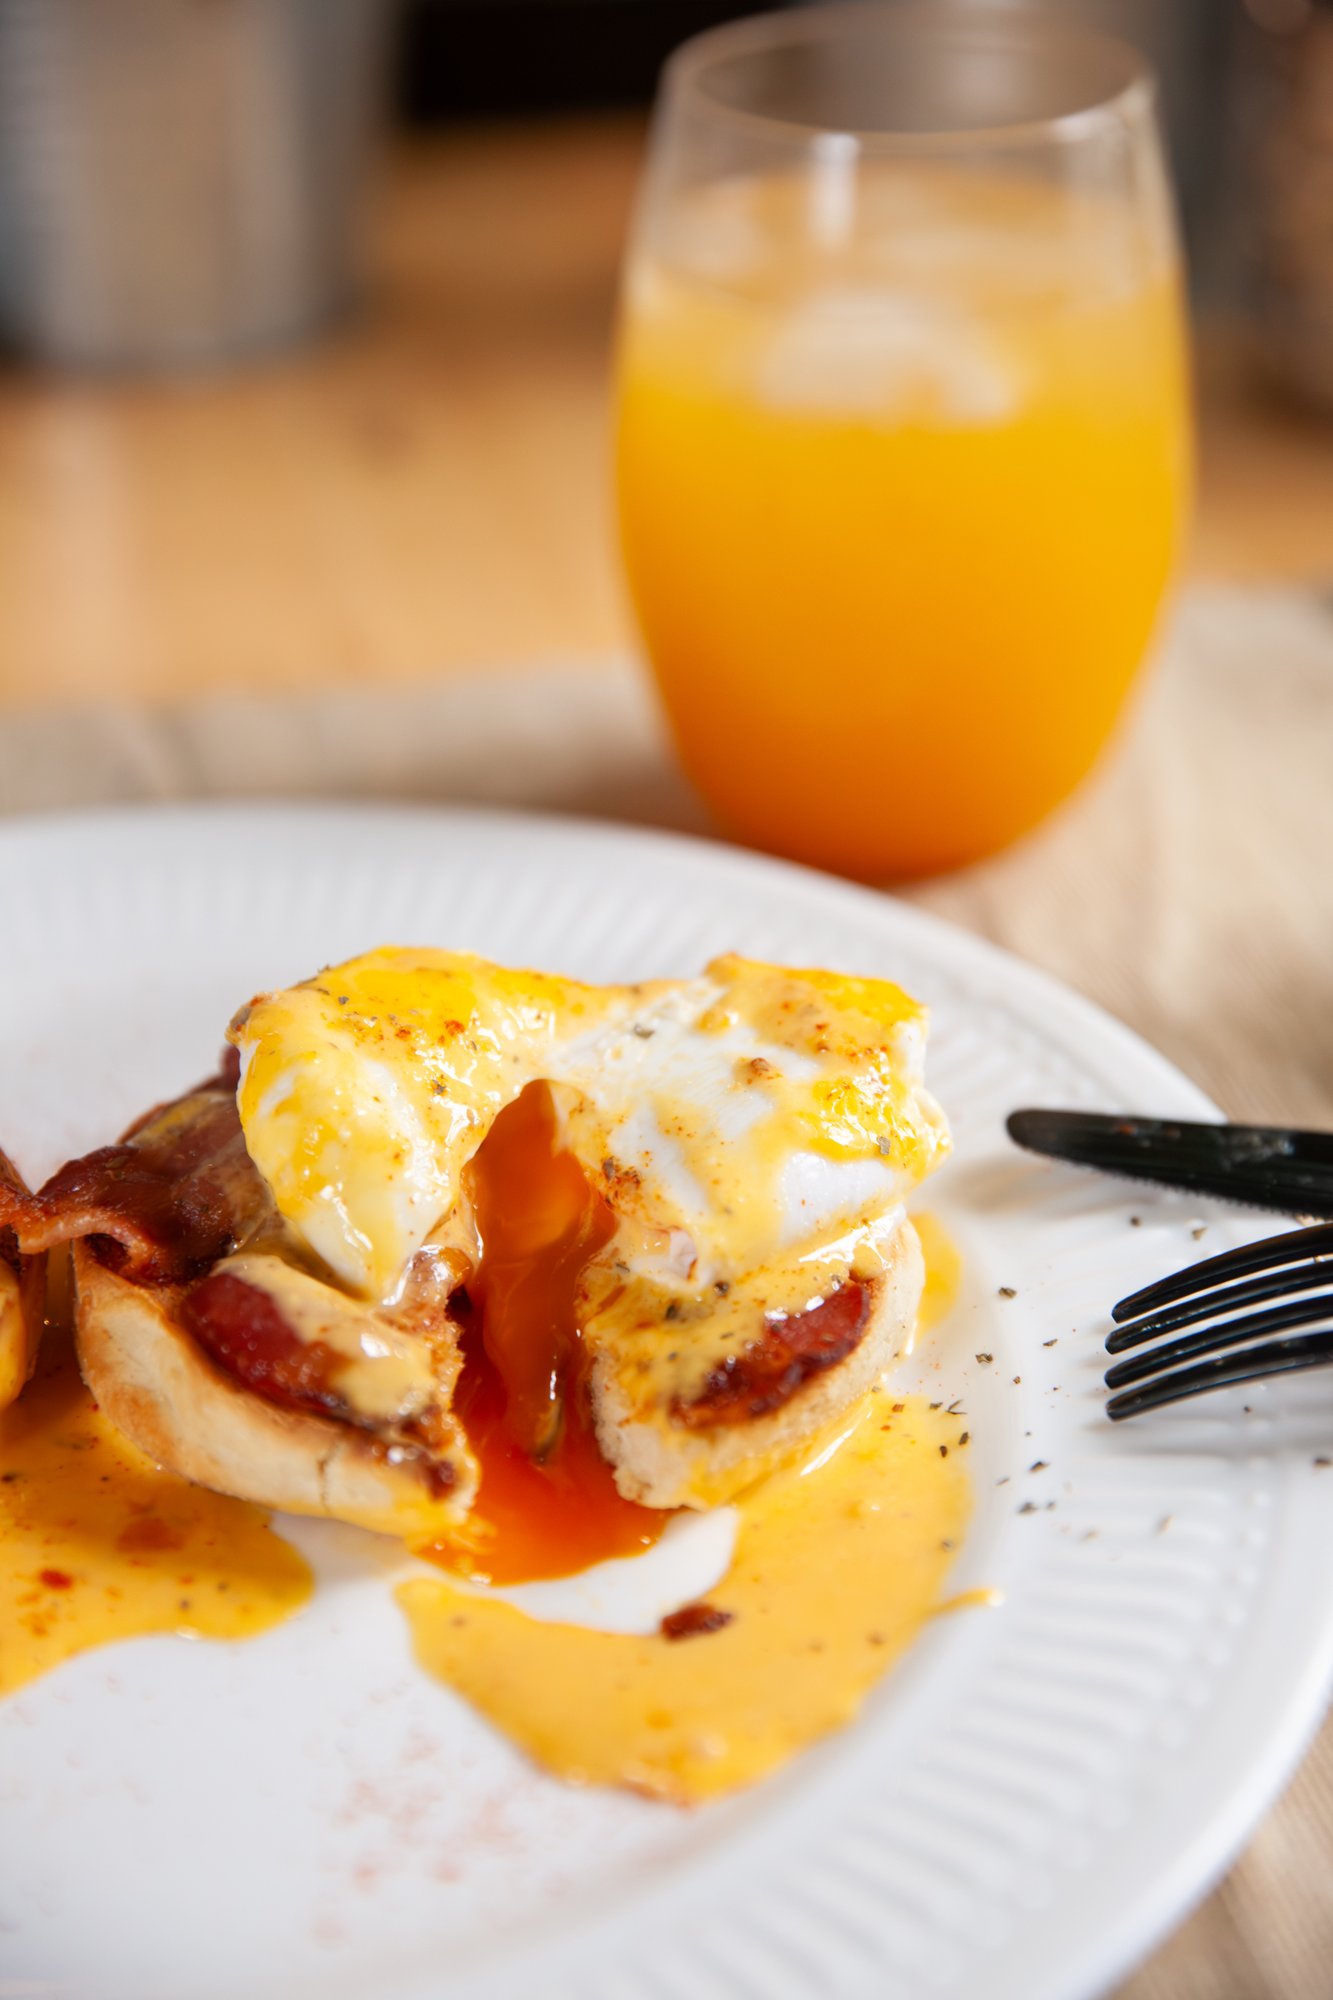
English muffins are so versatile, from a simple buttered one, to holding together a greasy breakfast sandwich, to being the sturdy base for an eggs benedict. 
 
Whichever way you prefer, once you make them from scratch and taste them for the first time, you may never go back. And while they’re extremely good fresh out of the pan (yes, pan!), you can also freeze them for that Sunday morning brunch. 
 

INGREDIENTS: 

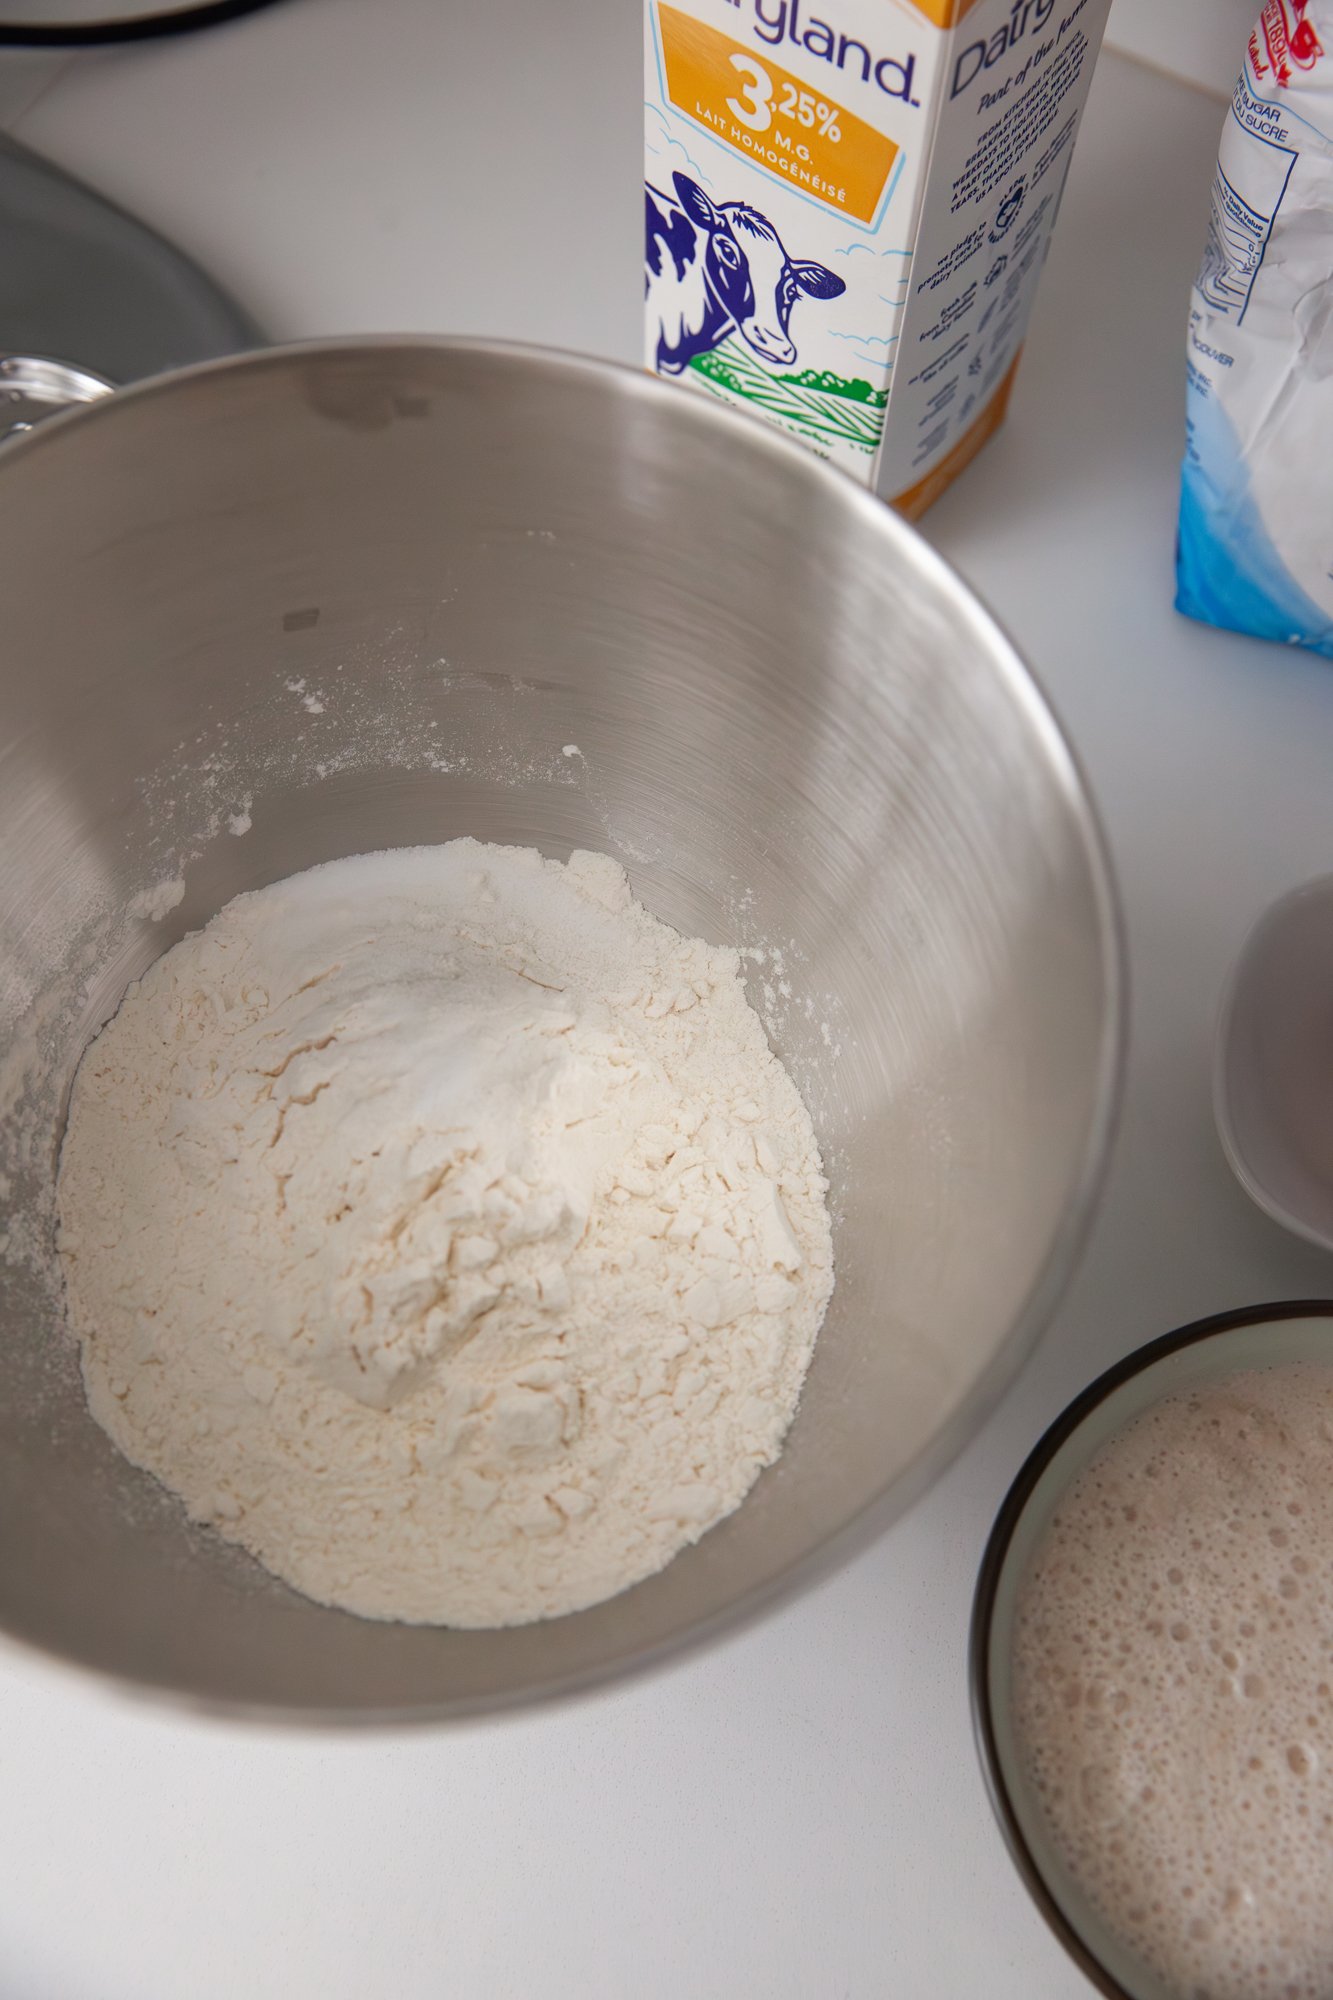
2 cups all-purpose flour 
1 tablespoon granulated sugar 
1 teaspoon salt 
1 tablespoon active dry yeast 
1 cup warm milk (around 110°F/45°C) 
2 tablespoons unsalted butter, melted 
Cornmeal, for dusting 
 
INSTRUCTIONS: 
 
You can make this by hand if you don’t have a stand mixer, but the dough can be very wet and hard to work with. 

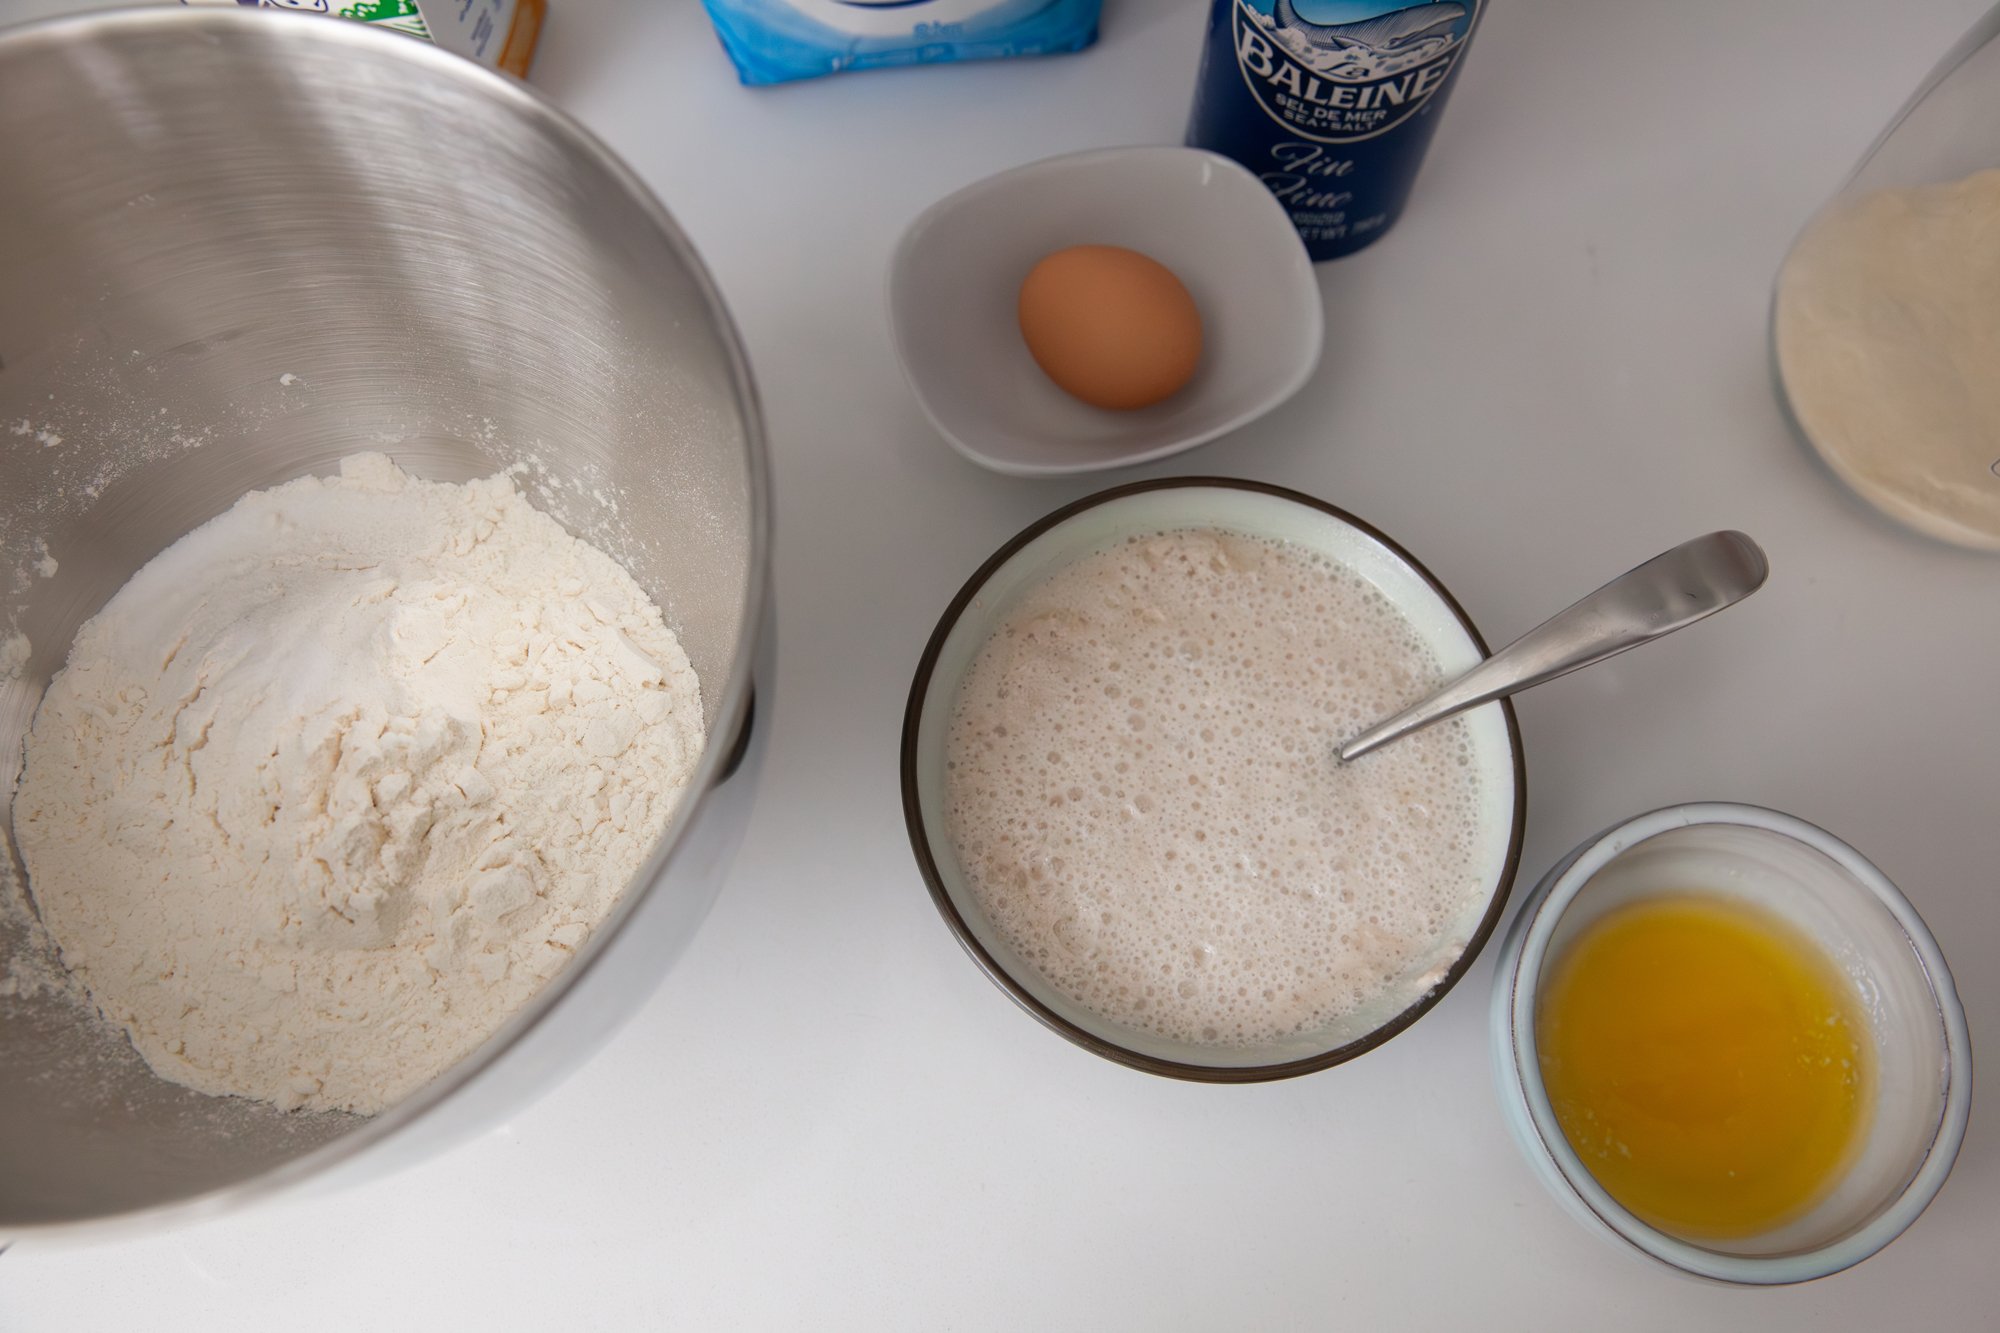
In the bowl of your stand mixer, combine warm milk and sugar. Sprinkle the yeast over the mixture and let it sit for about 5-10 minutes until it becomes frothy. 

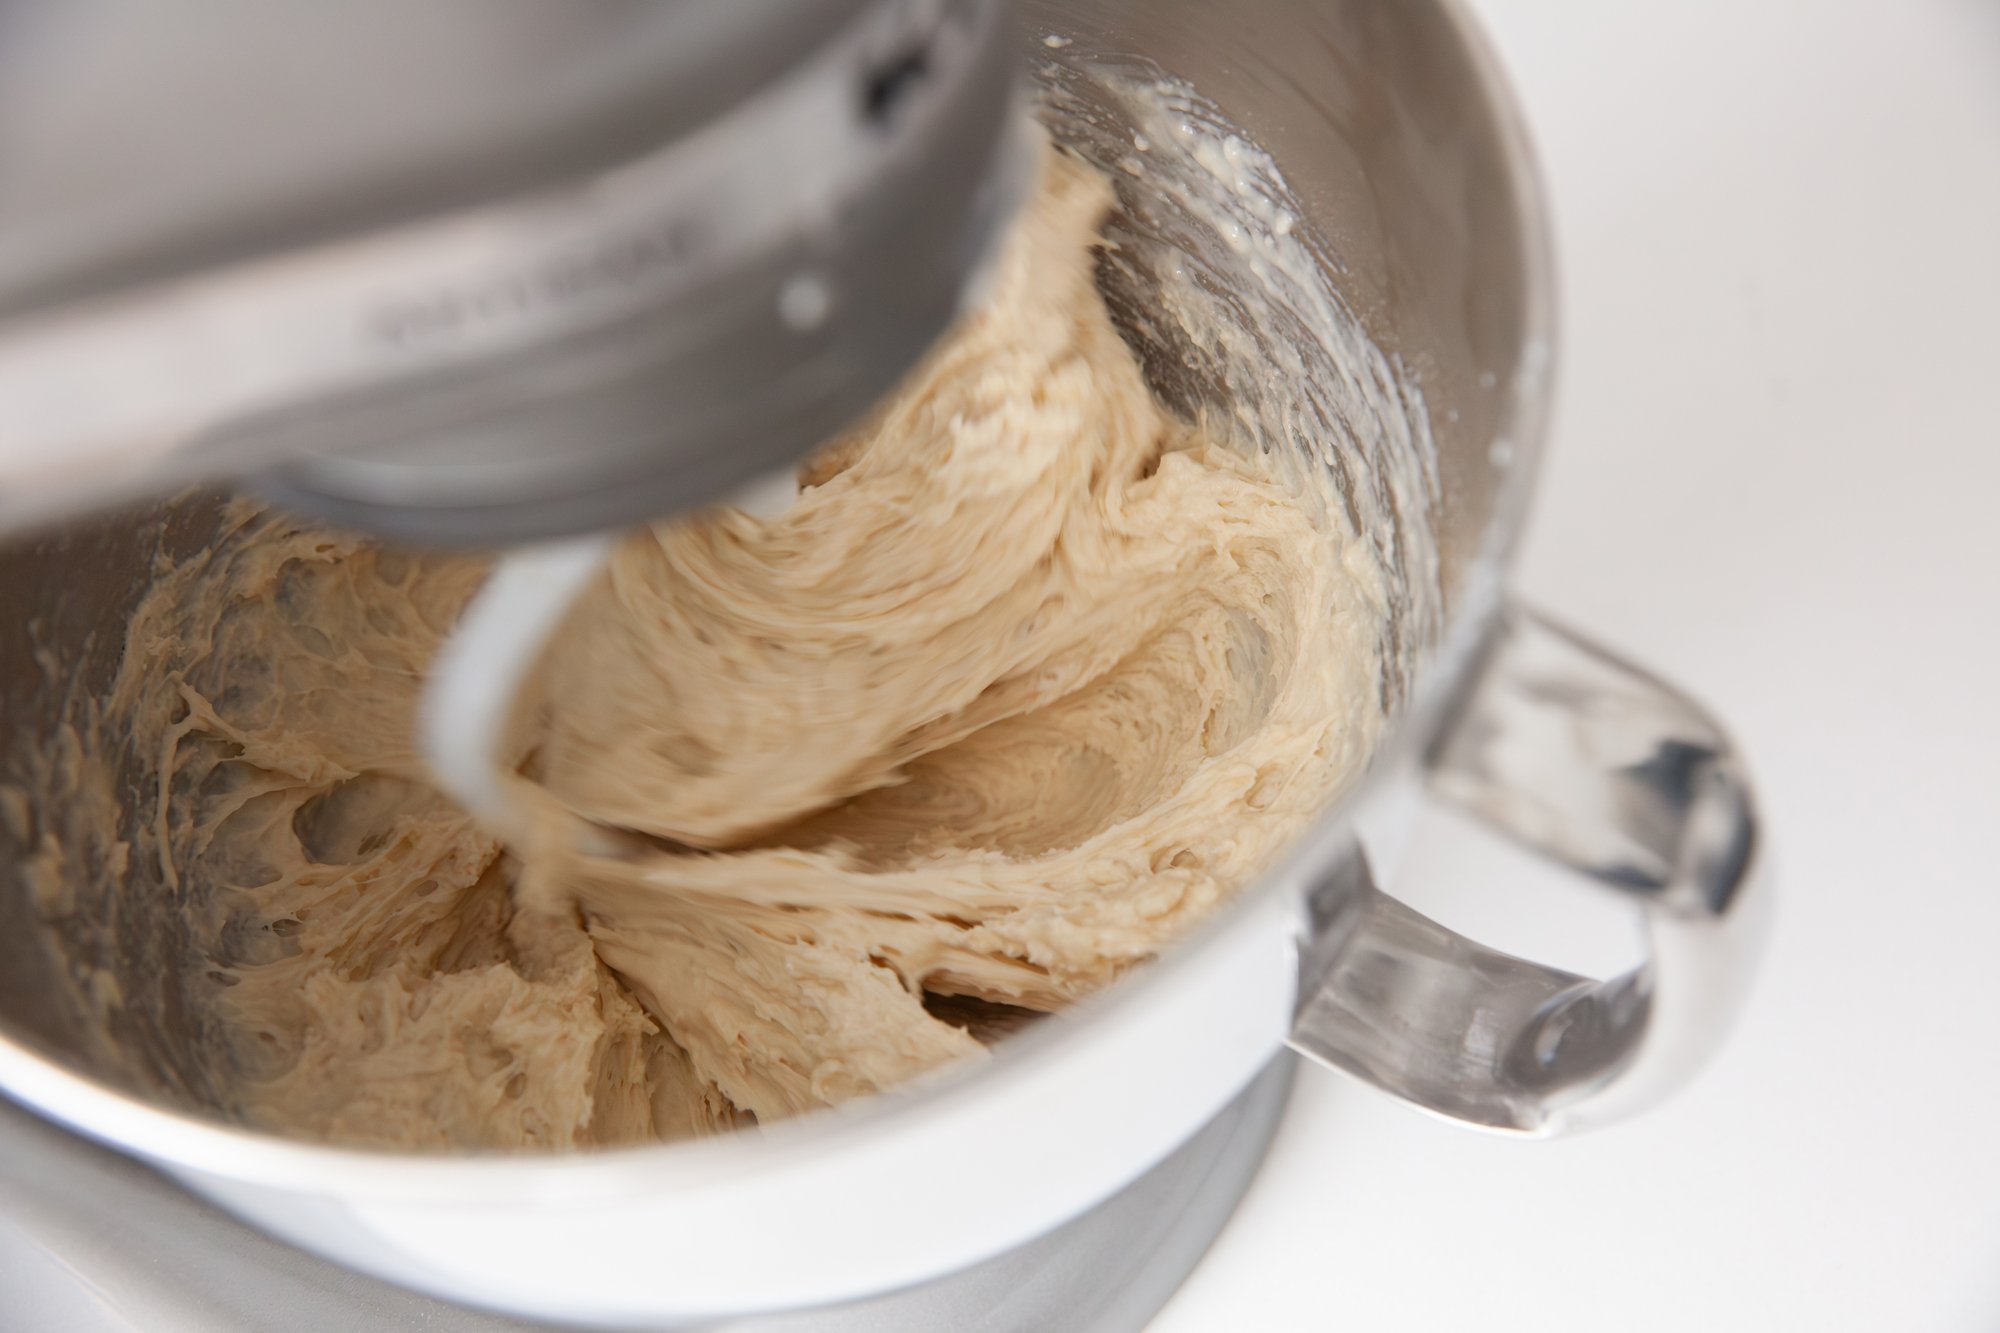
Attach the dough hook to your stand mixer. Add the flour, salt, and melted butter to the bowl with the activated yeast. Mix on low speed until a shaggy dough forms. 

Once the dough comes together, increase the speed to medium-low and knead the dough for about 5-7 minutes until it becomes smooth and elastic. Scrape down the sides of the bowl occasionally. 

Form the dough into a ball and place it in a lightly greased bowl. Cover it with a clean kitchen towel and let it rise in a warm place for about 1 to 1.5 hours, or until doubled in size. 

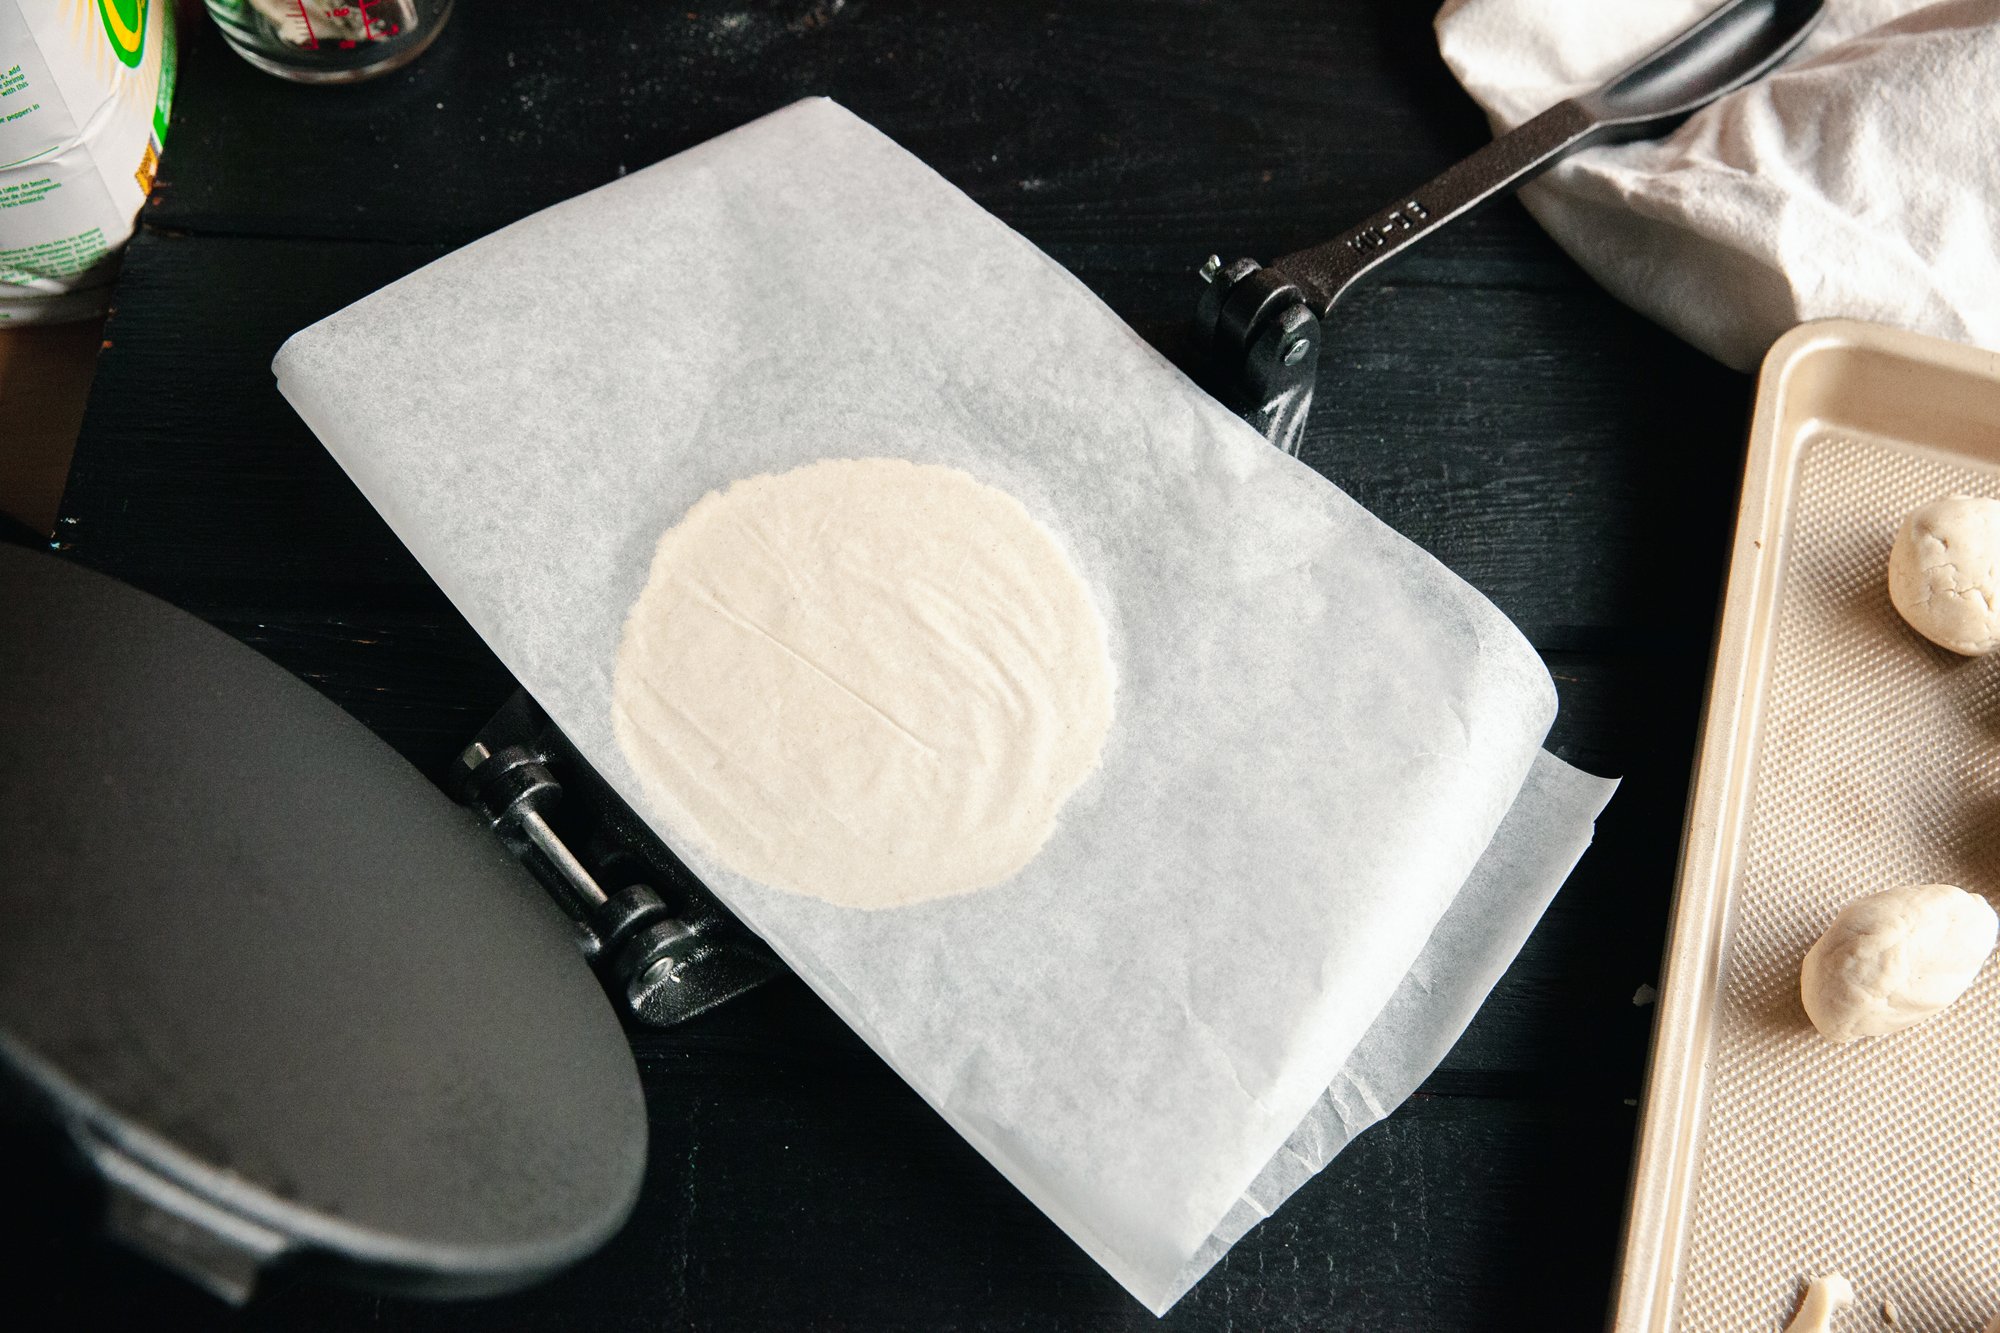
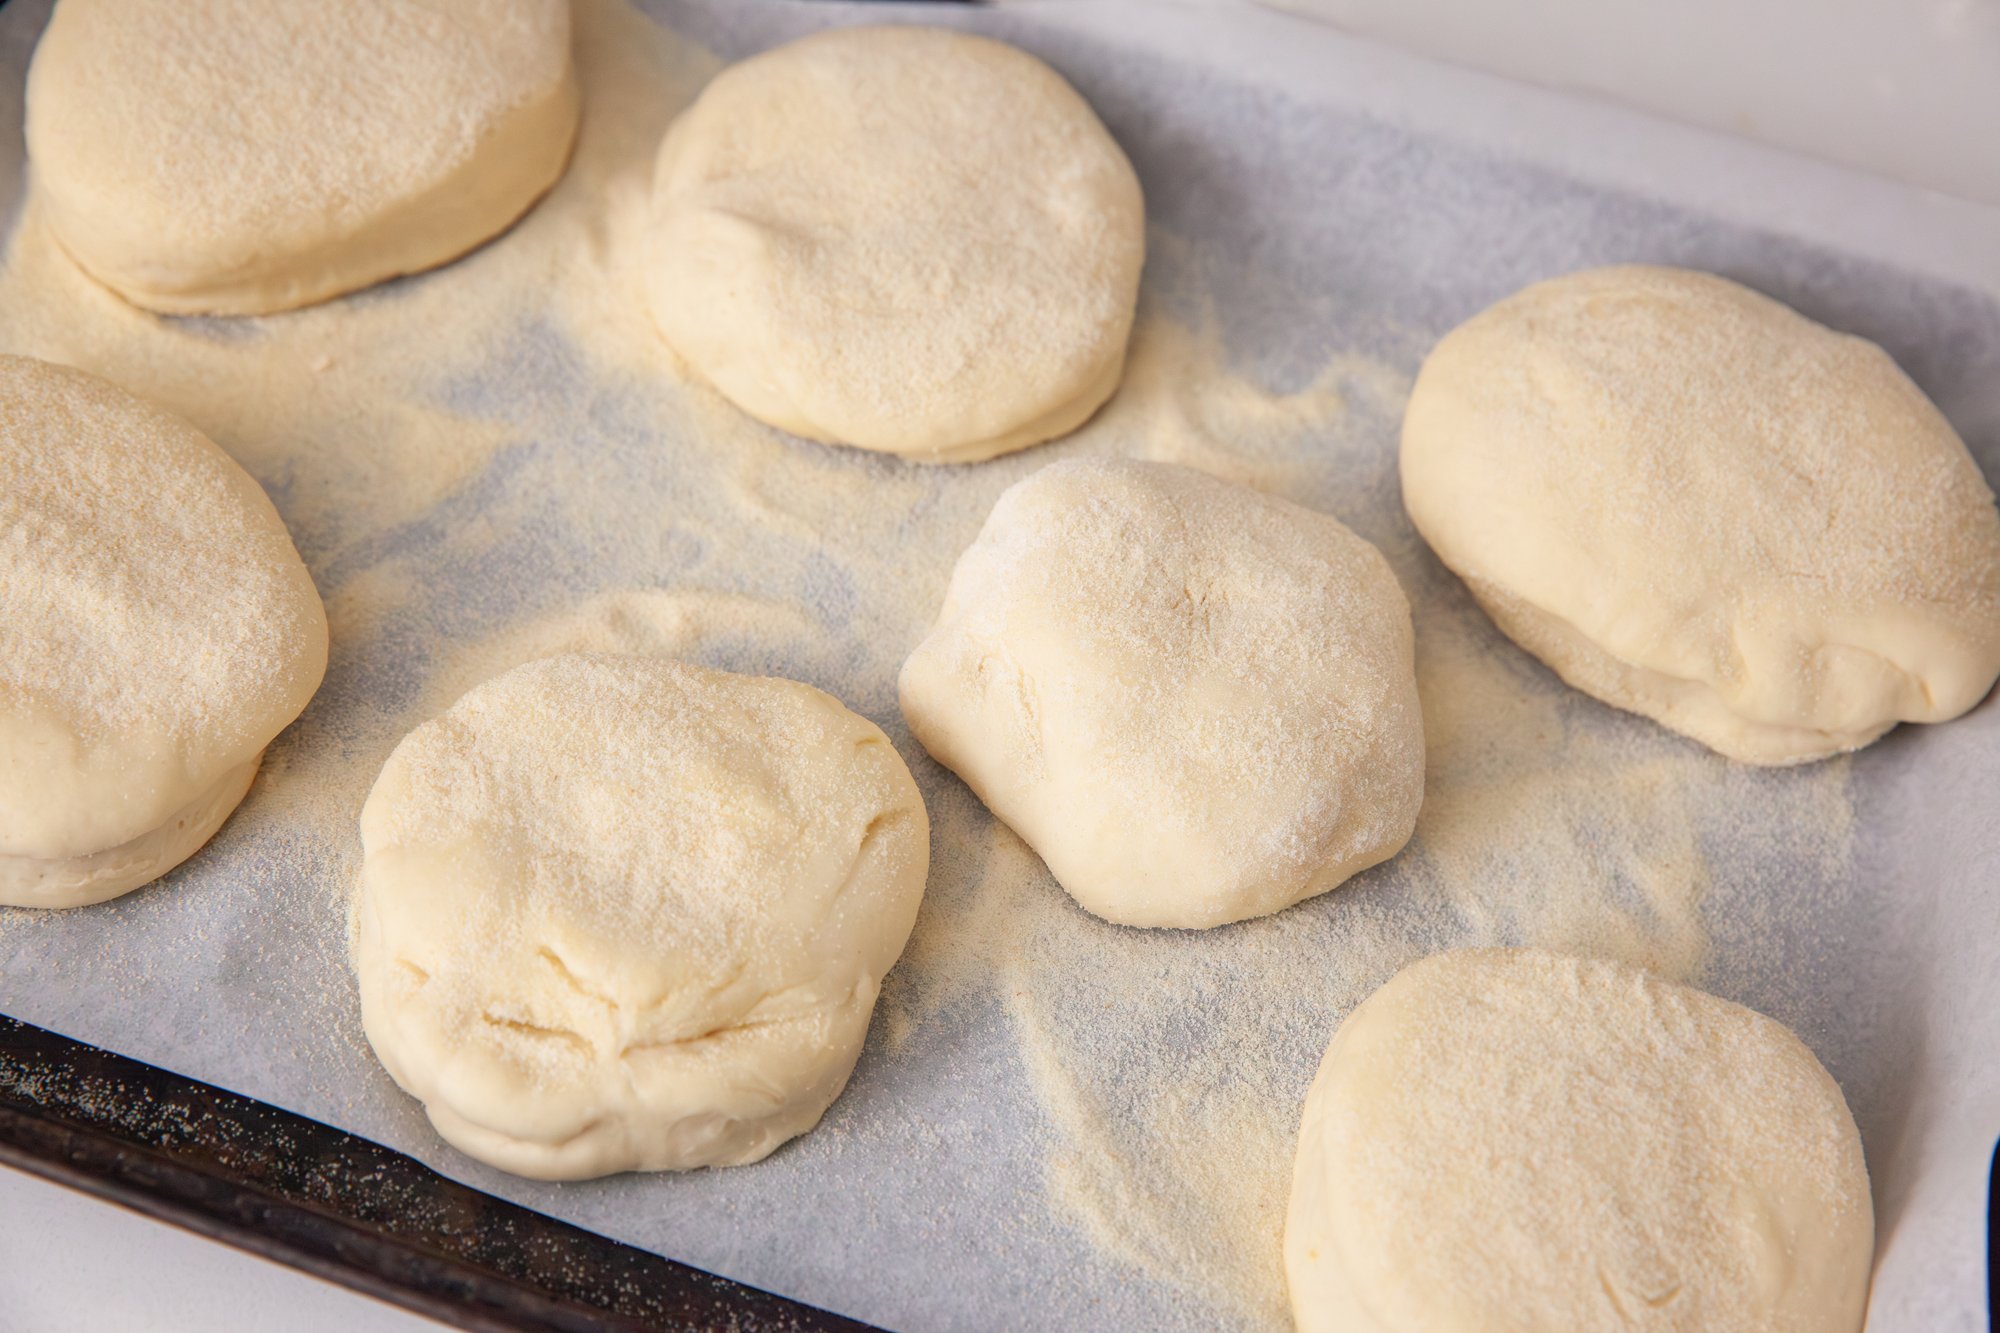
Once the dough has doubled in size, punch it down and turn it out onto a lightly floured surface. Roll the dough out to about 1/2 inch thickness. Use a round cutter (about 3 inches in diameter) to cut out the muffins. Re-roll any scraps and continue cutting until all the dough is used. 
Place the cut muffins on a baking sheet dusted with cornmeal. Sprinkle some cornmeal on top of the muffins as well. Cover them with a clean kitchen towel and let them rise for another 30-45 minutes. 


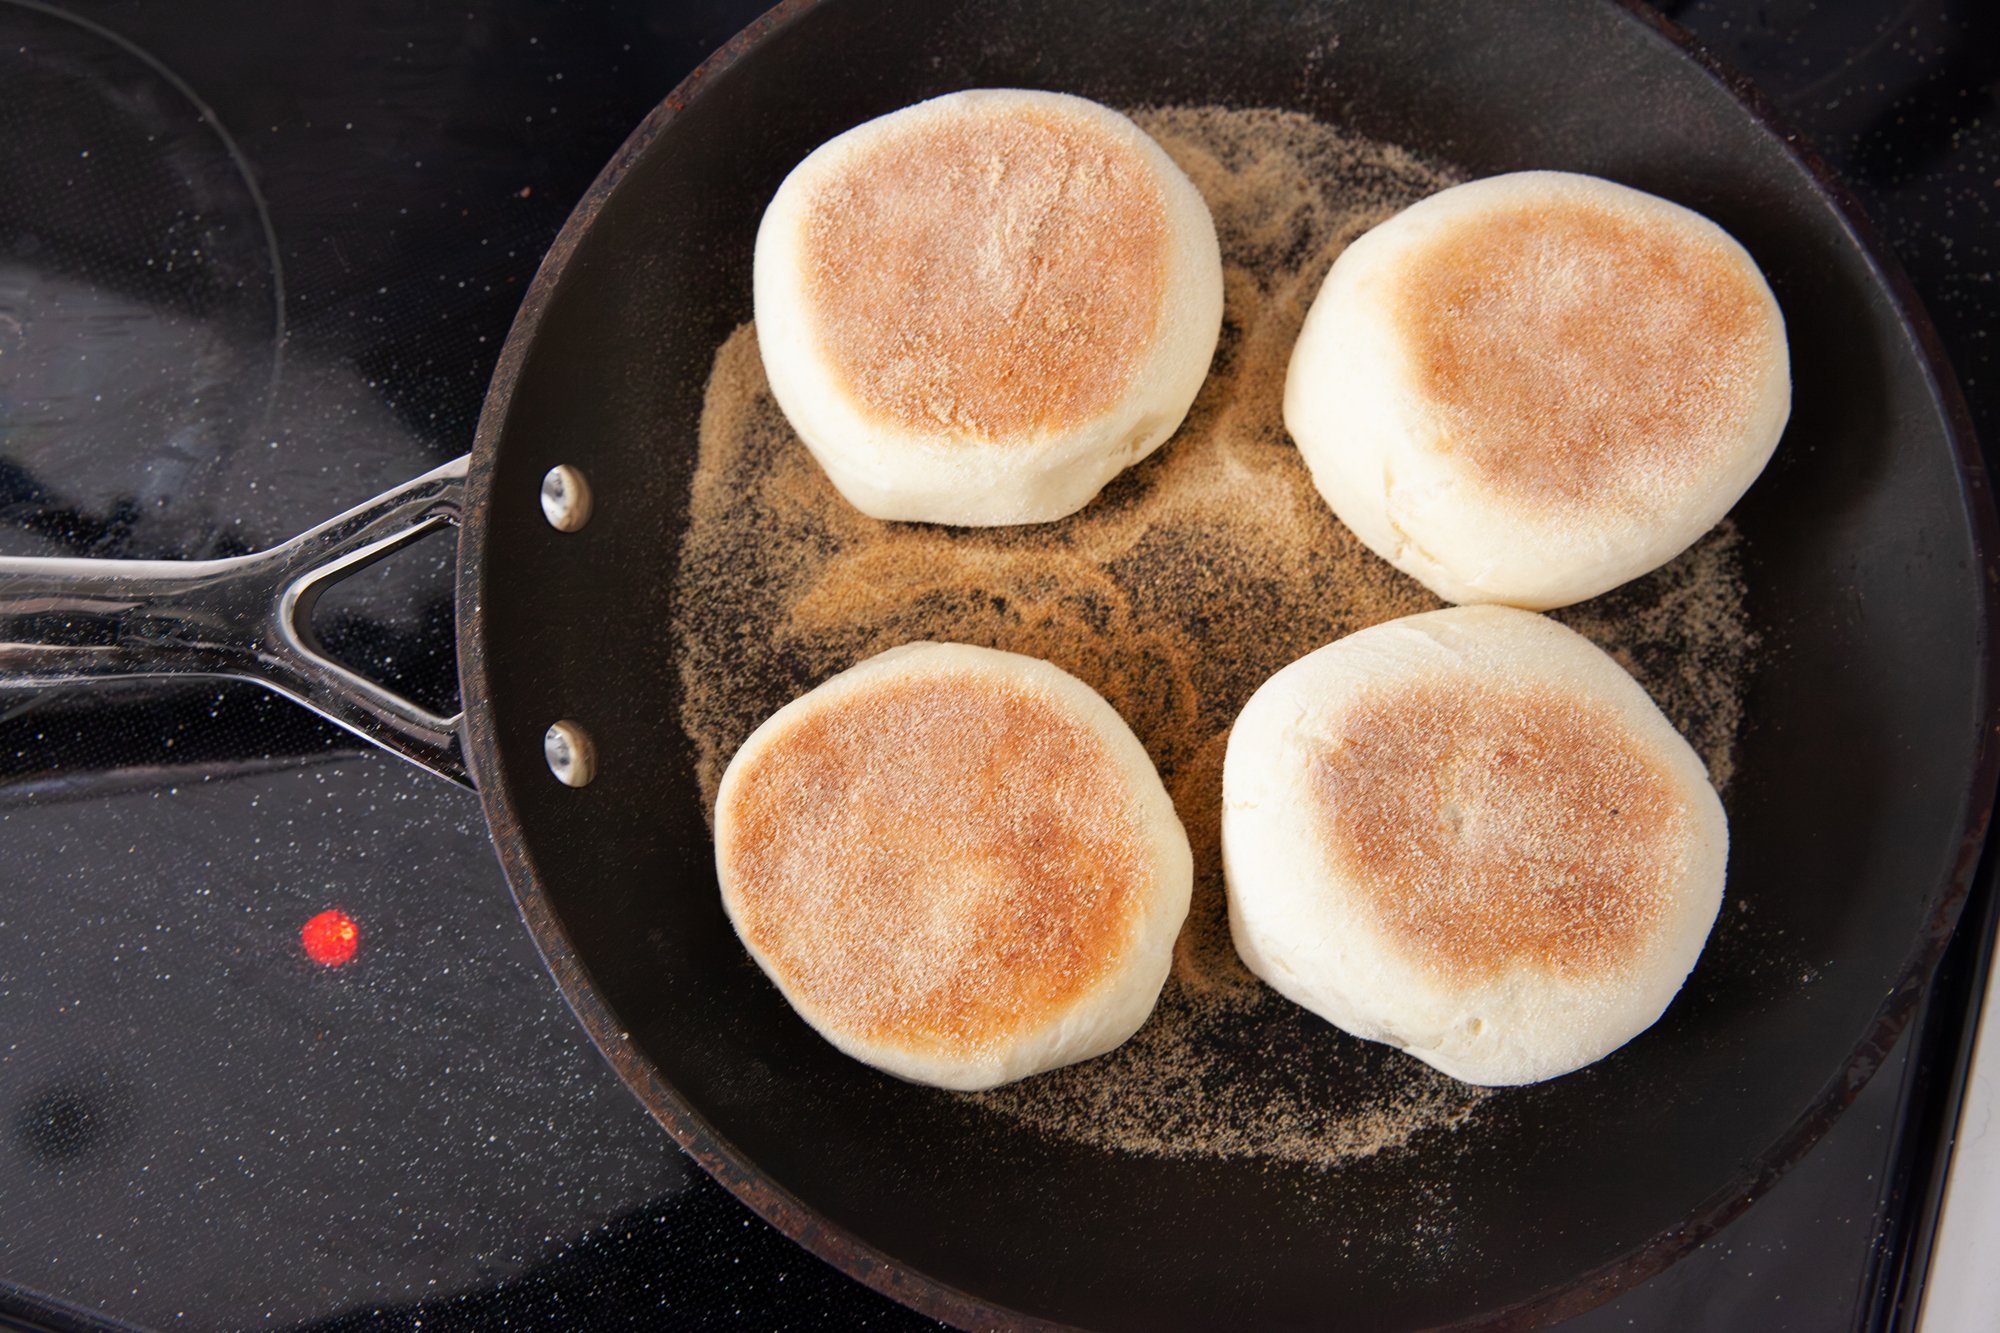
Heat a cast iron pan over medium-low heat. Lightly grease the pan with butter or oil. Carefully transfer one of the muffins to the hot pan. Cook for about 6-8 minutes on each side, or until they are golden brown and cooked through. If you have a food thermometer, the internal temp should be around 200°F. 
 
You may need to adjust the heat to ensure they cook evenly without burning. Once you can tell the correct cooking time and temp, repeat with the rest of the muffins, a few at a time, leaving some space between them. 
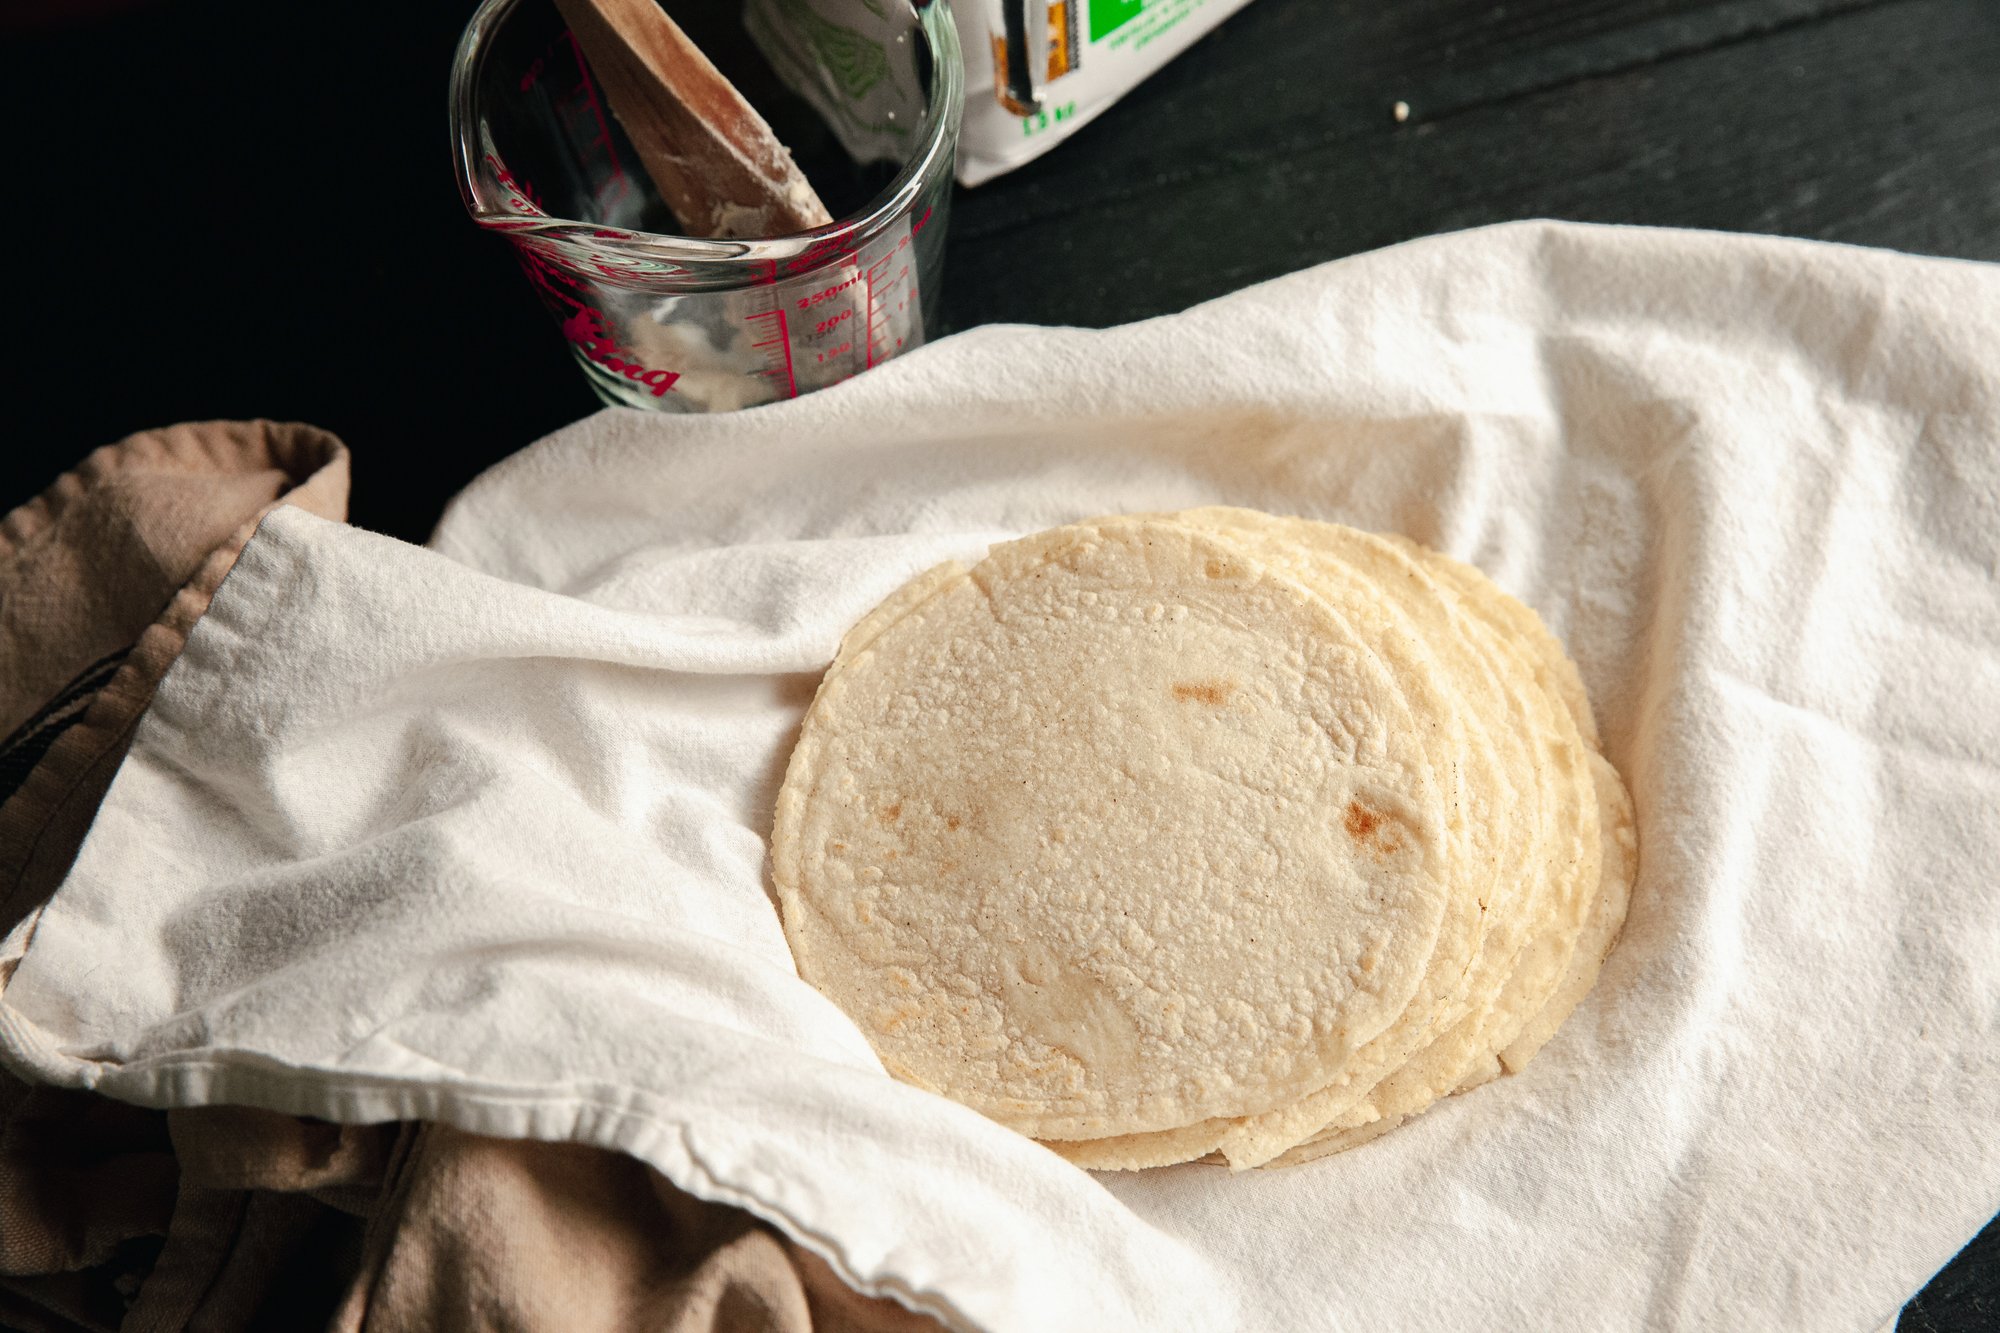
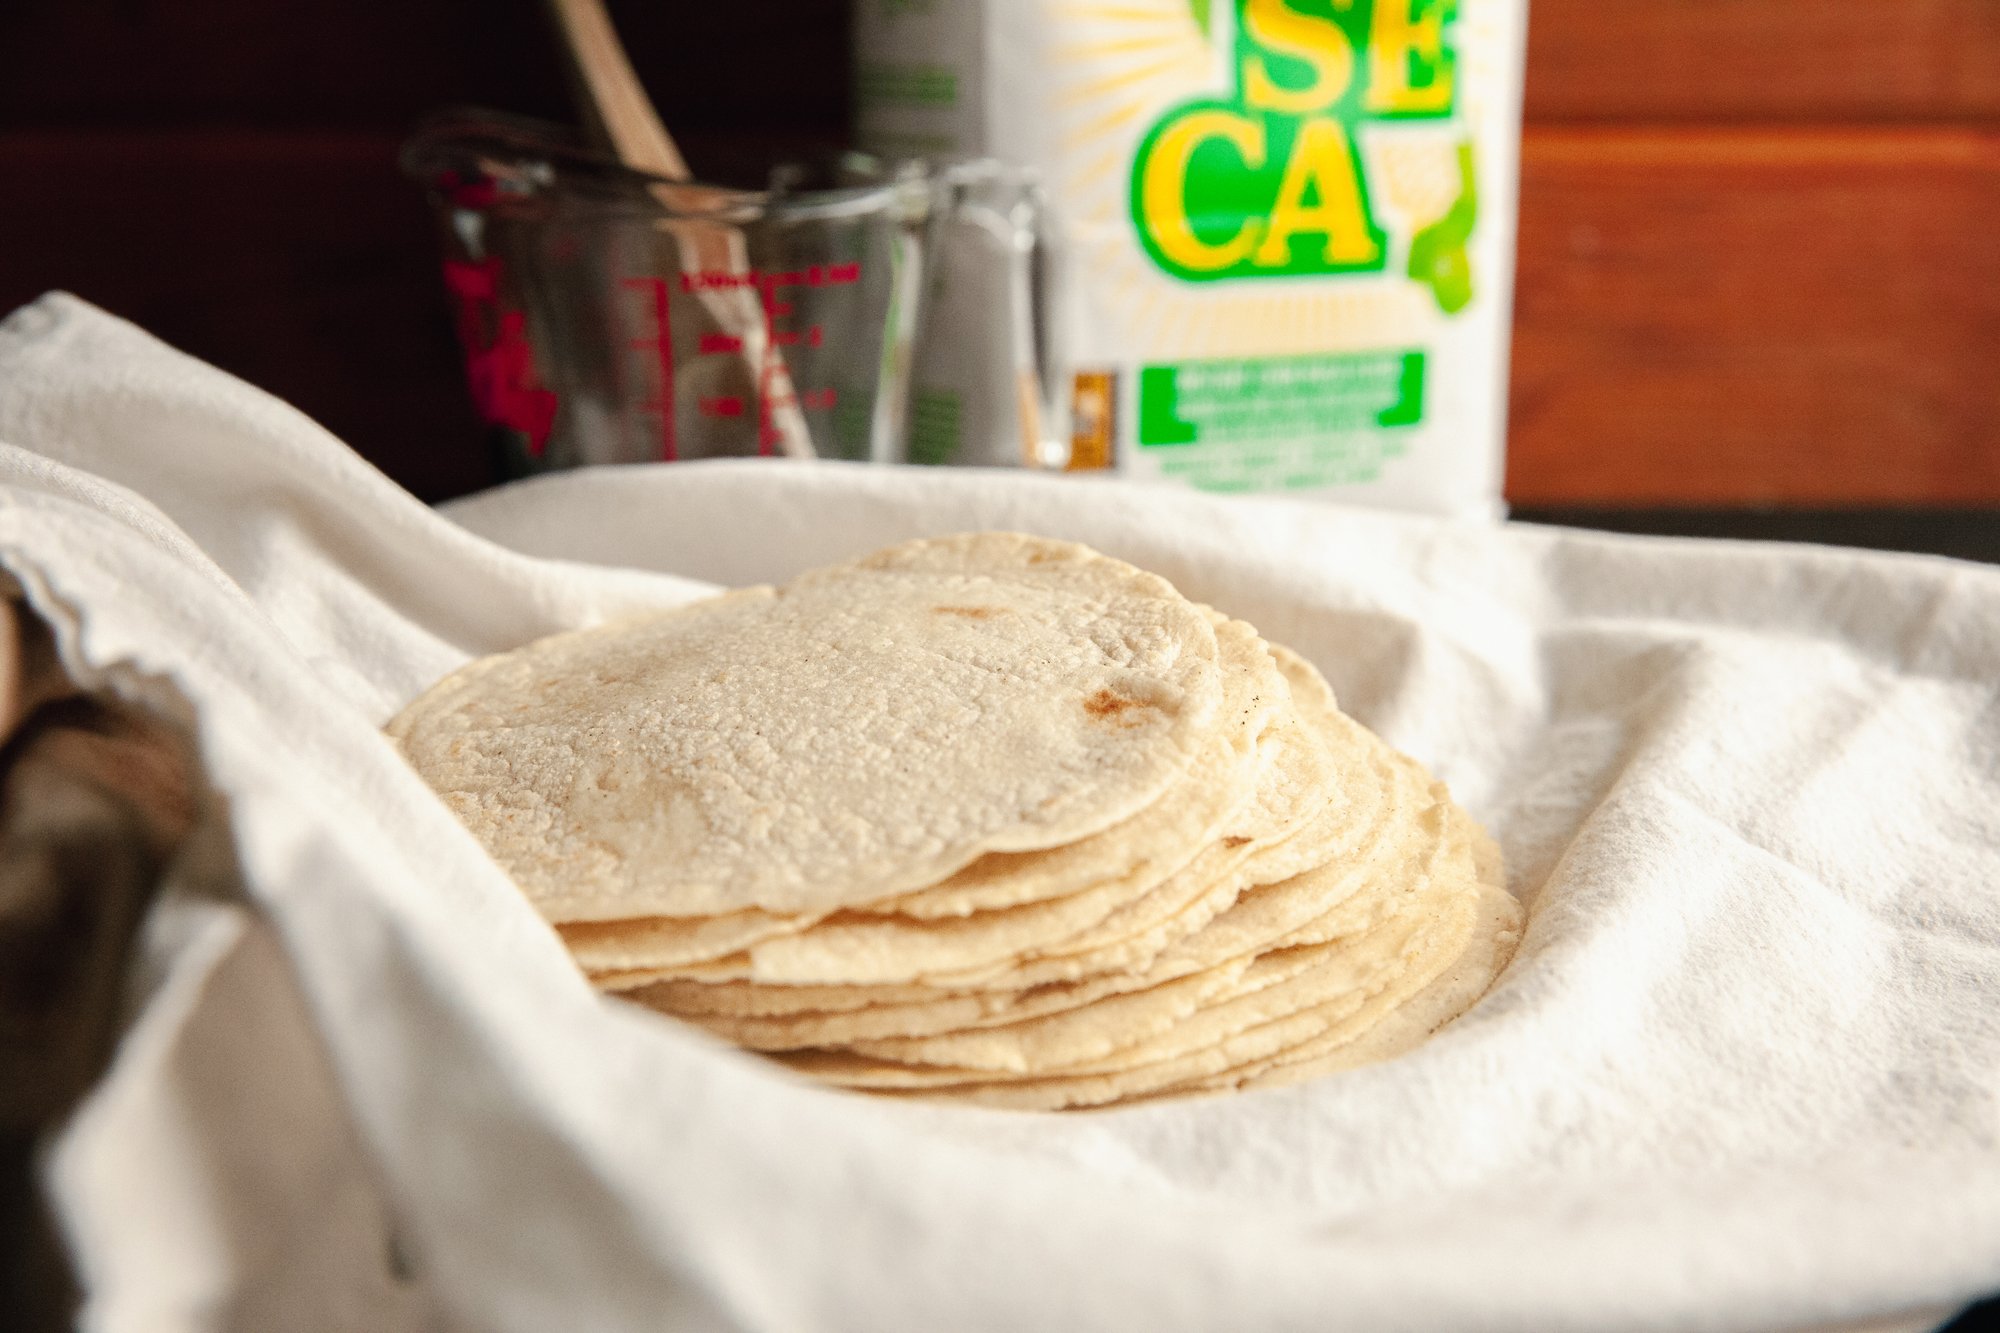
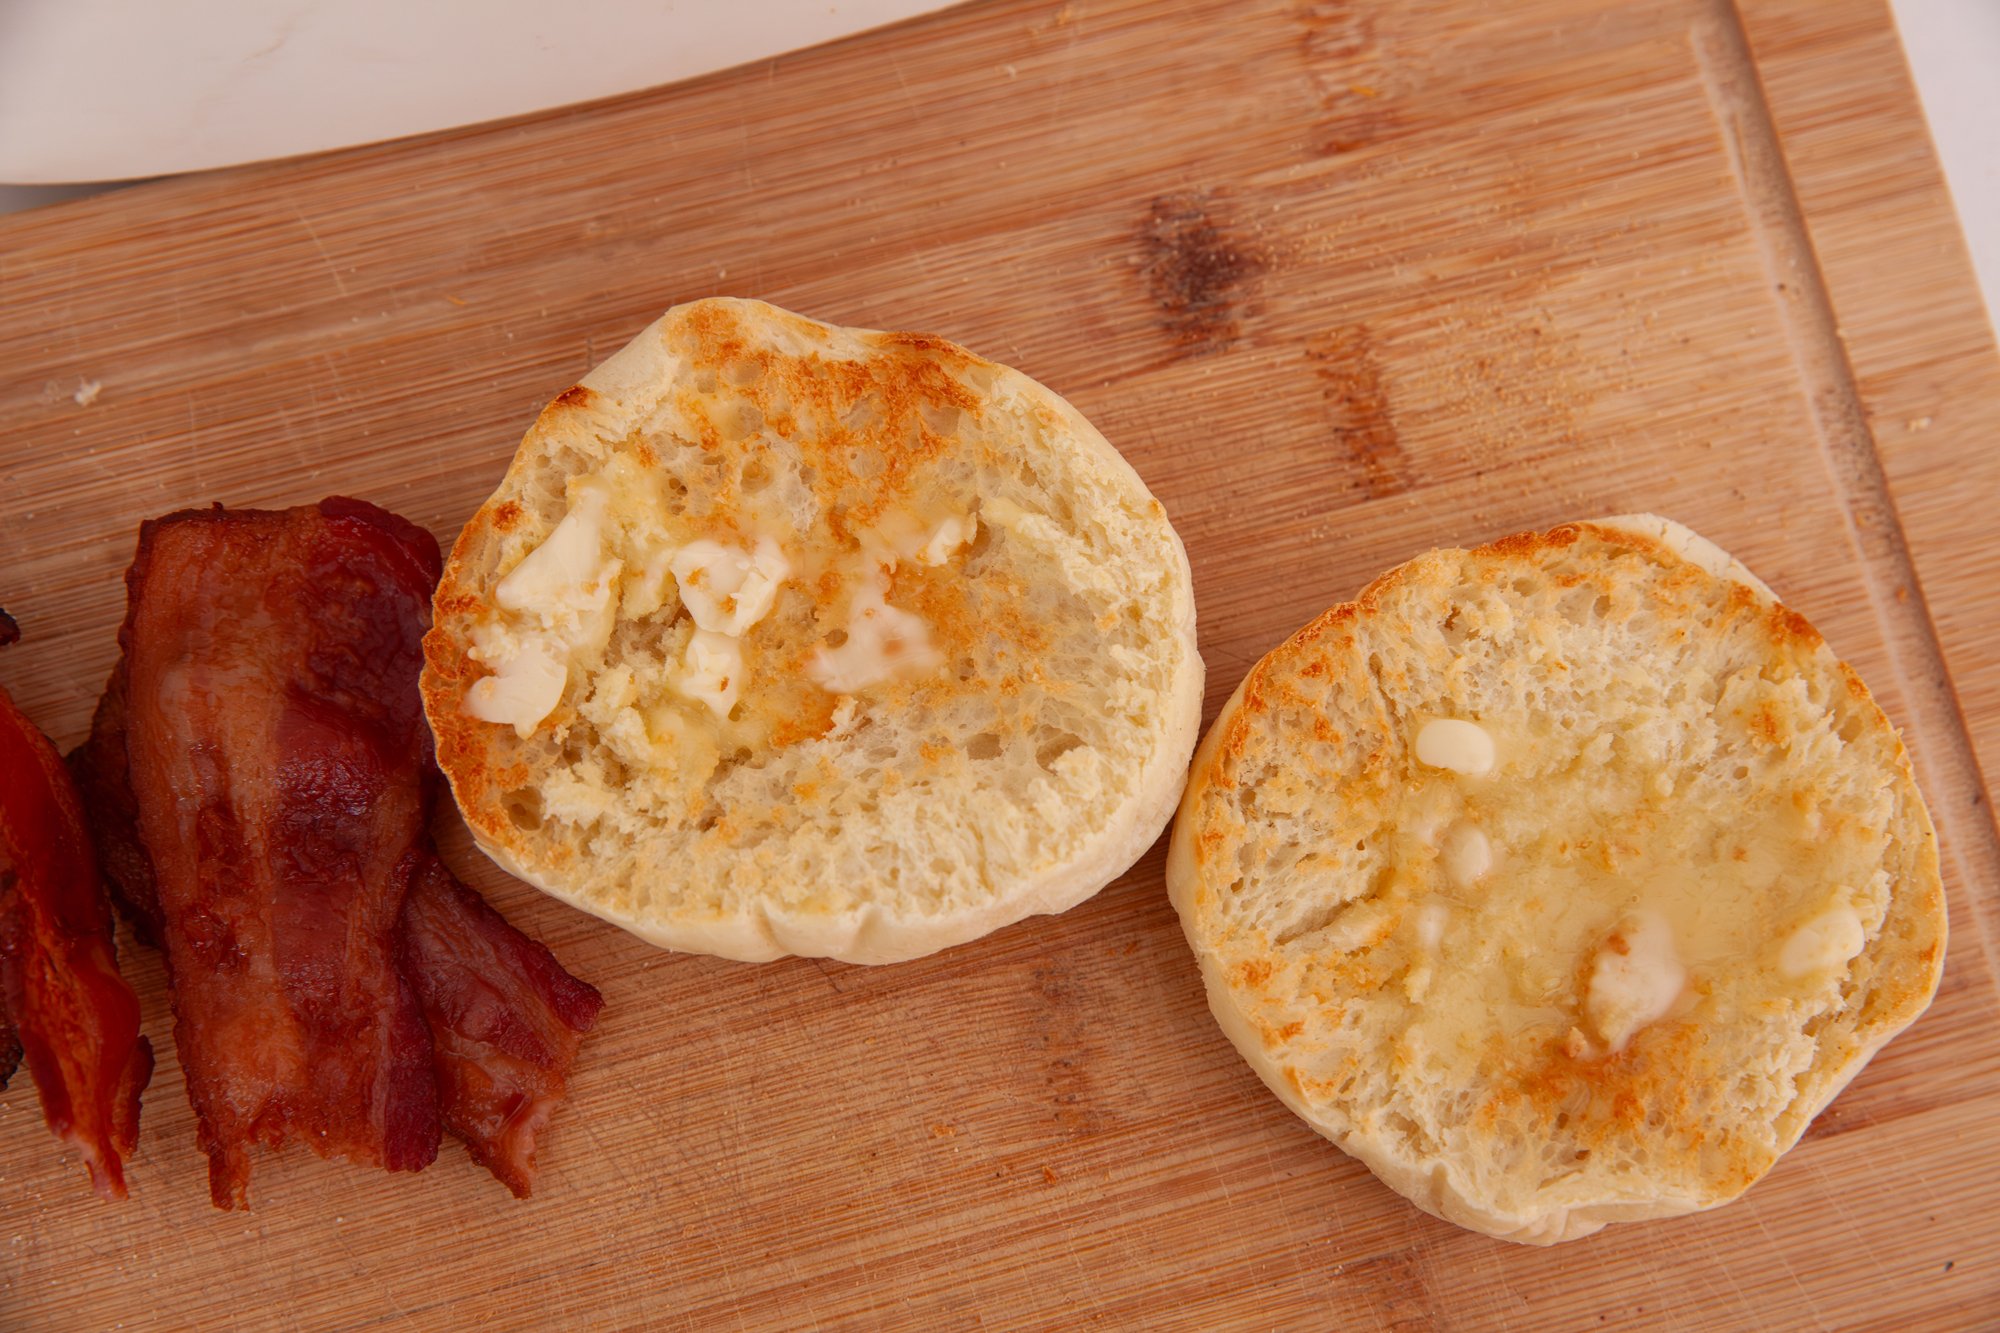
Once cooked, transfer the English muffins to a wire rack to cool slightly before serving. Slice them open with a fork to reveal their nooks and crannies. 
 
(It’s best to separate them before freezing, if you are choosing to do so. They can go directly into a toaster from the freezer.) 
 
Serve warm with butter, jam, or make your favourite breakfast meal. 
 
ENJOY! 

RECIPE: Mozzarella Sticks for BC Living

Mozzarella Sticks
”From Scratch” for BC Living
February 2024
 
Forget flavourless frozen snacks from the grocery store, these homemade mozzarella sticks are sure to level up your game day snack platter. 
 
You can deep-fry, bake, or air-fry these (my choice), and they pair perfectly with a homemade marinara sauce and some fresh parsley. 
 
 
INGREDIENTS: 
 
- low-moisture mozzarella cheese (if you want, you can use string cheese, cut in half) 
- 2 eggs 
- ½ cup bread crumbs (regular) 
- ½ cup panko bread crumbs 
- ¼ cup all-purpose flour 
- ½ tsp garlic powder 
- ½ tsp onion powder 
- ½ tsp dried oregano 
- ½ tsp dried thyme 
- ½ tsp salt 
- ½ tsp pepper 
 
- vegetable oil for coating 
- marinara sauce for dipping 
- parsley for garnish 
 
 
INSTRUCTIONS: 
 
Line a baking sheet or tray (that will fit in your freezer) with parchment paper and set to the side. 
 
Gather three medium-sized bowls. In one bowl, crack the eggs and add 2 tsp of water, and whisk together. 
In the second bowl add the regular and panko breadcrumbs and mix until combined. 
Finally in the third bowl, add the flour together with the garlic and onion powder, oregano, thyme, and salt and pepper – mixing. 

I like to put my mozzarella in the freezer for about 10-15 minutes before cutting it, as it makes it a lot easier. You’ll want to slice them in about 3-inch-long sticks, that are also about ½ an inch to ¾ inch wide. 
 
You’re going to follow the pattern of dipping the cheese in the egg, then the flour, into the egg for a second time, and finally the breadcrumbs. 
 
Be sure to press down into the breadcrumbs to help them stick as much as possible. 
 
When coated, place on the prepared baking sheet with parchment paper, and repeat with the mozzarella, until you’ve made your desired amount, or run out of breadcrumbs. 
 
Place the sticks in the freezer for at least one hour. Freezing the cheese means that the coating will cook evenly with the cheese melting. 
 
At this stage with the sticks frozen, you can also place them in an airtight container to store until ready to make. 
 
If using an air fryer to cook, preheat to 390F. 
 
Spray the sticks with cooking spray or use a brush to place oil on them. 
 
Test on stick by cooking for 4-5 minutes, rotating and watching closely to see how long it takes to brown, before making as many batches as you’d like. 
 
Place on serving dish, sprinkle with parsley, and serve with a marinara sauce on the side. 
 
[Note: If you’re frying in oil, bring vegetable oil to 350F, and cook sticks for approx. 2 minutes, and drain on paper towels. If baking heat to 450F and bake for approx. 8 minutes. You may want to make a test with either method first to be sure, as ovens can all be different.]

RECIPE: Dehydrated Soup for BC Living

Dehydrated Soup
for BC Living
September 2023

Dehydrated meals are EXPENSIVE! If you’ve ever looked into going on a backpacking trip where you’re trying to carry light, you’d see that the mass marketed meals are pretty pricey. 
Luckily, you can make simple dehydrated meals at home that will save you space, time, and fuel on the road/trail/adventure. A dehydrator is a great investment too – I've been drying my herbs from my garden and grinding them for my spice shelf. 
 
I’ll probably turn this into a series over the next few summers as I find more and more things I can dehydrate, but we’re starting with a simple one! 
 
DEHYDRATED SOUP 
 
This soup is perfect for the cold start to the outdoor season, a rainy night when you want something quick, or as a side with a sandwich. They’re also great for at home if you want to make a big batch of something and save space in the freezer.  

INGREDIENTS 

- 1 medium carrot, peeled 
- 1-2 stalks of celery 
- 1 small onion 
- 1 clove of garlic, minced 
- 1 tsp parsley 
- 1 tsp olive oil 
 
- ½ cup pasta/noodle shape of your choice 
- 1 bouillon cube (vegetable, chicken, or otherwise) 
- salt and pepper 
 
INSTRUCTIONS 
 
Finely chop the carrot, celery, onion and garlic into very small pieces. (This is a mirepoix/sofrito mix, with some garlic added as well.) 
 
In a large pot, heat the tsp of olive oil - do not use more than this, you don’t want fat in stored food if you’re keeping these for a while. 

Add the chopped veggies to the pot and cook, sweating them until their water has released, and the onions are tender. Set aside and let cool, then spread on the appropriate tray of the dehydrator, and follow the machine’s instructions for how long to dry them for. Mine took about 6 hours, but you can test and see throughout if they are done. 

At the same time, you can spread parsley leaves on another tray and dry them as well or skip this step and add dried parsley to the finished product. 

You have two options for the pasta. You can cook it ahead of time, drain it when just al dente, and douse it with cold water to stop the cooking process. And then dry the pasta again. 

Doing this will help it cook faster on site and save fuel. If that isn’t of concern, you can cook it all together in one pot at the campsite. 
 
When everything is dry, in a bag, or mason jar, add the dried carrot, celery, onion, garlic, and parsley. Toss in a bouillon cube, add some salt and pepper and the pasta. 
 
When cooking, add the mix to a pot, add a cup of water and let it stand and soak for 5-10 minutes – everything will begin to rehydrate without the use of fuel. 
 
Then bring everything to a rolling boil, stirring to break up the bouillon cube, and let stand for 5 minutes, covered, or until the pasta is done. 
 
ENJOY! 
 

Note: If you’re going to be making a recipe in the near future that requires a mirepoix/sofrito - ex. A Bolognese, other soup, etc. - you can make extra and dehydrate it for future recipes like this! 


RECIPE: Pancakes - From Scratch - For BC Living

Pancakes
From Scratch - for BC Living
August 2023

You’re never going to use a box for pancakes again when you find out how easy it is to make from scratch. This version of the recipe is also super beneficial for camping, as you can mix the dry ingredients together at home, and then just add the wet at the campsite – saving yourself some measuring cups and mixing bowls. 
This is also just the base for the pancakes, you can add chocolate chips, nuts, fruit, whatever you like while the first side is cooking. And then maybe take a nap because you’re so full. 
 

INGREDIENTS 

- 1 cup all-purpose flour 
- ¼ cup of granulated sugar 
- ¼ cup dry milk powder (skim) 
- 4 tsp of baking powder 
- pinch or two of salt 
 
- 1 large egg 
- 1 cup of water 
- 1 tsp vanilla extract (optional!) 
- oil for the pan (or butter)  
 
- maple syrup 
- toppings (fruit, powdered sugar, butter etc.) 
 
 
INSTRUCTIONS 
 
In a large mixing bowl, whisk together the flour, sugar, dry milk powder, baking powder, and salt until combined. 
 
In a second bowl whisk together the egg and water, and optional vanilla until light and airy, and then add to the dry ingredients. 
Stir until everything is just combined and no dry spots are left. Over-mixing might lead to flatter, less-fluffy pancakes. 

Heat a griddle, or frying pan over medium heat, and add the oil or butter. 
 
Scoop out approximately ¼ cup of the batter at a time and place in the pan. 
When you start to see the air bubbles, check the bottom to see if it’s browned and then flip to cook the opposite side. 
Cook until the second side is brown and then repeat with the rest of the batter. 
 
Serve with syrup and any other toppings you’d like. 
 

Makes Approx. 10-12 Pancakes

RECIPE: Refried Beans for "From Scratch" on BC Living

You may have caught a pattern over the last few months. I made homemade Queso Fresco that I put on some tacos, which inspired me to make my own refried beans, which inspired me to make my own tortillas. Yes, that is backwards of the recipe release order, but I wanted to give you all the options to make it from scratch from start to finish! 
 
Refried beans from soaking your own to plating it on a tortilla is a gamechanger. No more cans for me, this is worth the effort, tenfold.  
 
REFRIED BEANS
for BC Living

INGREDIENTS 

- 2 cups dry pinto beans (you can also use black beans if you prefer them!) 
- water 
- 2 tbsp lard, oil, or bacon fat 
- 1 onion 
- 4 cloves of garlic, minced 
- salt 
- fresh epazote (fresh oregano if you can’t find, I located dried epazote and used that) 
- optional: ½ tsp cumin, oregano 
 
 
INSTRUCTIONS
 
 
To make your own Queso Fresco – follow this recipe. 
and 
To make your own Tortillas – follow this recipe
 
Rinse your beans, remove any unwanted pieces or debris, and place in a pot or bowl, cover with water, cover and soak overnight.  
(You can also do a faster cooking method by soaking in boiling water for a while first, but I find the overnight soak is the best). 
 
Drain the beans and return to the pot. Add enough water to leave two inches above the beans. 
Peel and quarter the onion and add to the pot with the beans. Also add in the fresh herbs (or a bundle of the dried ones), and a pinch or two of salt. (You can also add in cloves of garlic here.) 
 
Bring this to a boil, and then cover, turn down the heat, and simmer for an hour, giving it an occasional stir. After an hour, check the beans to see if they are cooked, and if not, continue to cook them, checking frequently until they are very tender. 
 
Making sure to retain the bean-water, drain the beans, removing the onion and herbs. 

In a large (make sure there is lots of room) skillet or cast-iron pan, heat the lard/bacon fat or oil (oil to make it vegan) until shimmering – over medium-high heat. 
 
Add in the garlic, and cook for a minute, then add the spices, and beans. If so desired, you can also chop some of the onion and add it in here as well. 
 
Cook in the pan, stirring and smashing as you go (a potato masher would be helpful here – or a fork). 
Add the bean water as needed until you get a texture that you desire. If you prefer a very smooth refried bean, you can also use an immersion blender once you’re done cooking.  
 
Taste the beans for seasoning, adding more salt, cumin, oregano etc. as desired. 
 
Keep warm and serve on tortillas with your desired toppings. (I made a lime crema, and added some cilantro and the queso fresco.) 
 
Enjoy! 

RECIPE: Tortillas From Scratch for BC Living

Tortillas
for “From Scratch” for BC Living
April 2023 
 
I’d been wanting to try making my own tortillas for a while now. I always find when I get a pack from the store, I cannot finish them before they go stale (esp. the fresh corn ones in the HUGE packages). 
 
I got myself a press but you can do the same with a heavy pot, and it will take some practice not to rip them or make sure they’re even, but when you get going, you REALLY get going. 
 
Taco parties just got a whole lot better! 
 

INGREDIENTS 

-2 cups corn flour (masa harina) 
-1.5 cups warm (to hot) water 
 
INSTRUCTIONS 
 
[NOTE: I used Maseca brand corn flour for my dough.] 
 

In a large mixing bowl add the flour and water and mix until the dough starts to come together, and then finish with your hands until it is smooth but springy. (I heard it compared to Play-Doh texture and that’s pretty accurate.) If it’s too dry you can add a tiny bit more water and vice versa with flour if too wet. 
 
Once your dough is formed, cover it with a damp towel (paper or tea towel) and let it rest for 20mins. 
 
I weighed the dough and portioned it into approx. 40g balls – if you do not have a scale, use either a cookie/ice cream scoop or take approx. 2 tbsp of the dough and roll it into smooth balls. You will get around 16 give-or-take. 
 
Get two sheets of parchment paper, or wax, or cut the sides away from a ziplock bag – you might find the dough sticks to one of these, so try another if this is the case. 
 
Place one of the balls between the sheets, and press down with the tortilla press (if you are using, or your heavy pan). The tortillas should be about 5 inches across. 
If you’re using the tortilla press, I recommend placing the ball closer to the hinge – the tortilla will be more centered when you press it this way. 

Carefully peel the tortilla away from the lining, taking care not to rip it. 
I laid the tortillas down on a parchment lined sheet while I made a few, and the skillet was heating over medium-high (I used a cast iron pan – a griddle works too). 
 
Place the tortilla on the hot pan and cook for about 30 seconds on each side – flipping it 3 times and getting some nice browning on each side. 
 
Place in a clean kitchen tea towel to keep warm (or a tortilla warmer if you have one), and repeat the whole process until you’ve made all the tortillas. 
 
The leftovers will keep in the fridge for a few days – freezing isn’t recommended. 
Reheat them in a pan (I add a tiny spritz of water to each side if they’re a little stale), for about 15-20 seconds. 
 
ENJOY!